Science Center Lecture Wing
The Science Center Lecture Wing, consisting of rooms 160, 162, 360, and 362 were renovated during the Summer of 2025. The renovations including major Audio-Visual (AV) systems upgrades in these spaces.
Overview
Displays
All four rooms have one instructor facing display and 3 three student facings displays.
|
Instructor Displays
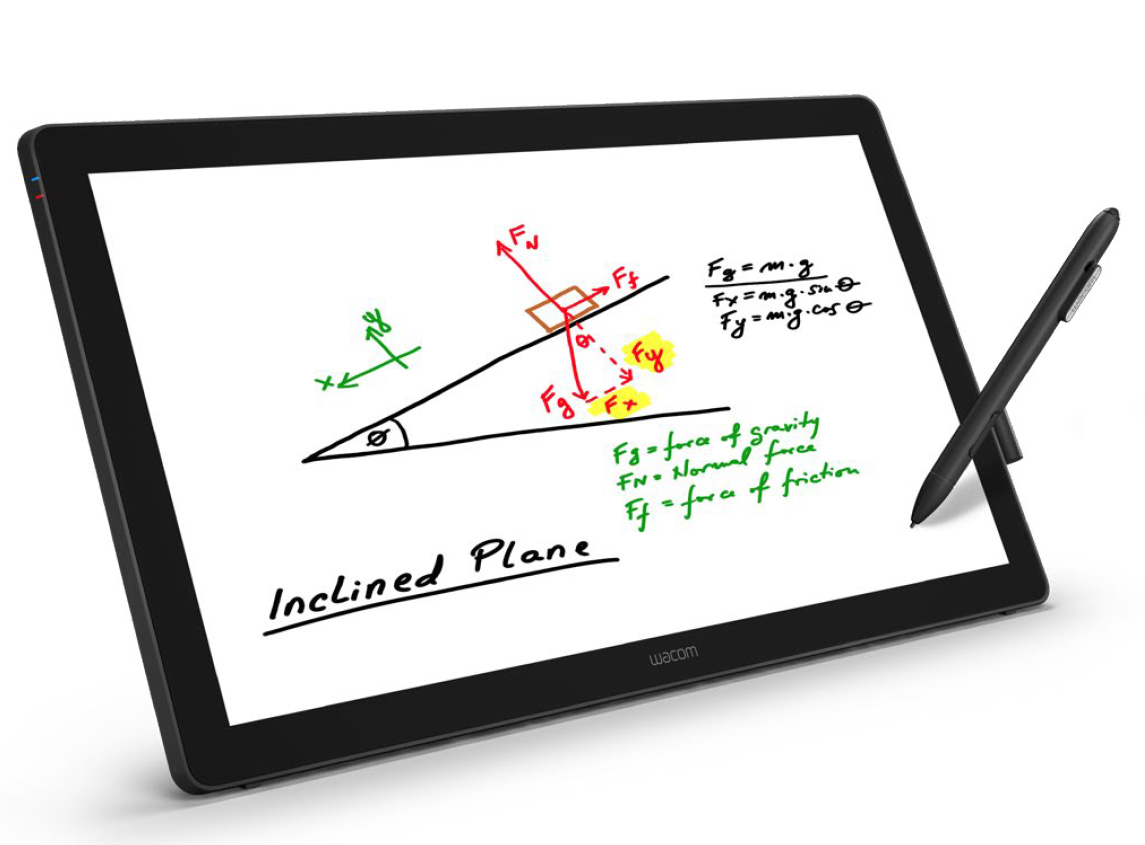
We use Wacom 24" Interactive Pen Touch displays at the podiums. These units allow the instructor to "write" on the screen using the included pen/stylus. |
 |
|
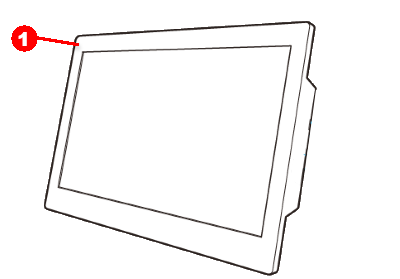
1 - Status LED: The Status LED lights blue when the pen tip comes close to the surface or when you press the pen button. Power LED
|
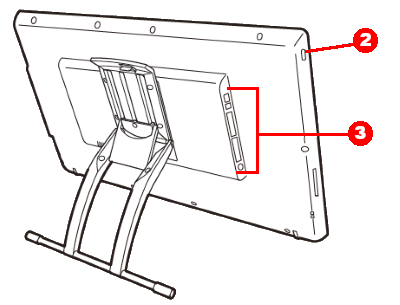
2 - Power button: This is located on the back edge of the device. 3 - Input Ports:
|
|
Student Facing Displays
Science Center 160, 162, & 362 uses a ceiling mounted projector for the center display and then Samsung 85" TVs for the side displays. |
Microphones
All four rooms have instructor microphones on the podium. Additionally, each room has a wireless lapel/lavaliere microphone receiver mounted din the podium. Instructors wishing to use a wireless lapel/lavaliere microphone can contact the helpdesk to request one to be issued to them. Here are some tips on using a lapel/lavaliere microphone (link).
Science 360 has additional ceiling microphone arrays (a cluster of 8 microphones contained in a single enclosure). There is also an option for 4 additional wireless microphones for special event use - you can request any combination of up to four wireless handheld or lapel/lavaliere microphones for event use.
Computers
All four rooms have Windows 11 desktop PC mounted in the podiums. A wired mouse and keyboard are connected to each computer. We also provide HDMI and USB-C connections if you prefer to connect your own device such as a laptop, tablet, or smart phone. It's worth noting that they USB-C connection is for display purposes only and cannot be used to charge devices.
Cameras
There are four (4) cameras in each room. There is a controllable Pan-Tilt-Zoom (PTZ) camera mounted in the rear of the room facing the instructor, there is a front center 180° camera which is selectable for part classroom instruction purposes, and then there are two additional 180° cameras mounted above the front entrance door for security use.
Use
Touch Panel Controller
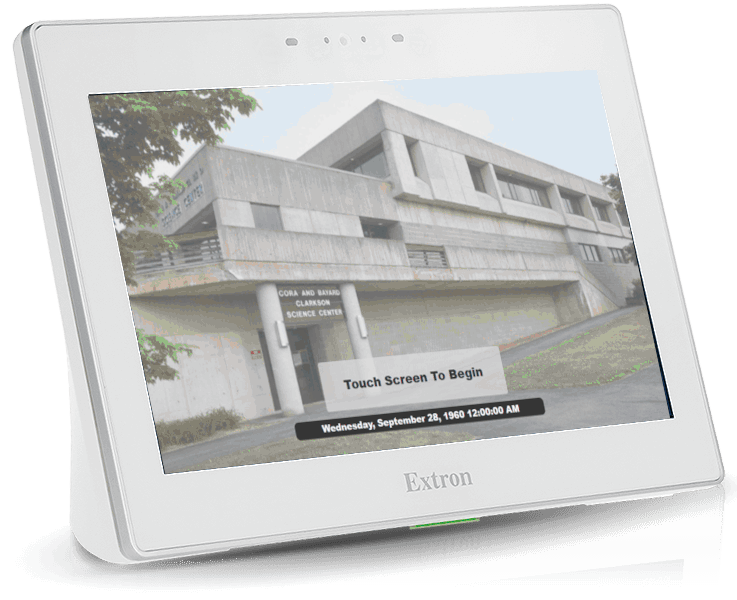
| Extron 10" Touchpanel controller. Each room has a touchpenl control that will "wake up" when it detects motion near it. So as you approach the podium, the display will light. If the system is currently off, a "Touch Screen To Begin" message will be on the screen. Doing so will turn on the projectors in the room and set all of the audio levels to their initial starting volumes. |
|
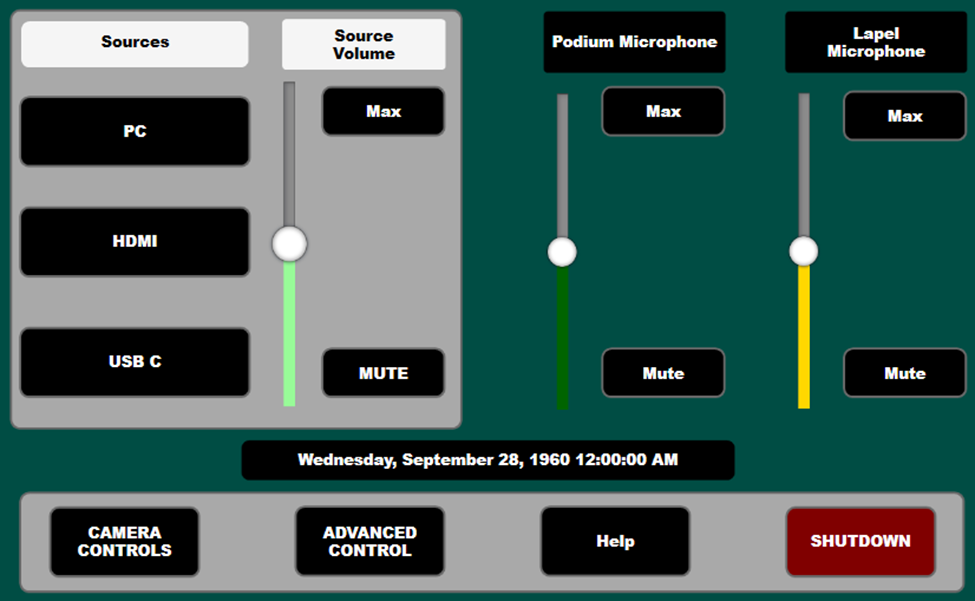
| Simple Mode Each room has two modes - Simple & Advance. The default screen that you will see once the system starts-up is the Simple Mode screen. From you, you can select your display Source - either PC, HDMI, or USB-C. Once selected, the same image will appear on the three student facing displays. You can also adjust the Source volume - this is the amount of room amplification for any audio coming from the source you selected to be displayed. Podium & Lapel Microphone levels - from here you can adjust the amount of room amplification for the podium microphone using the slider, or you can use the Max & Mute buttons for quick adjustments. NOTE: Muting a microphone is only muting the in-room amplification. The microphones are always active for any Echo classroom capture sessions. |
|
|
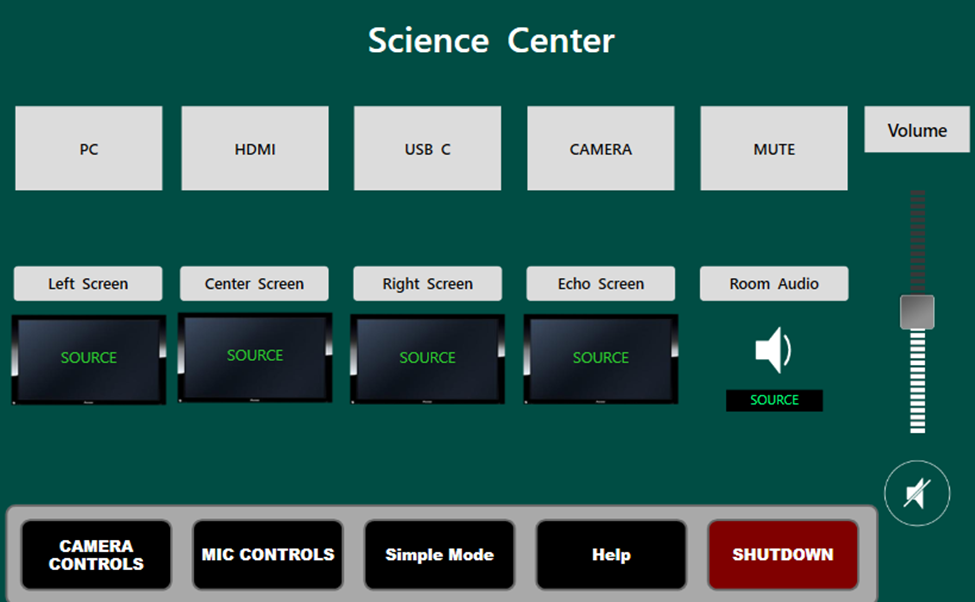
Advanced Mode
The Advance Mode allows you to send different sources to different displays, as well as change the Room Audio to something other than the classroom PC.
For instance, the classroom PC is always the default source being sent to all the student facing displays, but say I want to bring in a laptop and have that displayed on left and right display. |
|
|
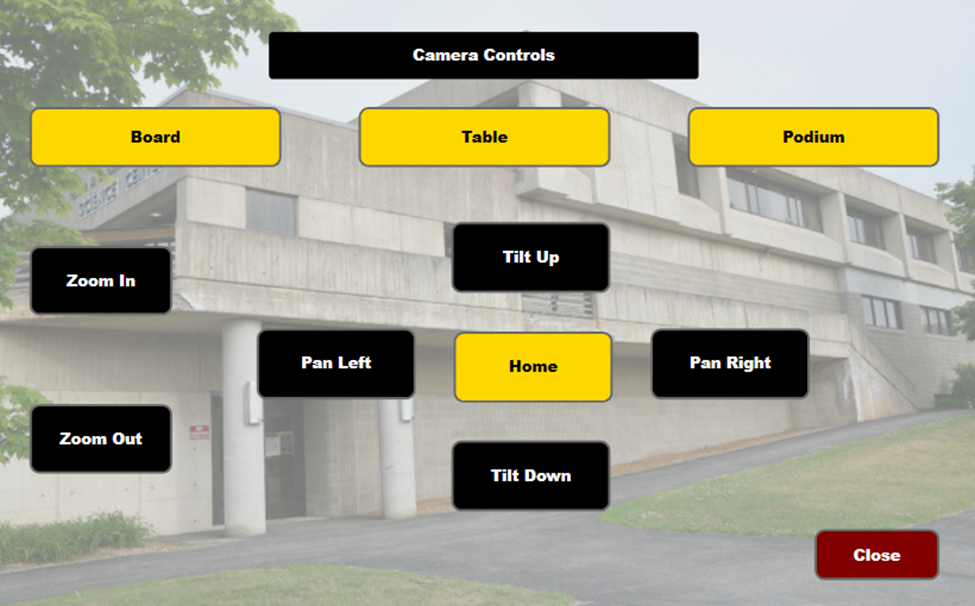
Camera
The default camera used for Echo classroom capture recording is the rear PTZ Camera.
Clicking on the CAMERA CONTROLS button from either the Simple Mode or Advanced Mode screens will bring up the rear camera controls. |
|