
ERC 2202 Presentation Rehearsal
This rooms contains:
Basic instructions for using the recording equipment to capture presentation rehearsals.
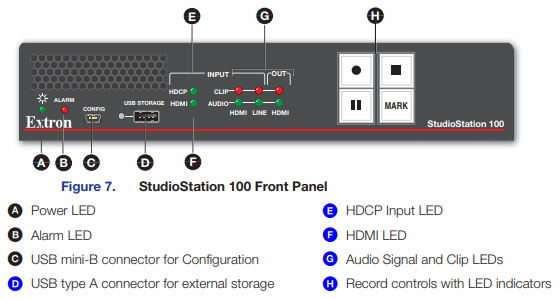
| S.tudio Station 100 This space is equipped with a video camera, a ceiling mounted microphone, a microphone pre-amp (Neewer NW412), an Extron Studio Station 100To record a presentation follow these steps. 1. Insert a thumb/flash drive into the USB STORAGE slot (D on the image to the right) 2. Press the Record Button  - wait for the light to turn solid green - wait for the light to turn solid green1. Note: The Record LED may blink a few times when the recording is first initializing. 3. When you are finished press the Stop button 1. The stop button may blinks green while the recorded file is being finalized. 4. Once the Stop button is solid green, remove your thumb/flash drive - your recording will be in M4V format. Other controls/tips. Pause | | — Press to pause recording. When pressed, the Pause button blinks green to indicate recording is paused. Press Record or press Pause again to resume recording, or press Stop to halt the recording. MARK — Press MARK to place a chapter marker in the recorded file. When pressed during recording, the button illuminates green momentarily to indicate a chapter marker is inserted. The button also blinks when JPEG thumbnails are automatically created at a fixed interval (default: 5 minutes). |
  |
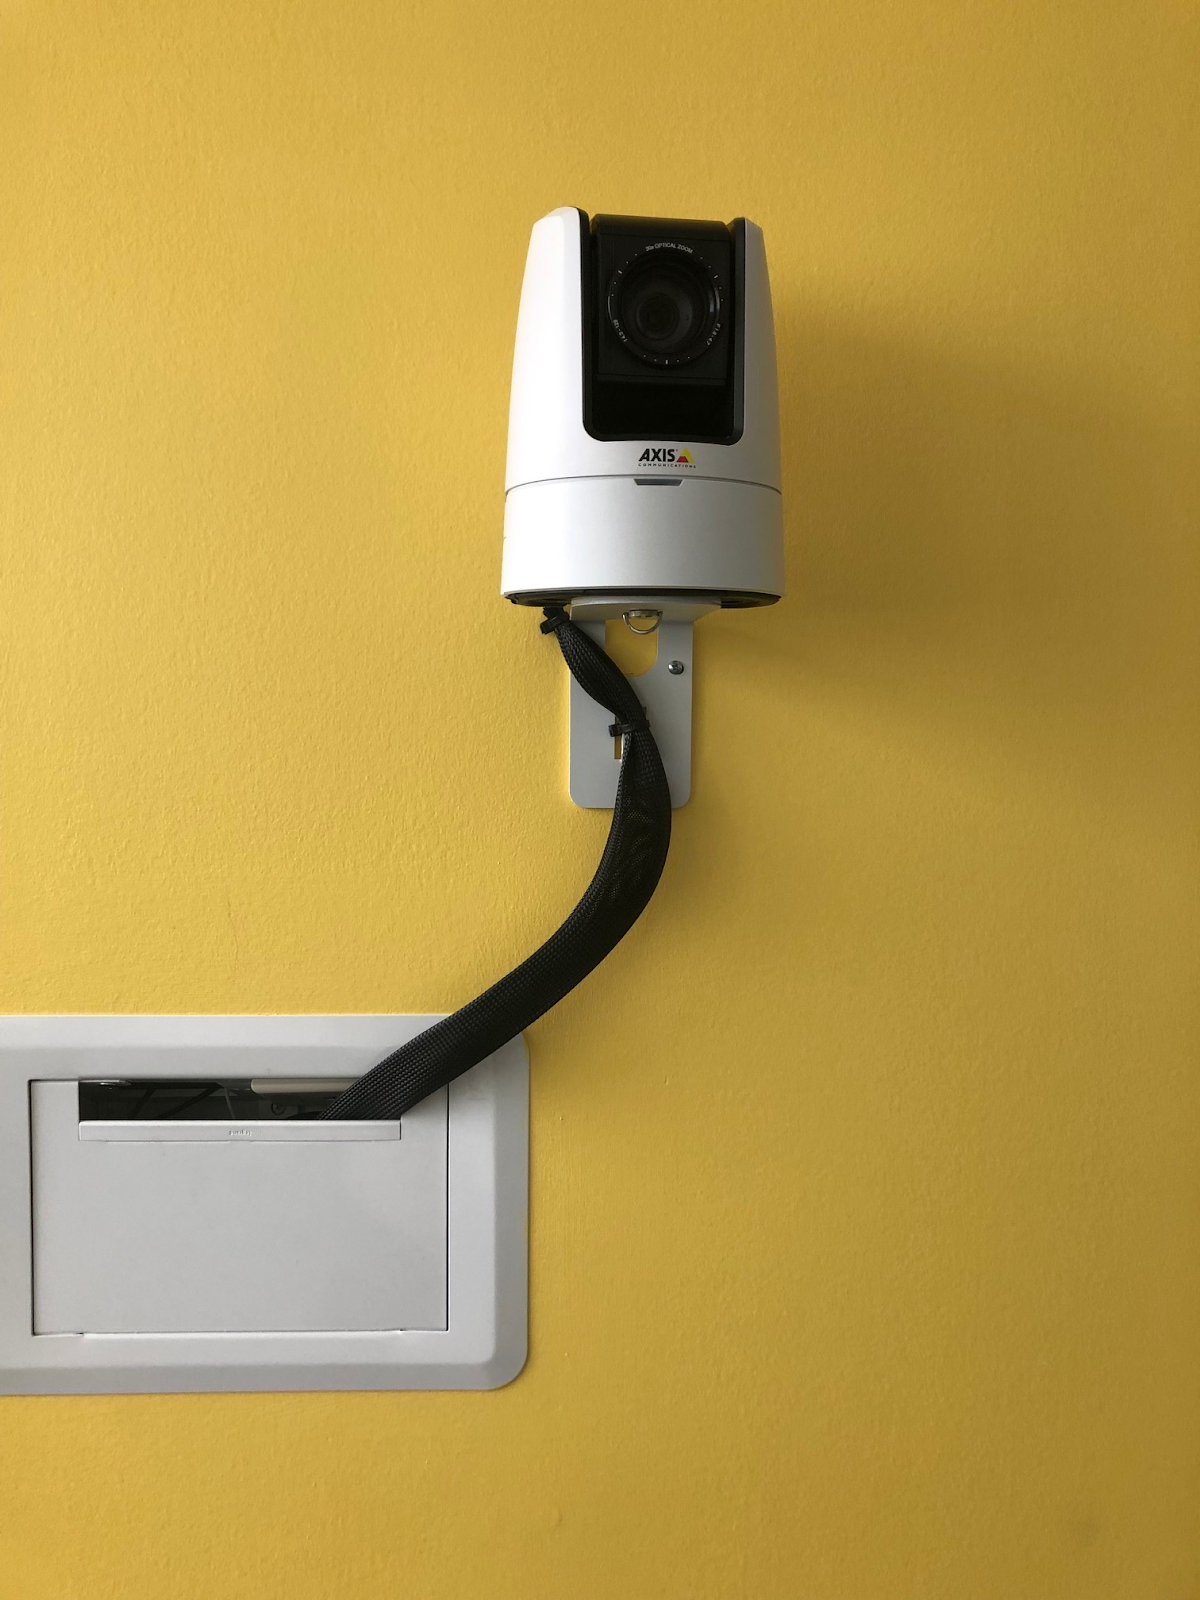
| Axis Camera The Axis camera on the back (yellow) wall provides a nearly wall-to-wall view of the opposite wall. DO NOT ATTEMPT TO RE-POINT THE CAMERA! Doing so can cause damage to it and stop if from functioning. The image below shows the approximate viewing frame of the camera. You may also notice the ceiling mounted microphone. |
 |
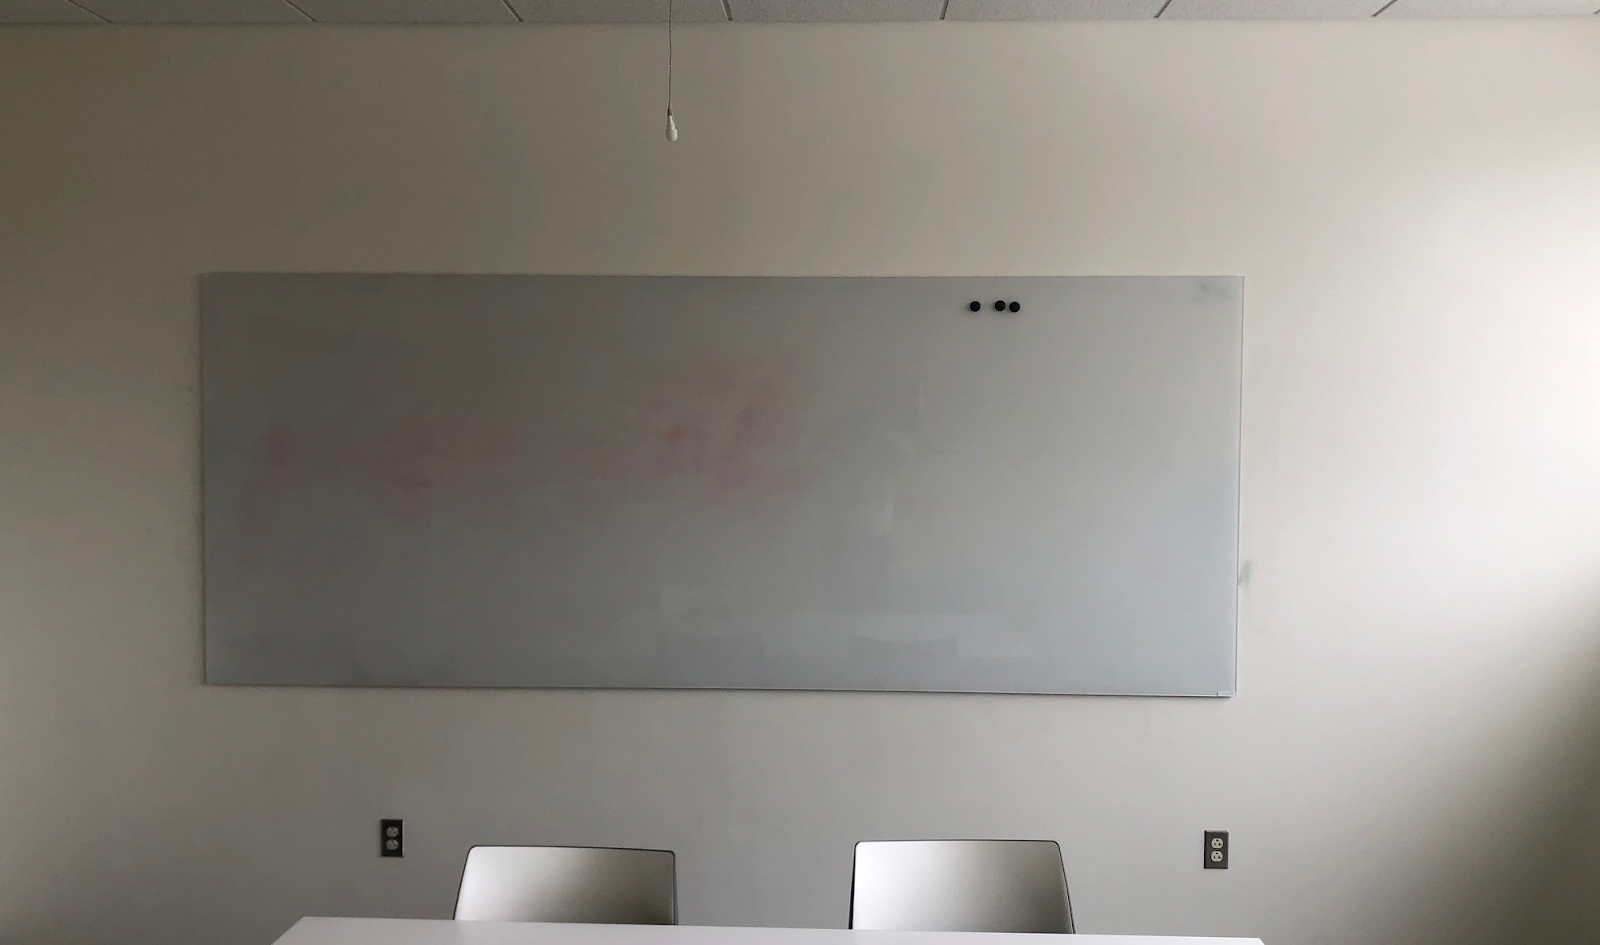
| Microphone & Viewing frame This is the approximate field-of-view of the camera. |
 |
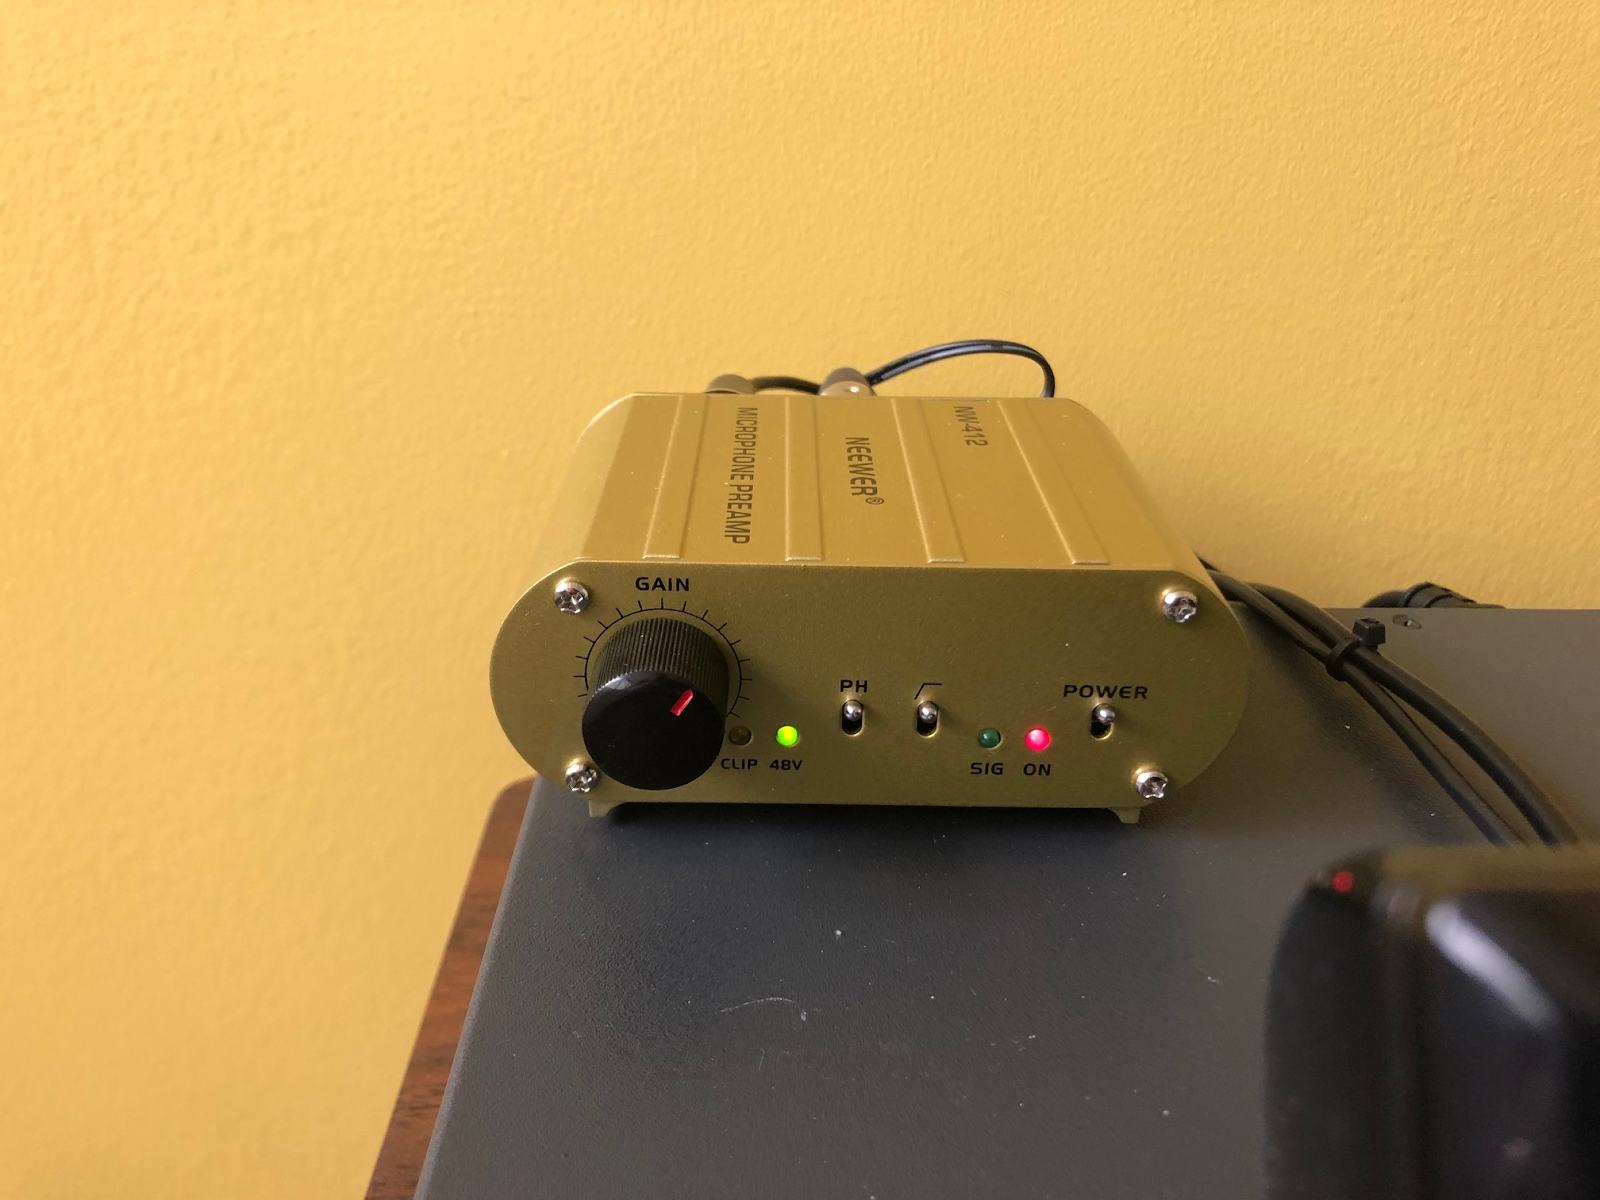
| Neewer NW412 The microphone requires a pre-amp with phantom power. This is the gold box (Neewer NW412). For the microphone to work properly, the PH (phantom power) LFF, and Power switches all need to be in on/up position. The green 48V and red On lights will be illuminated when properly functioning. The gain knob has been properly adjusted for the average speaking volume and should be set at ~2 0'Clock. When speaking from the presentation location, you should notice the green SIG light blinking as well green Audio lights on the Studio Station 100 flashing. If you happen to notice the yellow CLIP light on the gold box flashing, it means that the GAIN is too higher. You can either speak more softly or decrease the gain by turning the GAIN know counter-clockwise  |
 |