
Zoom: Attendance for Your Online Meetings
Attendance for Your Zoom Online Meetings
Taking attendance in Zoom is easy as long as you have set up your meeting so that students (attendees) must authenticate in order to log into the meeting.
Steps
Meeting Settings
-
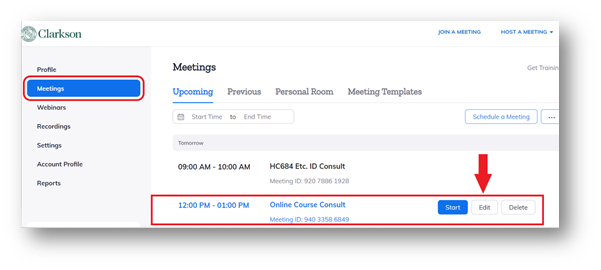
After logging in to Clarkson.zoom.us, in the navigation menu, click **Meetings.
-
Point to the right of the scheduled meeting for which you would like to take attendance (or schedule a new meeting) and the Start Edit Delete buttons will show up. Click Edit.
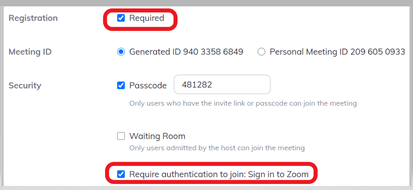
3. Under the Time Zone selection, look for Registration and Mark the checkbox to select Required.
4. Mark the checkbox Require authentication to join: Sign in to Zoom
Registration
- Registration information defaults to: First and last name, Email address, Date and time of registration and Approval status (meaning students are provided with information to log in). If you want to gather more information about students/attendees, see this Zoom support article for customization: Setting up registration for a meeting.

Viewing Attendance Reports
-
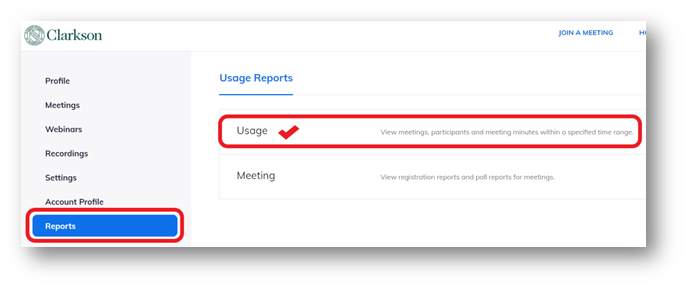
After logging in to Clarkson.zoom.us, in the navigation menu, click Reports on the left navigation under your Account Profile.
-
Under Usage Reports, click on Usage to view meetings, participants and meeting minutes within a specified time range.


-
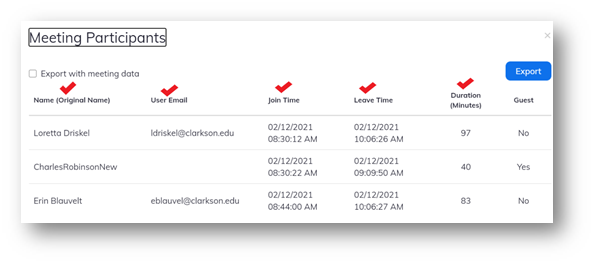
Note the default information in the usage report. Zoom will automatically keep track of meeting attendance for 30 days AFTER the scheduled end date of the meeting so you may choose to export the report for your records.

See details for Generating Meeting Reports for Registration and Polling at Zoom Support.
You may want to view the very brief YouTube video:
Zoom Meetings "How Teachers Take Attendance"