
Instructors: Adding Polls to Video in Echo360 - Creating Interactive Media
Instructors use videos in their classes for many reasons including to provide lessons, tutorials, and recorded lectures. Adding a poll to videos uploaded in Echo360 can provide students with a more engaging learning experience. Videos added to Echo360 become interactive media once you add a poll or polls to the video. Both Polls and Interactive media may be created in your Echo360 Library and shared to courses from there. You can also embed interactive media within a course.
Create Interactive Media
The easiest way to add a poll to a video is to start in your Echo360 library (https://echo360.org/home)
1. In your Echo360 library, search for the video to which you want to add the poll(s).
2. Click on the video where you want to add the poll(s)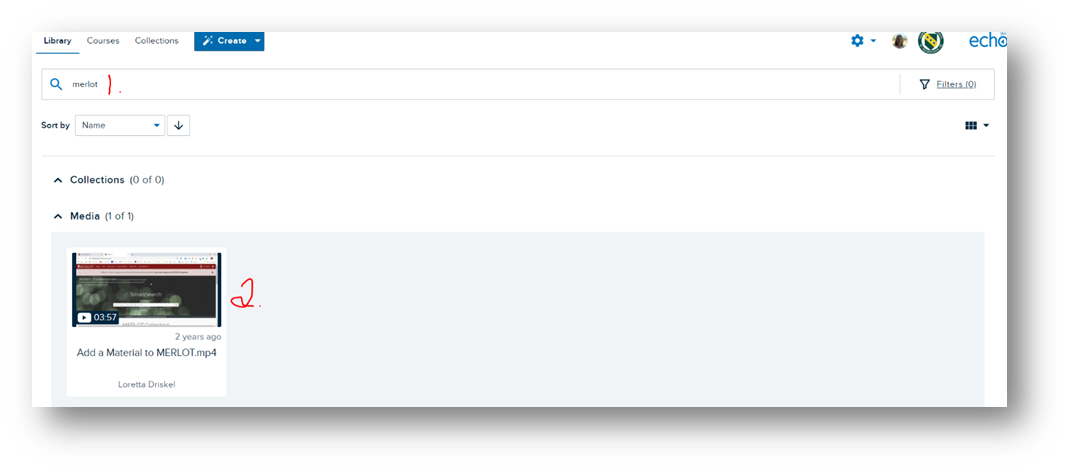
 The video will open in Video Detail view. Click on the Add a Poll.
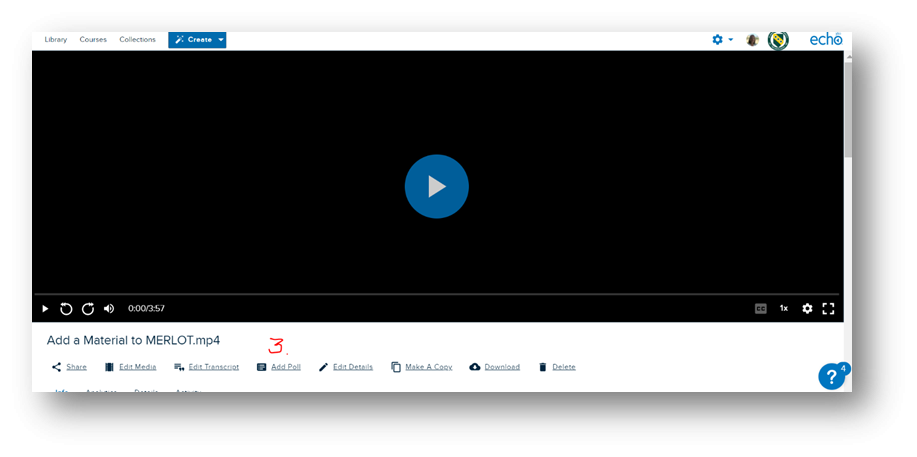

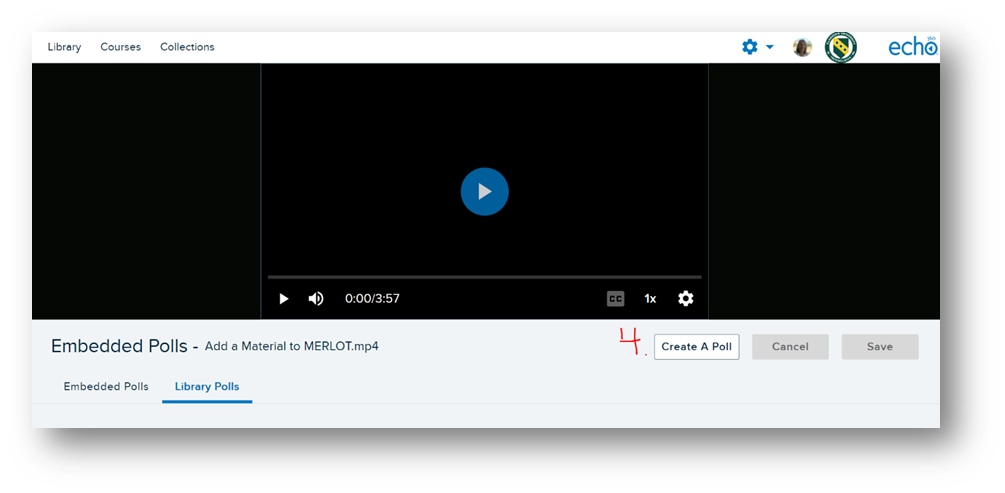
- If you are creating a poll for the first time, you will not have any polls listed under either the Embedded Polls tab or the Library Polls tab. For now, click on the Library Polls tab and click the Create A Poll button


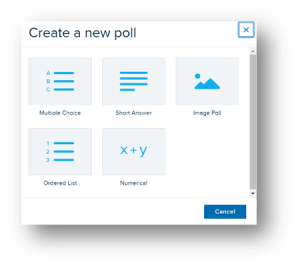
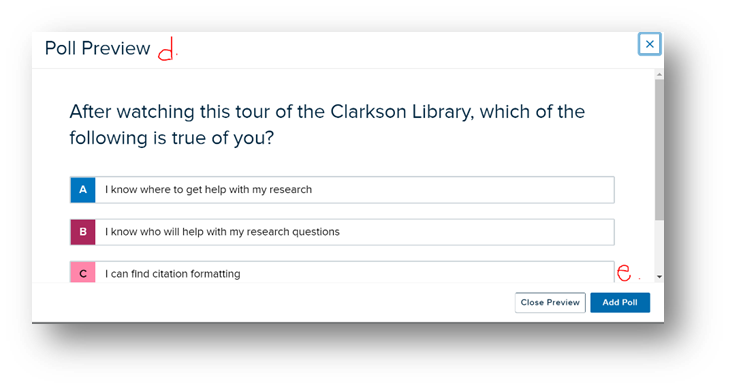
3. Choose the type of poll you would like to add and then fill in the options available
-
- Time placement can be added after the poll is created. You can also choose to set the video to the correct time placement after the poll is created.
- Fill in the other information requested.
- Feedback is optional but helpful for the student. Students must respond to the poll and they will have only one chance to answer the poll question because once they have answered, the video will begin again.
- Preview your poll to see how it will look to students as they watch the video.
- If all looks good, click the Add Poll


Where is My Interactive Media Located?
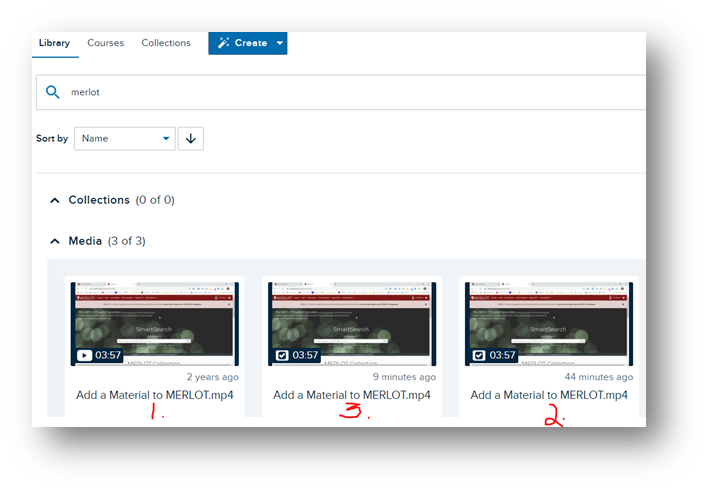
Once you have added a poll to a video and saved, and then edited the newly created interactive media, you will have three separate media items in your Library-1. 3. the original video, the interactive media with the unedited poll, and 2. the interactive media with the edited poll, as shown below.

Clean up!
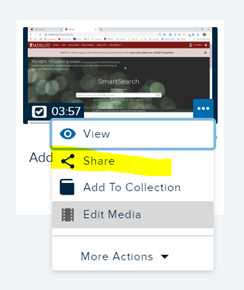
You may want to clean out unwanted video or interactive media from your library occasionally. Just point to the media thumbnail, click on the ellipse, click More Actions on the drop down, and delete.
Editing the Interactive Media
Since you created the Interactive Media in your Echo360 library, you will share it with your course from your library. However, if you have not yet added the time you want the poll to play. or if you want to edit the poll, you can make the changes before sharing the media with a course.
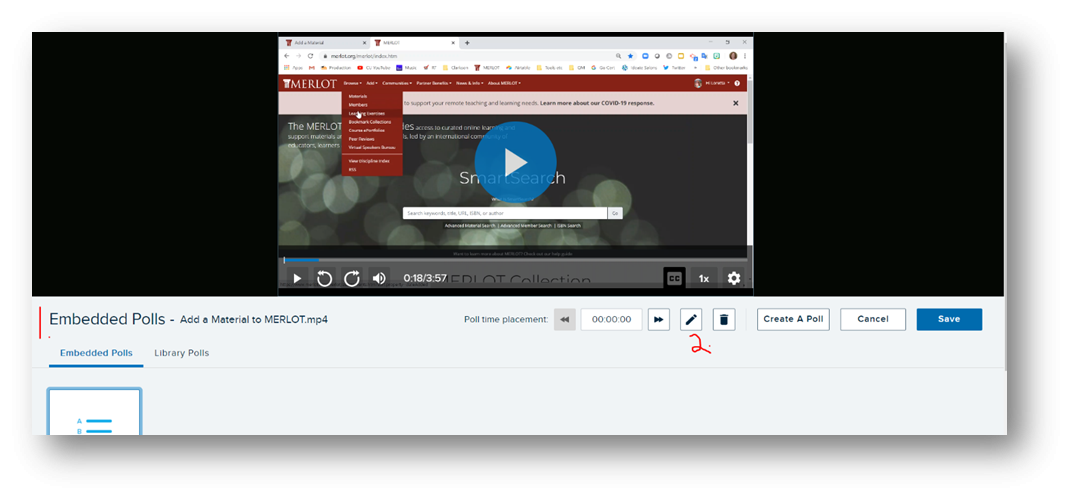
Note also that once you create a poll, add it to a video, and save, the poll will be listed under Embedded Polls.
-
Click on Embedded Polls and click on the Edit pencil to edit your poll.

-
Move the play button in the video to the place where you want the poll to be located. Note the time of play and add this to the Edit window. If you should lose the Edit window, you can always go to the interactive media in the embedded polls area and click on the ellipse and then the edit pencil.
-
Add the Time placement and make any other edits before Previewing and clicking Done and finally _Note the placement of the poll now shows on the playbar:


-
Your interactive media is now ready to share.


Sharing Interactive Media
- There are various ways to Share your Interactive Media depending on your needs. To keep it simple, go to your library and click on the interactive media you want to share. Alternatively, click on the ellipse for the media and click Share on the drop-down menu:

1 Individuals-other teachers or TA’s in Clarkson University
2. Class-any class you have access to
3. Collections- a group who shares media amongst the group.


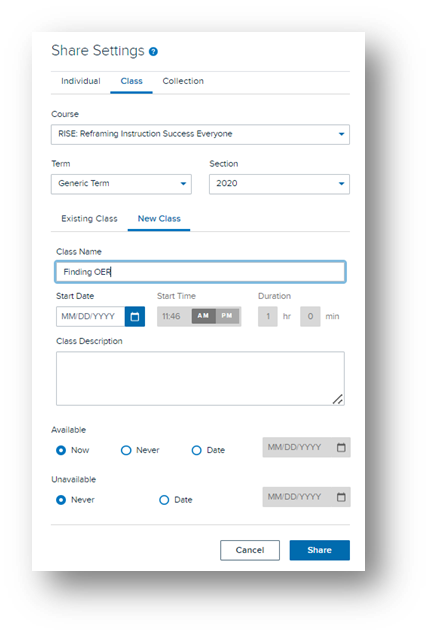
2. For our purposes, click to Share with a Class.
In this case, as you are filling out which Class to share with, you will choose the Course, Term, & Section. When determining whether new or existing ‘class’ Echo is referring to ‘class’ as a video. You will most like be creating a ‘new class’. The other choices such as timing and description are optional.

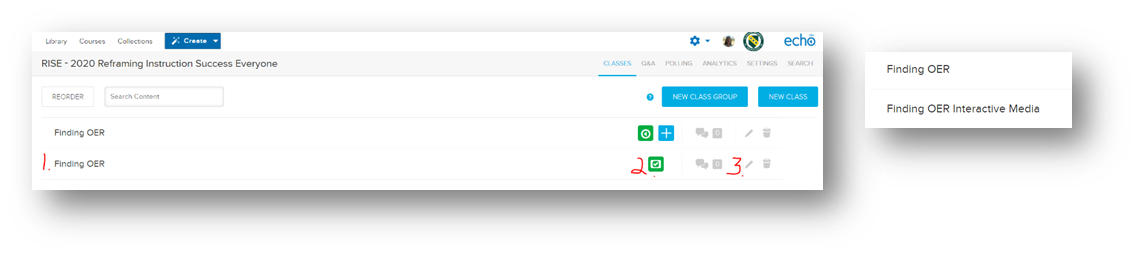
1. Note the name of the interactive media.
2. Note the icon is different from the icon for the video.
3. Click on the Edit pencil and rename the Interactive media

If students have access to your Echo360 course, they can access the interactive media there. Alternatively, you can add the interactive media to an appropriate place in Moodle.
Adding the Interactive Media to Moodle
- In your Moodle course, turn editing on.
- Navigate to the section where you want students to view the interactive media.
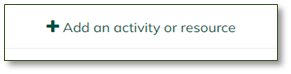
- In the lower right corner of the section, click Add and activity or resource

- Choose a Label (or Page) resource.

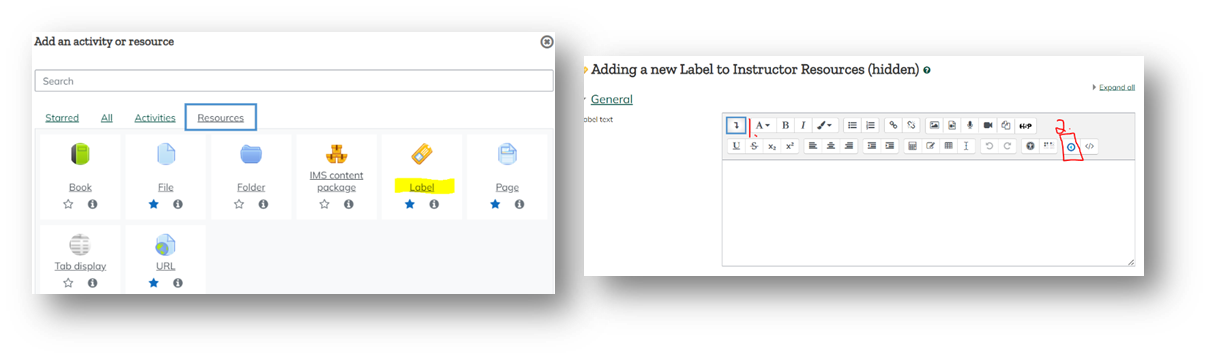
1. In the Label, click the drop down to view both rows of tools.
2. Click on the blue Embed Media button. Do not see this button? *See Important Note below in the Info section.

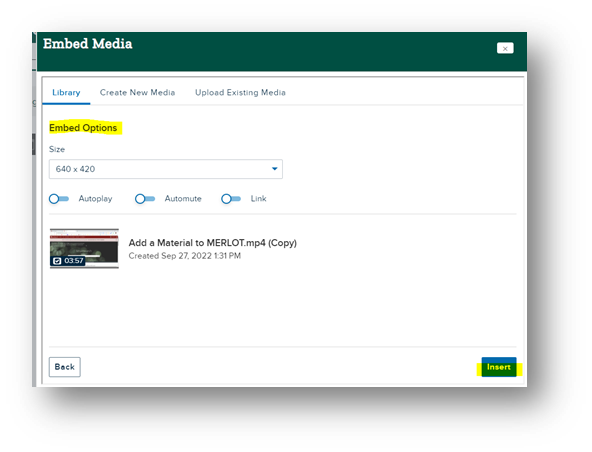
3. In the Embed Media window, click on Library
-
-
Search the library for the pertinent media.
-
Chose the Embed Options and Insert.


-
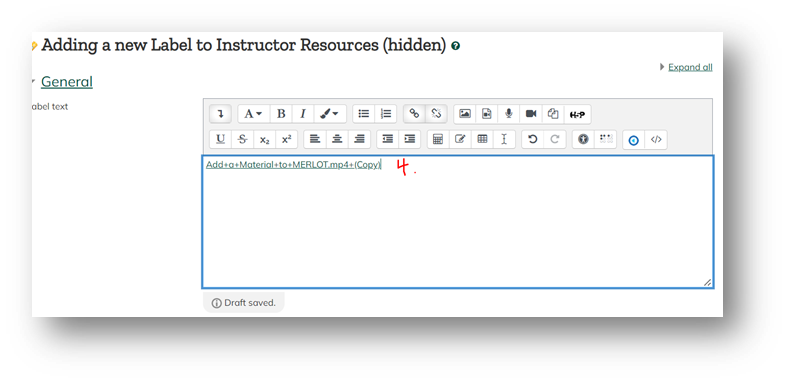
4. The link will be the title of the media with the + sign between each word. Save the changes to the label.

In Draft
Screenshot of embedded media goes here.
How Do Students View the Interactive Media?
Where Will I Find the Analytics?
Note: Changes made to media are only shown within the area where the change was made (your library or from the course where you have added the media.) This means you can create a generic poll in your library and then add the poll to your course videos and customize them there without changing the original in your library/polls areas.
*Important Note
If you do not see this same editor as shown above, you will need to change your preferences to the Atto Text Editor. Follow these directions below. You can always change your text editor back to your preferred editor.
1. Click on the drop down arrow next to your Moodle account image, in the upper right corner.
2. Choose Preferences from the drop-down menu.
3. Choose Editor preferences from the list of options.
4. Change your Text editor to Atto HTML editor.
5. Save changes. You will now see the same editor as shown above.