
NEW!! Echo360: Automatic Closed Captioning and Transcripts
Summary
Echo360 video uses Automatic Speech Recognition (ASR) to automatically generate text transcripts and closed captions (CC) for all media uploaded or recorded to the platform. This feature ensures digital course content is accessible to all students right away, with no extra steps required from instructors!
This guide will help you to:
- Understand how ASR works in Clarkson's Echo360
- Edit transcripts and closed captioning, if necessary
- View what students will see
- Use best practices for high-quality captions
How it Works Behind the Scenes
- Automatic Processing: When you publish a lecture capture or upload a video via Moodle, Echo360 processes the audio file in the background to build a time-synced transcript.
- Auto-Generated Captions: If the system detects clear audio, it will automatically push that transcript onto the video's active Closed Caption (CC) track.
- Processing Time: While shorter videos process within minutes, full-length lecture recordings may take up to a few hours after uploading.
Easy Editing of Transcripts and Captions via Moodle
Because the text is machine-generated, technical jargon, proper nouns, and acronyms may sometimes contain errors but instructors can easily fix these mistakes using the built-in editor:
Step 1: Access the Video Details
- Go to your Moodle course site and click on your Echo360 block or activity link.
- Locate the specific recording or media tile you wish to edit (perhaps in your library).
- Double-click on the video to open o alternatively, click the three dots (...) menu on the media tile, then select Accessibility
Step 2: Open the Transcript Editor
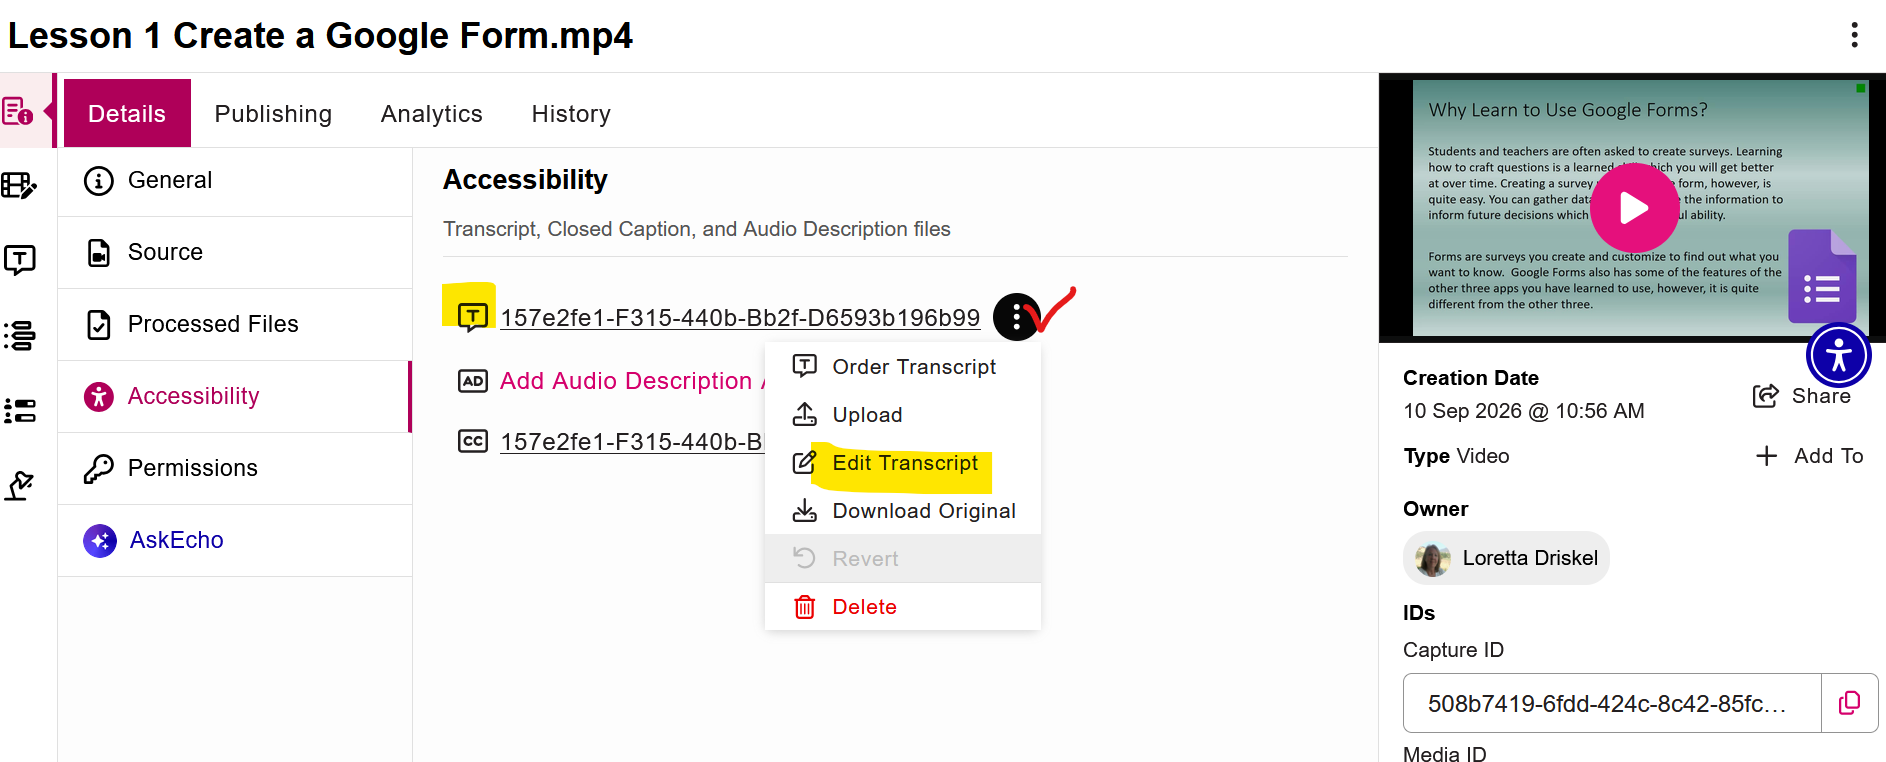
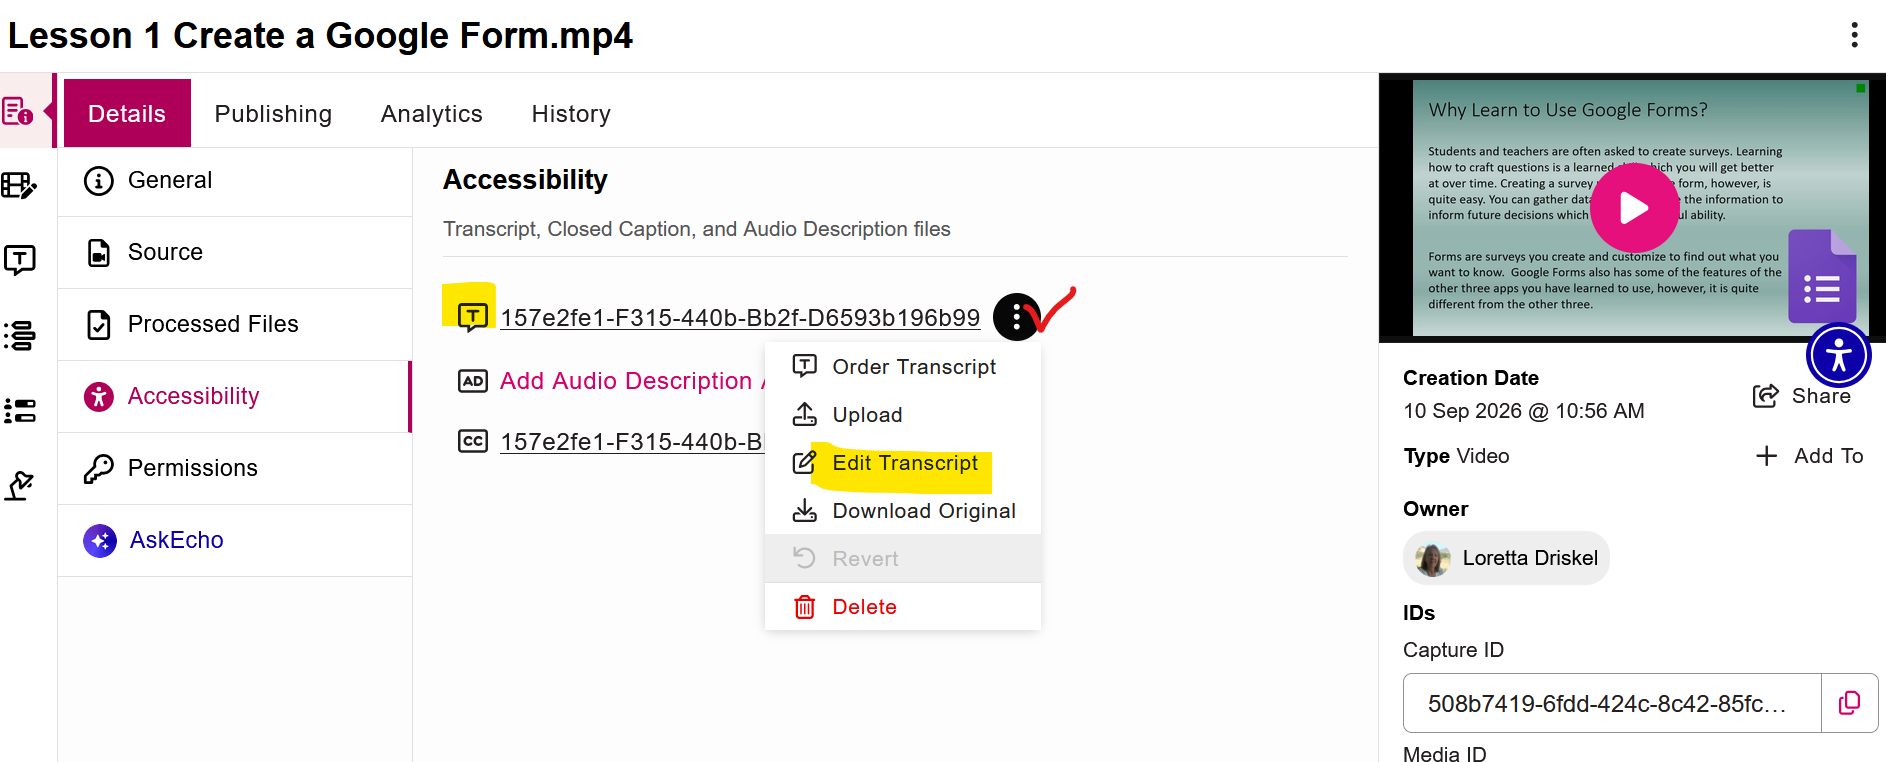
- On the media details page, click the Accessibility tab under the video window.
- Next to the Transcripts row, click the three dots (...) icon and select Edit Transcript.
(Note: If the automated transcript is still processing, the entry will read "Add" instead).
-
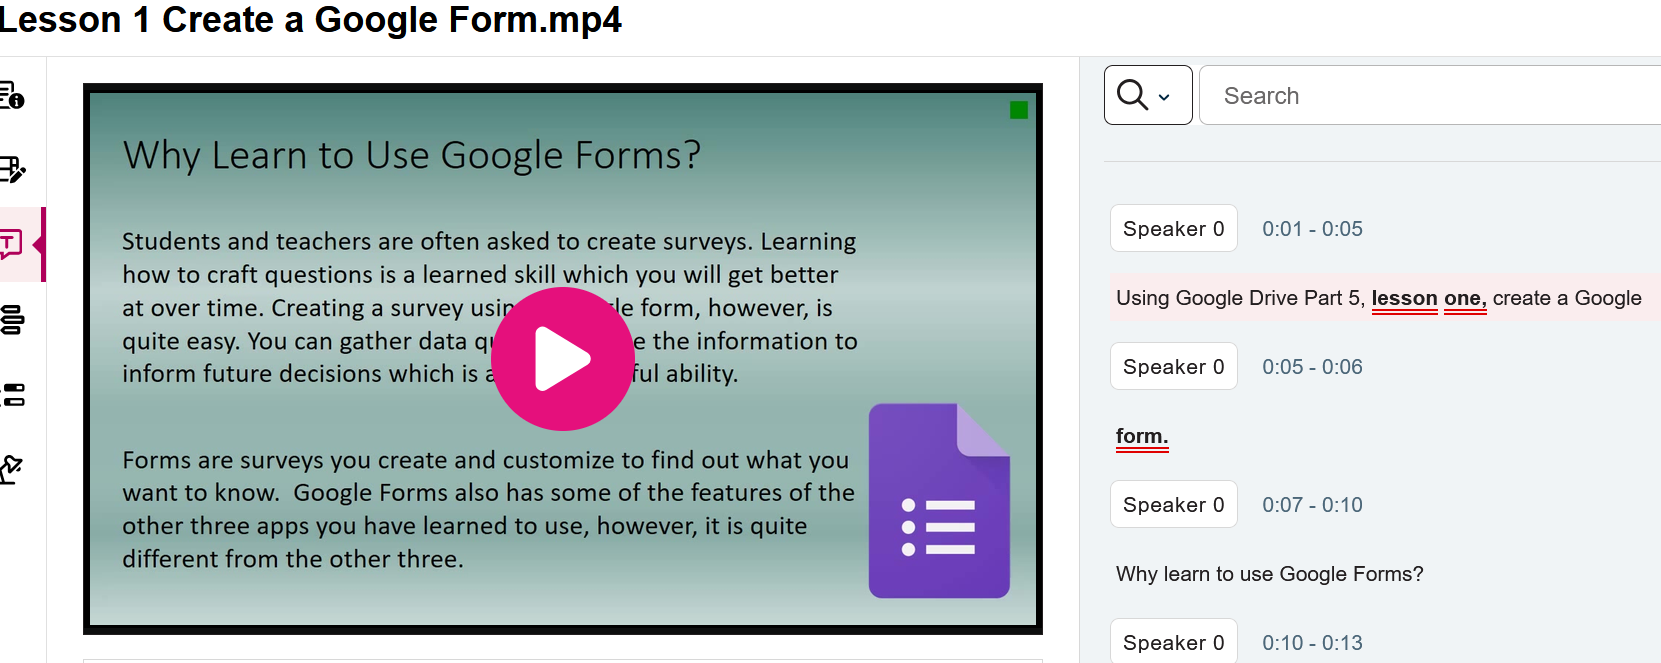
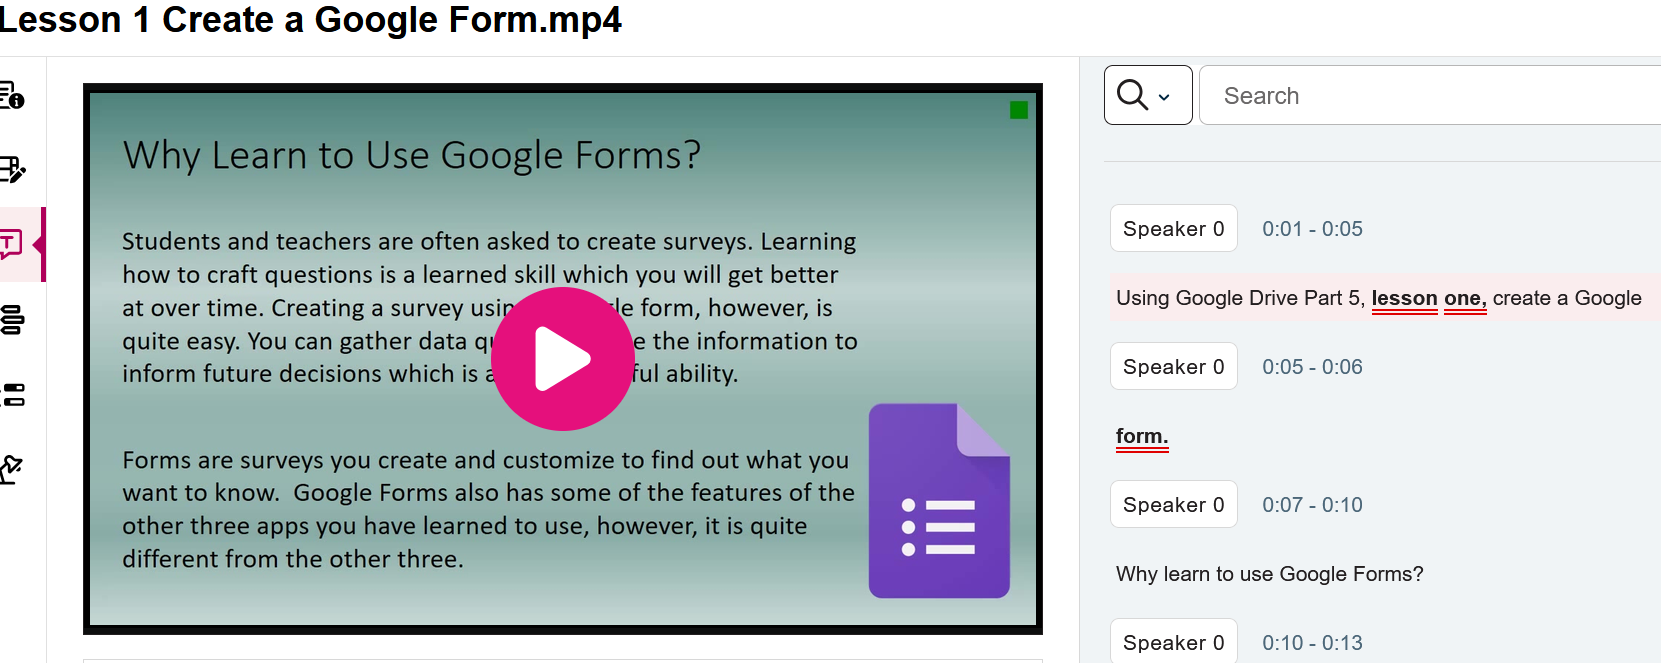
When the Transcript Editor opens, you will see a video playback panel on the left and the time-synced text cues on the right.
-
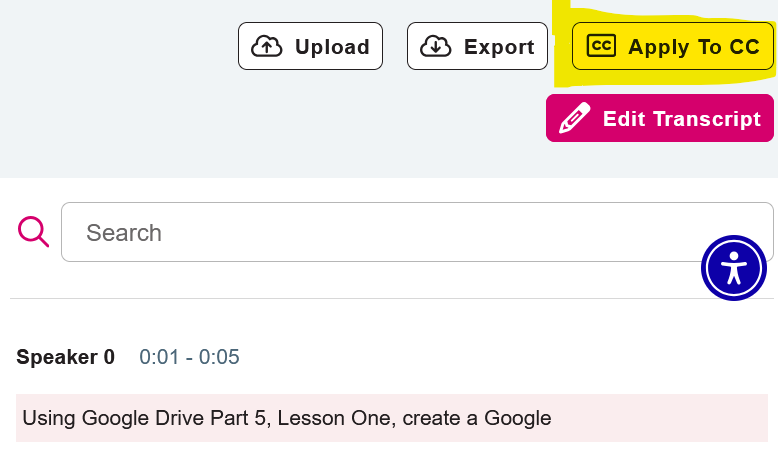
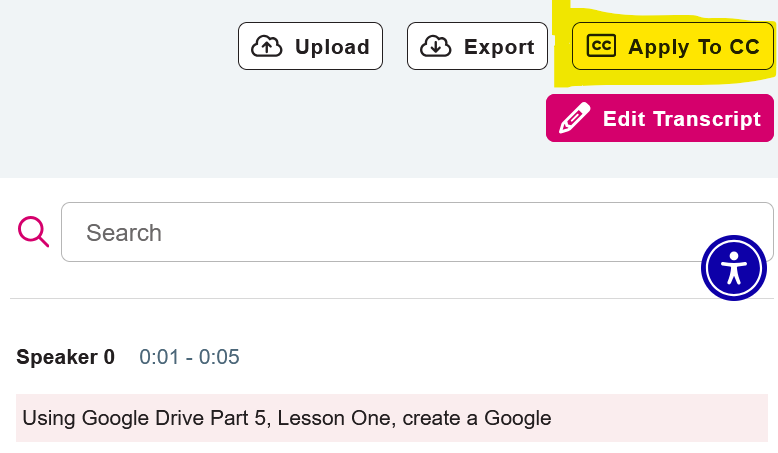
Click the Edit Transcript button along the top menu to enter editing mode and click directly into any text cue box to type your corrections using your keyboard.
- When finished, click Save as New Version in the upper-right corner to save your changes.
- Click Apply to CC to push your updated text directly to the on-screen closed captions track.
What Students Will See
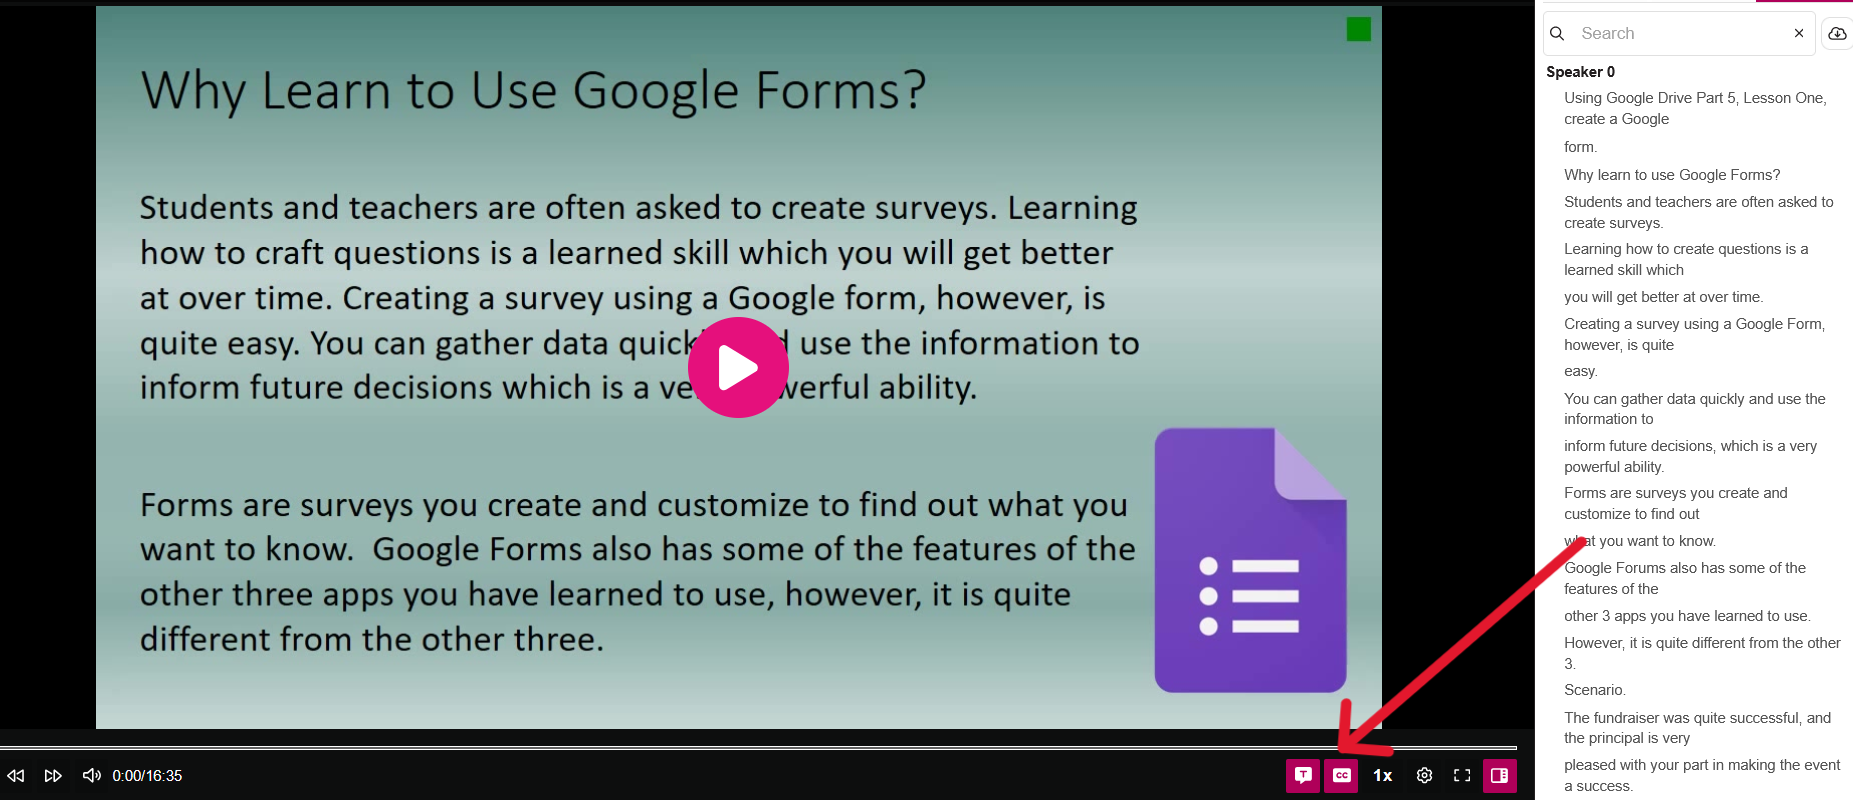
Students will see the transcript on the right of the video and closed captioning of the transcript. The T and CC icons at the bottom of the video can be toggled off and on as desired.
Best practices for high-quality captions
To help the automated system achieve the highest accuracy,
- Use a high-quality external microphone, minimizing background noise, & speaking clearly during recordings.
- Pause briefly before speaking if you are moving away from the podium.
- Minimize environmental background sound like loud fans or office chatter.
Another new tool in Echo360! See the Echo360 Support document for Study Aids
Seek Further Assistance
For additional assistance please contact, Clarkson OIT Help Desk;
Online: Get Help
Email: helpdesk@clarkson.edu
Call: 315-268-HELP (x4357