Cash Advances
PeopleSoft Financials 9.2
There are essentially two steps to creating a Cash Advance (CA):
- enter general travel and expense information (the header information)
- enter the detailed cash advance line(s)

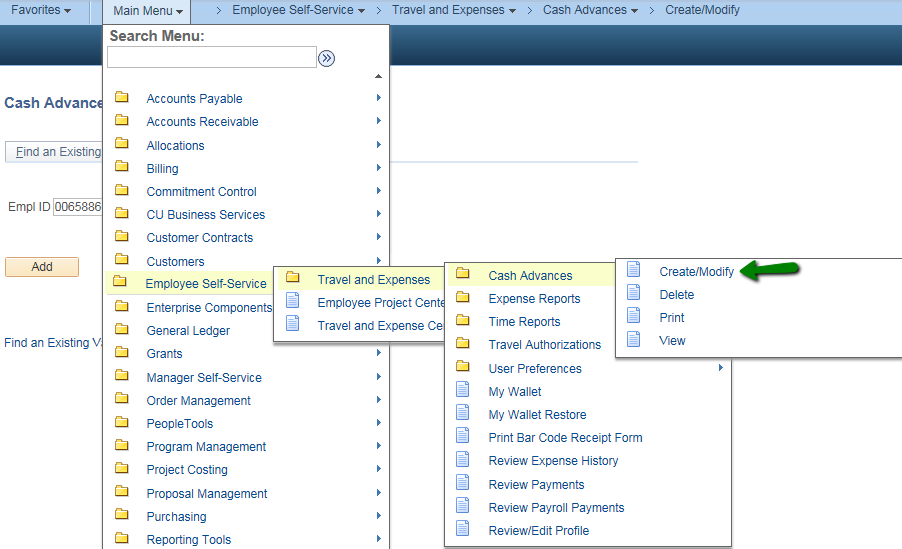
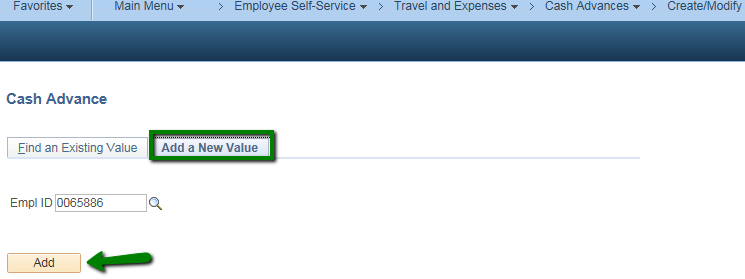
Whether you are creating your own cash advance or are an Authorized User (proxy) for another person, you will see the page shown below. Your employee ID will default into the "Empl ID" field. If you are creating a CA for yourself, click "Add" and continue to the Create Cash Advance page shown on the next slide.
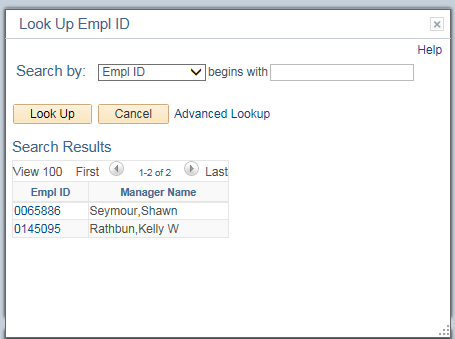
If you are creating a TA for another person, click the magnifying glass icon to display a Look Up page. Select the correct employee by clicking the hyperlink for his/her Employee ID. You can then click the Add button to open the Create Travel Authorization page (pictured above).

The Create Cash Advance Report page is your "home base" for all fields that must be completed. There is a User Defaults hyperlink available that opens your User Profile on the User Defaults page.

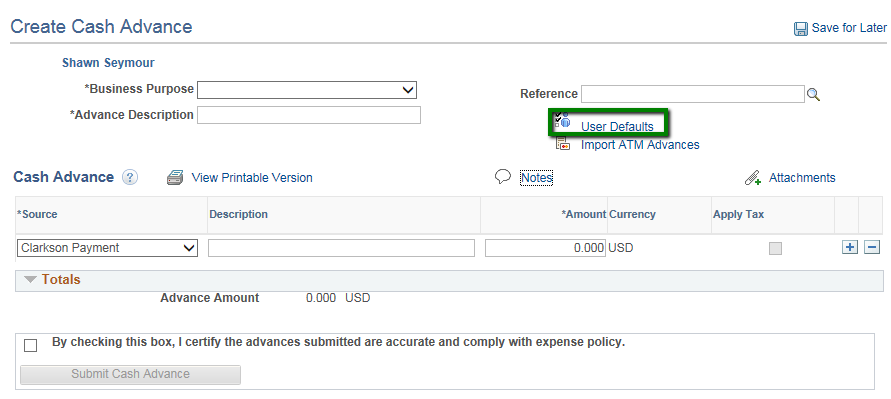
The CA header is also known as the General Information section. This is where you enter information about the Cash Advance. Fields marked with an asterisk (*) are required.
- **Description* - **Enter a descriptive reason for the Cash Advance.
- **Business Purpose* - **Select the best choice from the drop down menu.
- Notes - This is not a required field; however, it is Clarkson's policy that a full reason for the trip or expenditure should be entered in this section.
- **Reference - **Put the Travel Authorization number in this field.


Enter Notes, click Add Notes and OK. More than one Note can be added. Your Note(s) will appear in a list.
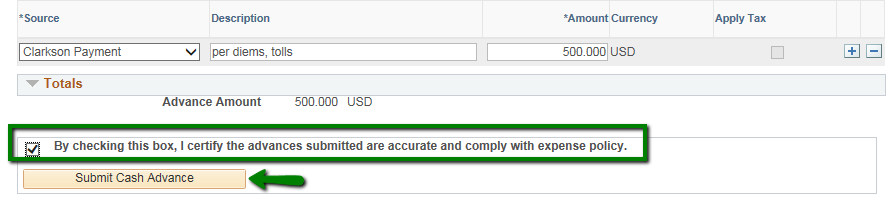
The Details grid is where you enter your detailed request. The grid has multiple fields for the pieces of information needed; the required fields are marked with an asterisk (*).
- **Source* - **Clarkson Payment is the only option.
- **Description - **Enter a description.
- **Amount* - **Enter the amount requested.
- **Apply Tax - **Not applicable at Clarkson.
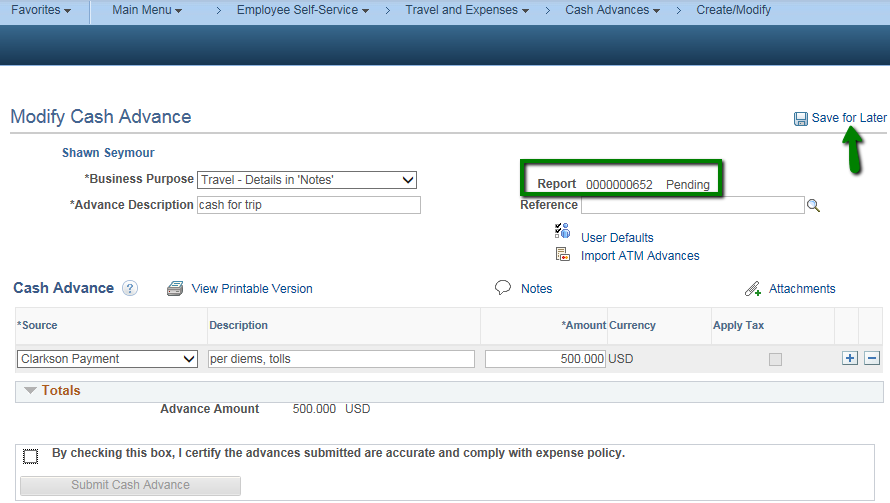
You can add more lines if desired, but since you cannot change any of the accounting distribution information there is no need.


There is no requirement to attach any documents to a Cash Advance, so Save for Later is only needed to save your work in progress. This is a good way to prevent losing work in case of a power outage, or if you step away and your computer "times out".
A Report number will be created and the Status will show.
Up until the CA is submitted for approvals, you can save it and go back later to complete it or make other changes.

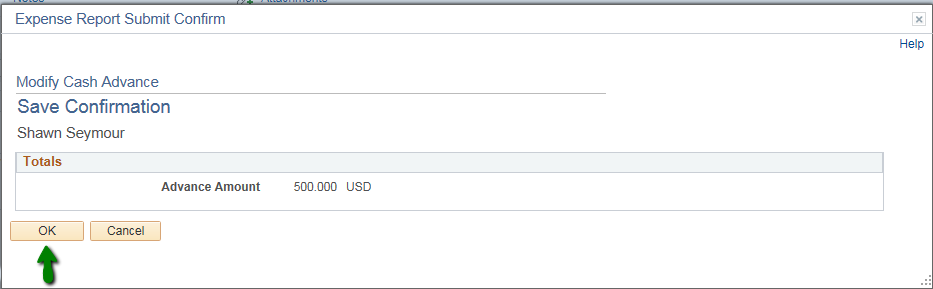
Check the Box to Certify the Cash Advance. Click the Submit Cash Advance button. A Save Confirmation page will be displayed. Confirm the totals shown, and click the OK button to finish. Your CA will be routed to the appropriate approvers.
Please note that once you've submitted your CA, you will not be able to make changes unless the the expense report is "sent back" by an approver.