
Assigning Awards to A Student In PeopleSoft
Before you begin, check to see that the student has a Financial Aid Year established. You can find the instructions on how to check if an aid year is established, and how to add an aid year, by clicking to this guide here. If the student has an aid term established, you can proceed.
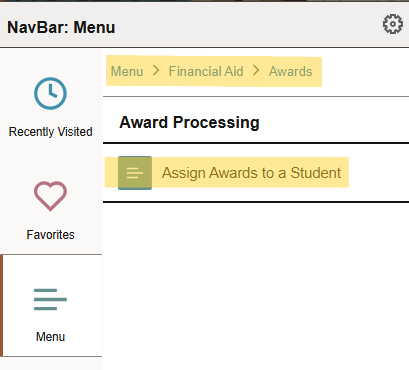
Log into PeopleSoft, then click into myCU. Once in myCU, follow the navigation chart below:
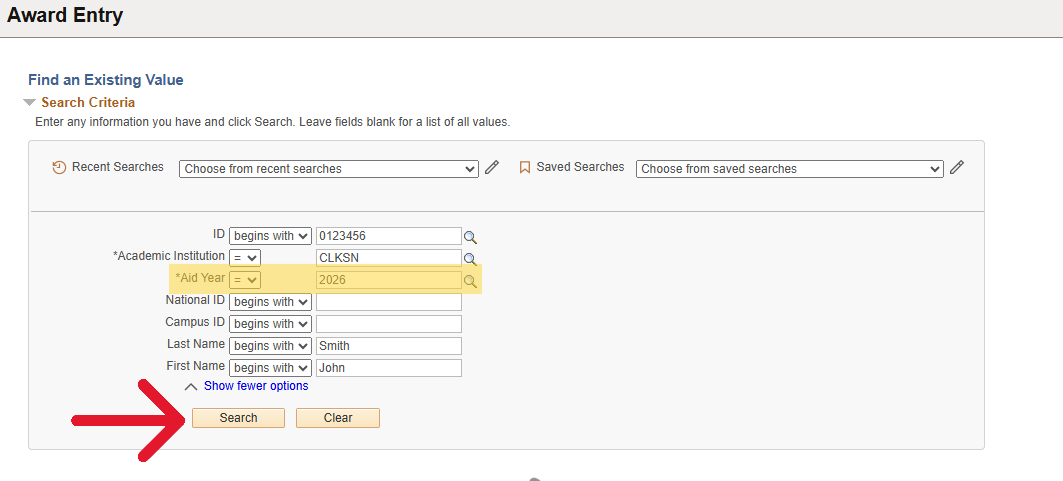
Input the Student's ID in the ID box, if you do not know the students ID, you can search them by first and last name in the indicated boxes. Type the aid year into the box, then click 'Search'.
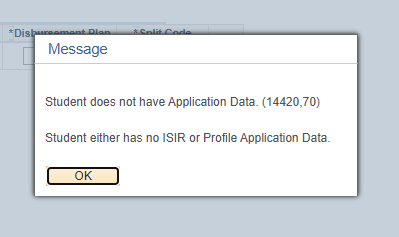
This warning message may pop up, click 'OK'
Applying the scholarship Pt. 1:
- Career - Select the magnifying glass and click GRAD
- Action - Click the magnifying glass next to the box, then select 'B - Offer/Accept'
- * Item Type - Copy and paste the Item Type from either the graduate appointment or the Common Item Type guide
- Item Type not coming up? First, make sure you are copying the numbers exactly as they are stated in the appointment
- Still having an issue? Most likely this means that the Item Type needs to be created. You can follow the guide linked here to create it.
- Item Type not coming up? First, make sure you are copying the numbers exactly as they are stated in the appointment
- Offered - Put the total amount dollar amount of the award being offered
- If you are applying an award for multiple semesters, this is where you will indicate the sum for all semesters
- If you are applying an award for multiple semesters, this is where you will indicate the sum for all semesters
- Accepted - This will autofill in once you fill out the Offered box
- *Disbursement Plan - Typically this will autofill in '02' which allows you to apply awards for Fall/Spring
- If you need to apply an award to a summer term, you will want to use '05' which allows for Summer/Fall/Spring application
- *Split Code - Leave as EV
- Click 'Validate'

Applying the Scholarship Pt. 2:
After clicking Validate, if the validation is successful, you will receive the following message, click 'Ok' to continue.

Once you have validated the amounts, a blue Disbursement button will appear at the end of each row. Click the button to verify that the disbursement is correct for each semester.

The following pop up will appear, showing how the award has been split. Since the split code was *EV, the amount will be split between the Fall and Spring semesters evenly. If you need to adjust this split, click the Custom Split box at the top. You will then be able to adjust the dollar amounts in the Offered and Accepted boxes. Once the adjustments are correct, click Ok.

Note: The disbursed column at the far right lets you know if the funds have been released or not. If there is a number in the column, that is how much has been disbursed. If the amount is 0.00, no funds have been disbursed for that semester.
Click Save at the bottom of the page and you are done!