
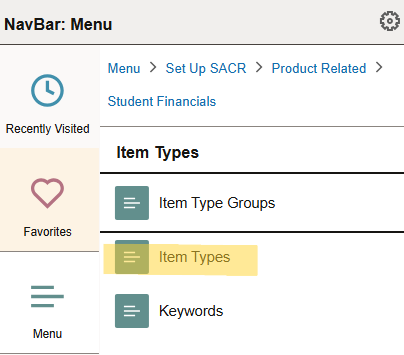
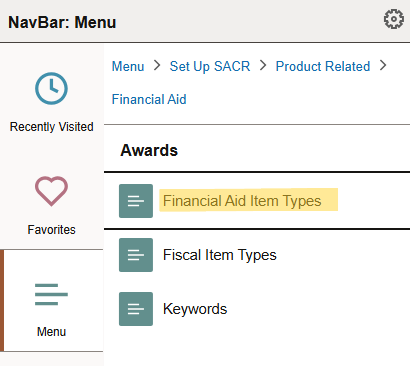
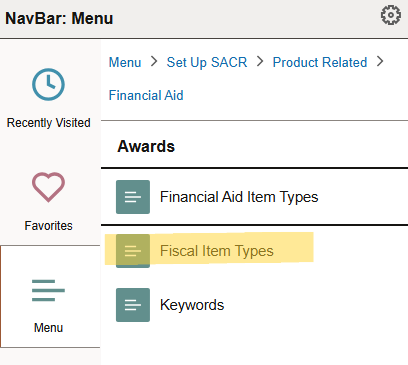
Creating Item Types In PeopleSoft
Item Types are what we use to properly attribute a student's scholarship to the right account. When applying a students scholarship, the item type should pop up when you type the numbers into the Item Type box. If the Item Type does not pop up, that most likely means you will need to create the Item Type, as it does not currently exist in the system. (This most often happens with RA's, as when a faculty member receives a new grant, a new Item Type must be made.)
Adding an Item Type is done in a four (4) step process in PeopleSoft.
STEP 1:
Before getting started on PeopleSoft, you need to format the Item Type Number: 12 digit number (Example: 983210170800 (98_32_101708_00). The breakdown is as follows:
Digits 1-2 always 98 for Graduate Level Financial Aid
Digits 3-4 depends on how the tuition will be handled:
- 32 - Waived Tuition
- 33 - Non Committed Cost Sharing
- 34 - Charged
*When in doubt, ask the Budget Approver under the Account number you are provided with
Digits 5-10 will be the Account Number (or project/grant number)
Digits 11-12 select from the below:
- 00 - School of Engineering
- 40 - ISE
- 50 - Programs formerly in the School of Arts & Sciences (Biology, Chemistry, Computer Science, Mathematics, Physics)
- 60 - CRC
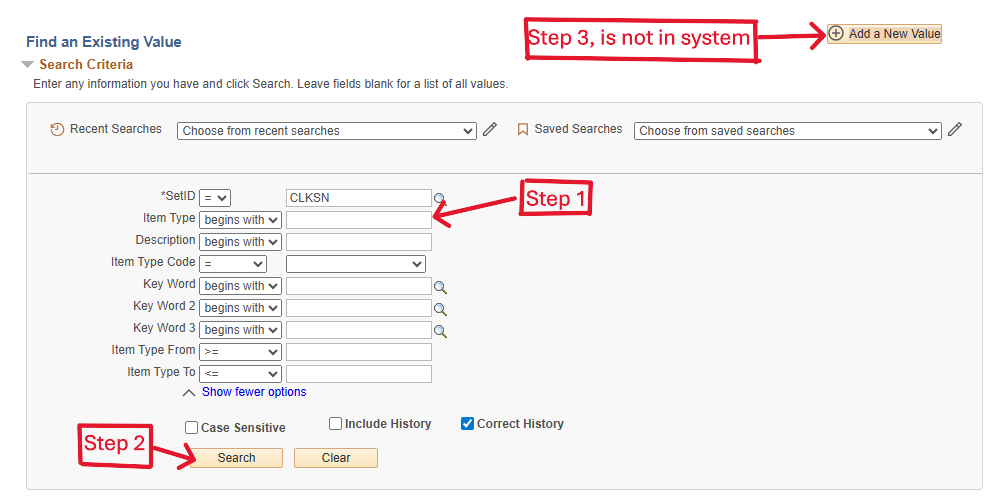
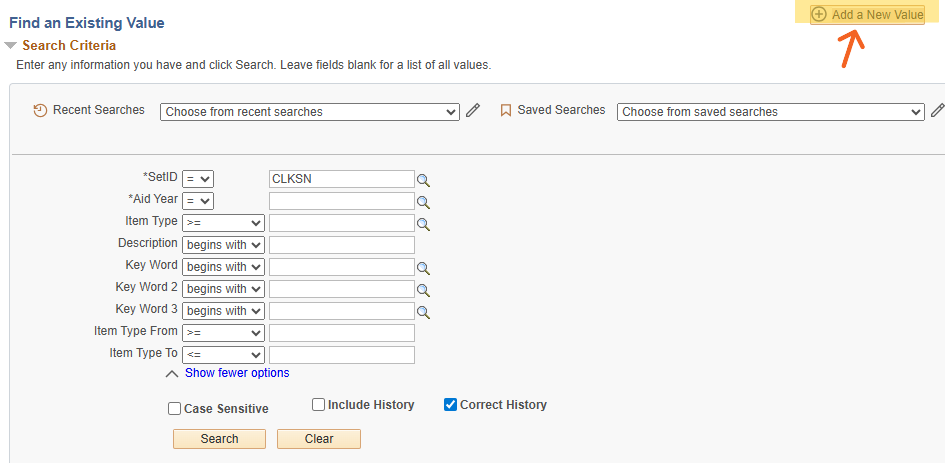
STEP 2:
-
Enter the Item Type number; Search (if nothing populates, the Item Type is not already in the System and needs to be set-up). Click Add a New Value (Noting, if the Item Type is already in the system, you would review the set-up before using. Additionally the item type used for a specific student ALWAYS follows the school a student’s major is in, NOT necessarily the school the Advisor or account is associated with. If an item type for the account number already exists but is tied to the wrong school, then a new item type must be created).
-
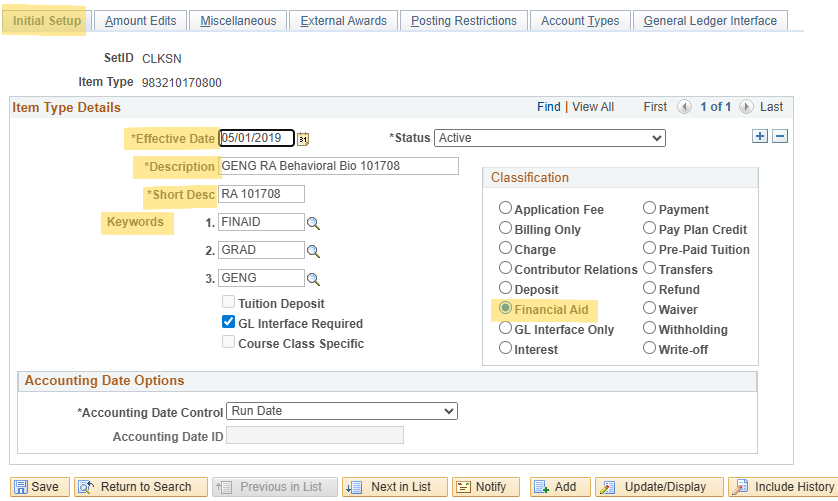
At the Initial Setup Tab:
-
Effective Date: will always be: 5/01/Year (previous year –must be prior to the start of the aid year)
-
Description: Type in a clear Description starting with the program (For Example: GENG, GSCI, GISE, or CRC) and then type of Aid, and Name (noting you only have so many characters)
-
Short Description: Type a short description including Account number
-
Keywords:
-
1 - FINAID
-
2 - GRAD
- 3 -This will be by program --- use drop down to locate applicable program
-
- Classification: check the button for Financial Aid
-
-
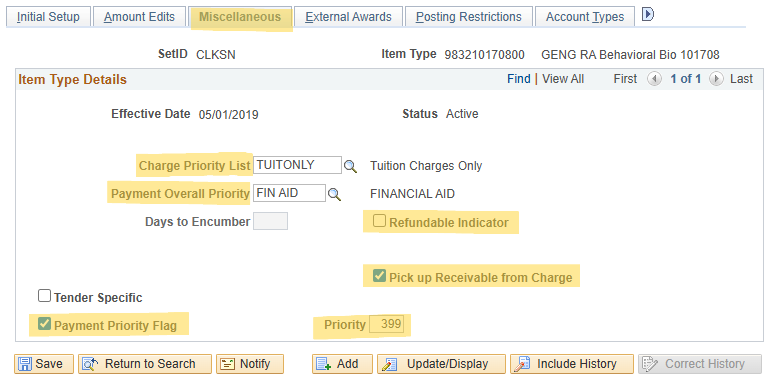
Next click on Tab to Miscellaneous
-
Charge Priority List: Enter TUITONLY
-
Payment Overall Priority: Enter FIN AID
-
At the bottom of this page be sure the only boxes checked are:
-
Pick up Receivable from Charge
-
Payment Priority Flag with the priority box filled in with 399
-
Uncheck the Refundable Indicator box
-
-
-
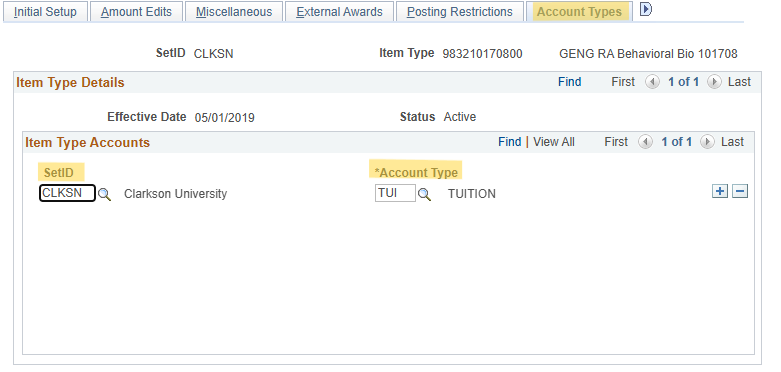
Move to Account Types Tab (You will skip tabs for External Awards & Posting Restrictions – no info is entered on these tabs)
-
Under SETID type in CLKSN
-
ACCOUNT TYPE type in TUI
-
-
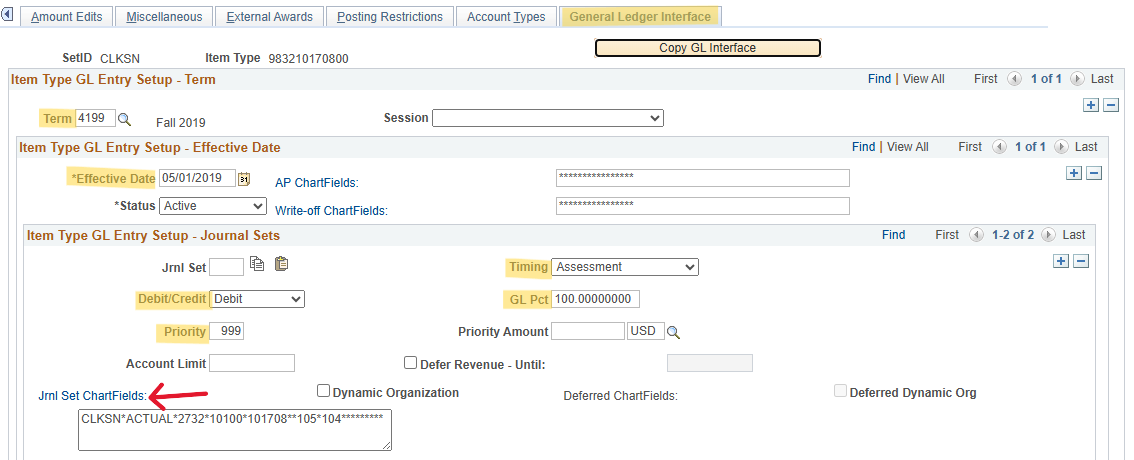
Move to GL INTERFACE Tab (this page be certain you are careful with as incorrect information can result in Error SF Journal entries).
-
Enter the Term you want the Item Type will begin to be used in
-
Effective Date: must be at the beginning of a fiscal year unless it is for the next year and will also
-
Start 05/01/ (and then year).
-
Under Journal Sets enter Debit information (tells the GL what account to debit)
- DB/CR – enter DEBIT
-
Timing = Assessment
-
GL PCT = 100
-
Priority = 999 (will default in)
-
Click the Jrnl Set ChartFields Link
-
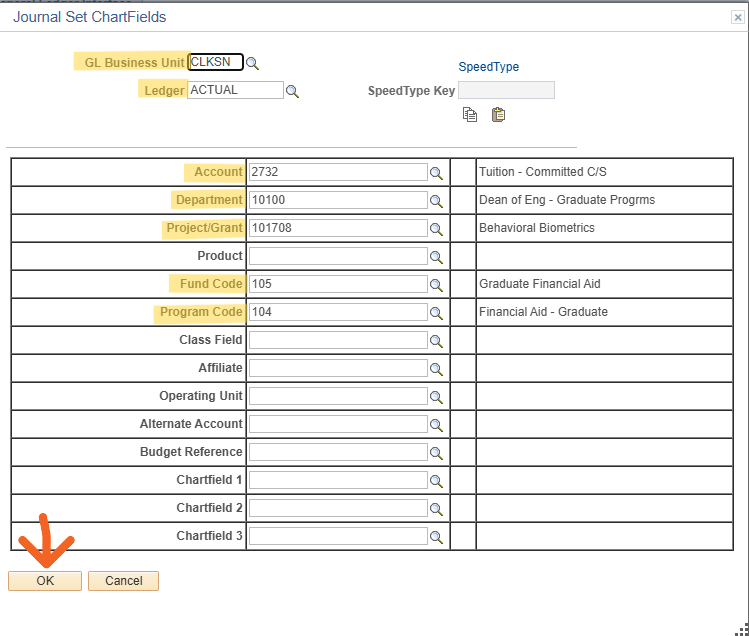
The next screen is important information impacting budgets so careful attention to filling out properly will avoid SF Journal Entry errors. If in Doubt, you can use PeopleSoft/Financials> Chartfield Conversion; also you can contact Carmen Camp or Karen LaPoint.
-
GL Business Unit = CLKSN
-
Ledger = ACTUAL
-
Account = you will enter the account according to digits 3 & 4 used in your Item Type Number with 27 in front of it (for example if digits 3 & 4 were 32, the Account would be 2732)
-
Department: Your Department number will be based off Digits 3&4 in your Item Type (is tuition being Waived (32) or Charged (33 or 34):
-
If waived (32); use Department for School:
-
10100 (SOE)
-
15100 (A&S)
-
41300 (ISE)
-
xxxxx (CRC)
-
- If Charged (33 or 34), it will be the 5 digit Department Number in the combination code on the graduate appointment.
-
- Project/Grant = the middle (5) numbers of the account being used
- Skip Product
- Fund = varies depending on 3 & 4 digit of Item Type (i.e. is tuition being charged or waived)
- If Waived (32) for Fund Number use: 105
- If charged (33 or 32) for Fund Number: Look at the Award Type line of the graduate appointment. In the Combination Code section, the first three digits of your budget account will be used (examples: 375, 378, 395)
- Program = Again, number will depend on the 3 & 4 digit of your Item Type:
-
If Waived (32) for Program Code use: 104 (Financial Aid)
-
If Charged (32 or 33): Look at the Combination Code in the graduate appointment (the same account code from the last step). You will use the last three digits of your budget account (examples: 200, 202)
-
- Click OK
-
-
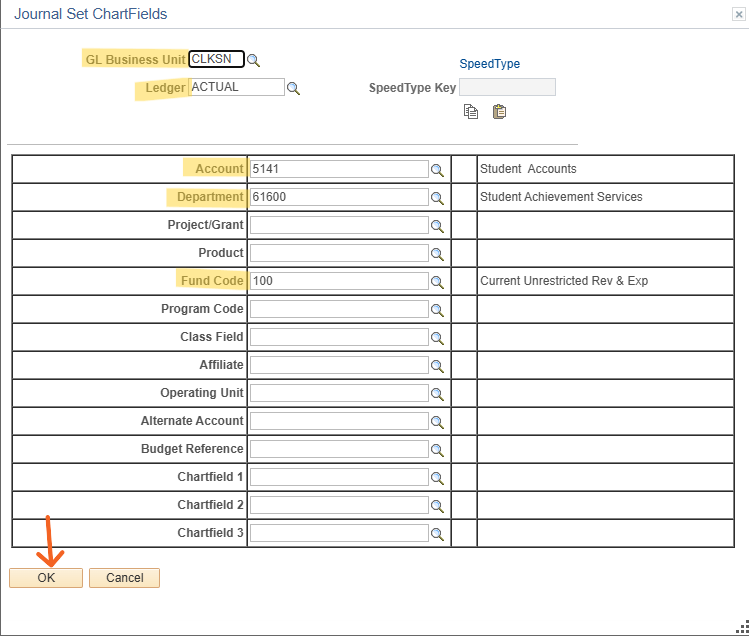
NEXT you will want to enter the Credit information under –Journal Sets (tells the GL what student account to credit and this information will always be the same for all Item Types).
Click the ADD a Row Button ![]() under the Item Type GL Entry Setup –Journal Sets
under the Item Type GL Entry Setup –Journal Sets
![]()
-
Once the Row has been ADDED fill in the following fields:
-
DB/CR – enter CREDIT
-
Timing = Assessment
-
GL PCT = 100
-
Priority = 999 (will default in)
-
Click the Jrnl Set ChartFields link again
-

-
Next Screen complete following fields:
-
GL Business Unit = CLKSN
-
Ledger = ACTUAL
-
Account = will always be 5141
-
Department = will always be 61600
-
Fund = will always be 100
-
CLICK OK
-
At this point you have completed the Item Type and can Click on SAVE ![]() -You will receive a Message Box with a Warning Message, do not be alarmed, this is normal. Click on OK until the Message disappears.
-You will receive a Message Box with a Warning Message, do not be alarmed, this is normal. Click on OK until the Message disappears.
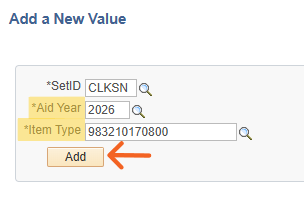
STEP 3:
-
Click Add a New Value
At Next Screen:
-
Be sure the correct aid year is entered
-
Insert your Item Type Number
-
click

-
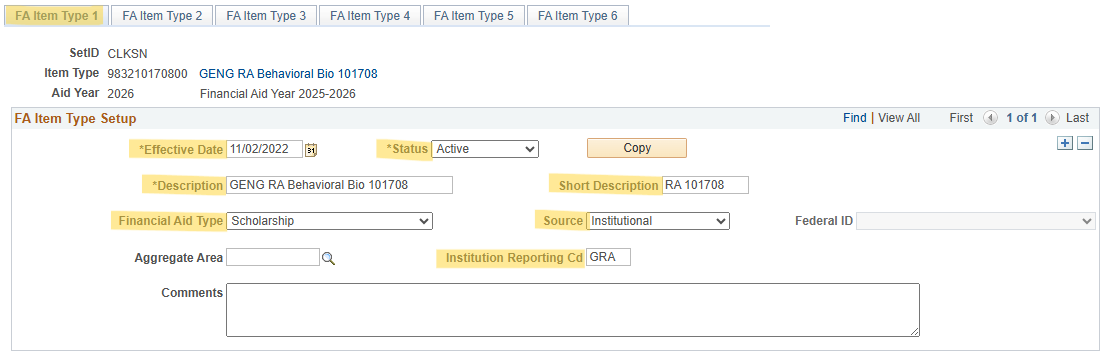
FA Item Type 1 Tab
-
Effective Date: be sure it is the beginning of the fiscal year same date you used when you set-up the Item Type
-
Status – leave default as Active
-
Description – will default in
-
Short Description – will default in
-
Financial aid Type – Scholarship
-
Source – Institutional
-
Institution Reporting Cd -Enter the Award Type abbreviation based on the below:
-
GSW - Graduate Student Worker (unlikely)
-
GTA - Graduate Teaching Assistantship
-
GRA - Graduate Research Assistantship
-
GFEL - Graduate Fellowship
-
GAA - Graduate Athletic Assistantship
-
GPA - Graduate Professional Assistantship
-
Leave Blank - Partial Tuition Scholarships (no work expected)
-
- Nothing more is entered on this page – go to FA Item Type 2
-
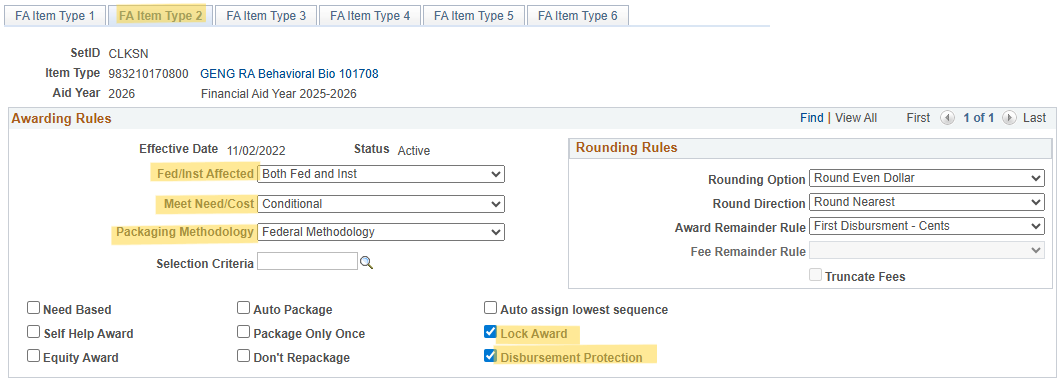
- FA Item Type 2 Tab
-
Fed/Inst Affected = Both Fed & Inst
-
Meet Need/Cost = Conditional
-
Packaging Methodology = Federal Methodology
-
Only check Lock Award & Disbursement Protection
-
Go to FA Item Type 3

-
-
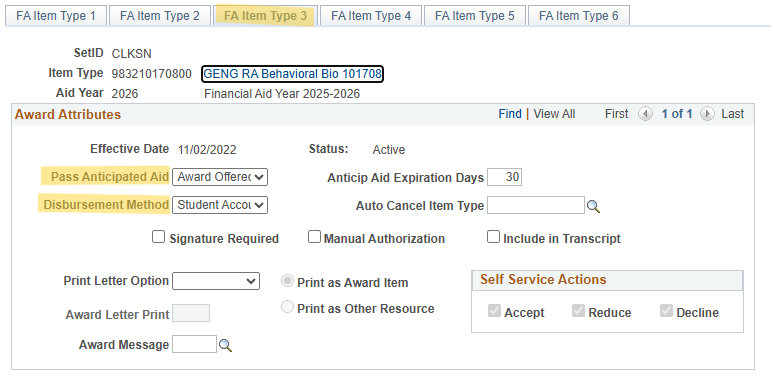
FA Item Type 3 Page
-
-
Pass Anticipated Aid = Select AWARD OFFERED
-
Disbursement Method = Select STDNT ACCT
-
Go to FA Item Type 4
-
-
-
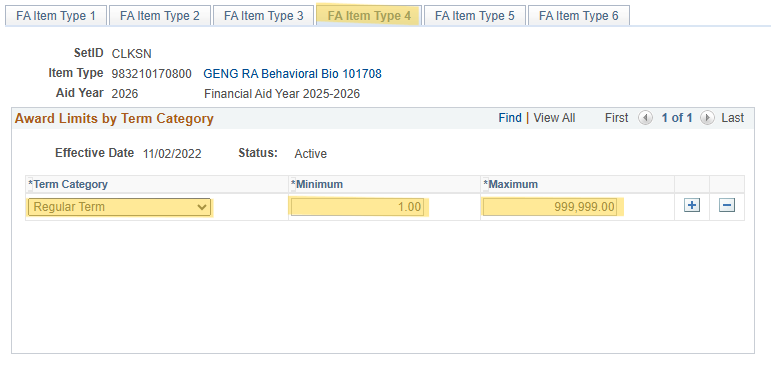
FA Item Type 4 Tab
-
Term Category – Using Drop Down select Regular Term
-
Minimum = 1.00
-
Maximum = 999,999
-
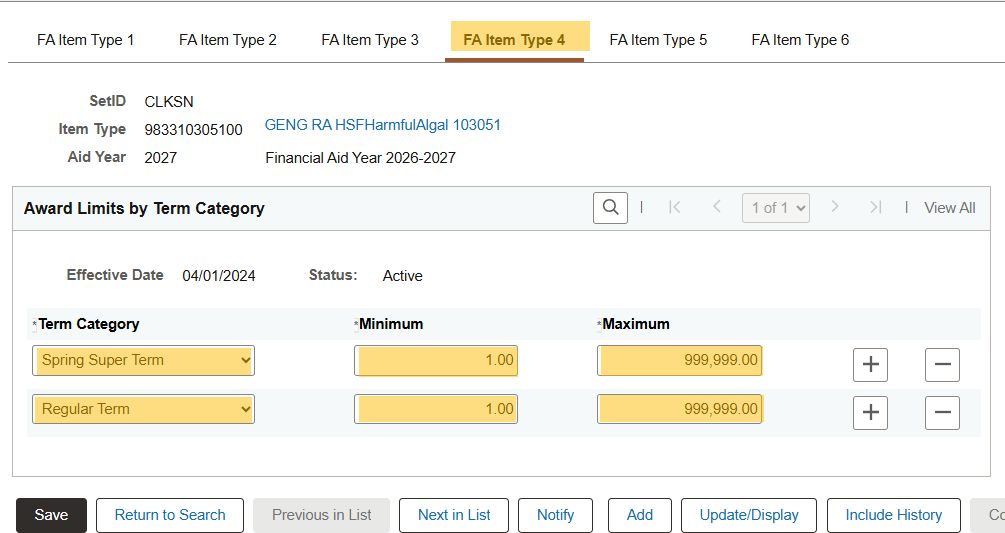
Go to FA Item Type 5

- 8(a): For any item types being created for FY27, you will also need to add 'Spring Super Term'

-
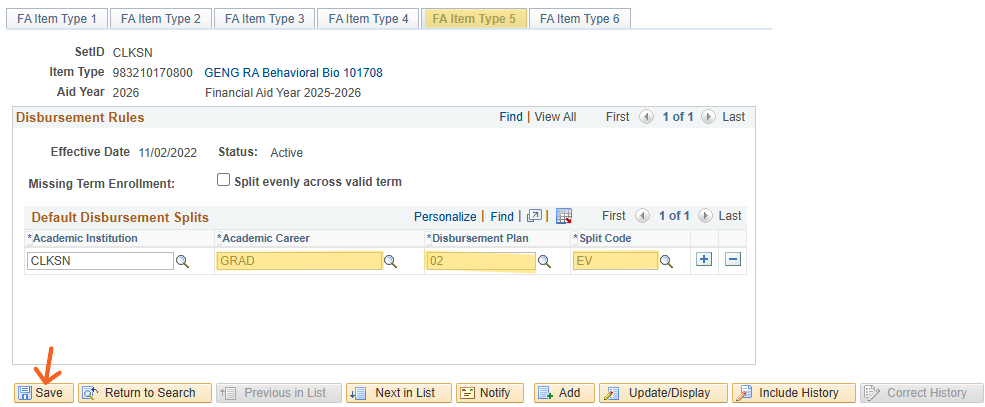
- FA Item Type 5 Tab – sets the defaults in for the item type. All you will enter is:
-
Academic Career = GRAD
-
Disbursement Plan = Using drop down, select based on your Financial Aid term being awarded to. Most commonly this will be 02, where the EV (even) split will be for FA (Fall) and SP (Spring). However, if the award will need to be used for a Summer term, select 05, which will evenly split the award between SU (Summer), FA, and SP.
-
Split Code = EV –normally use EV
-


-
hit

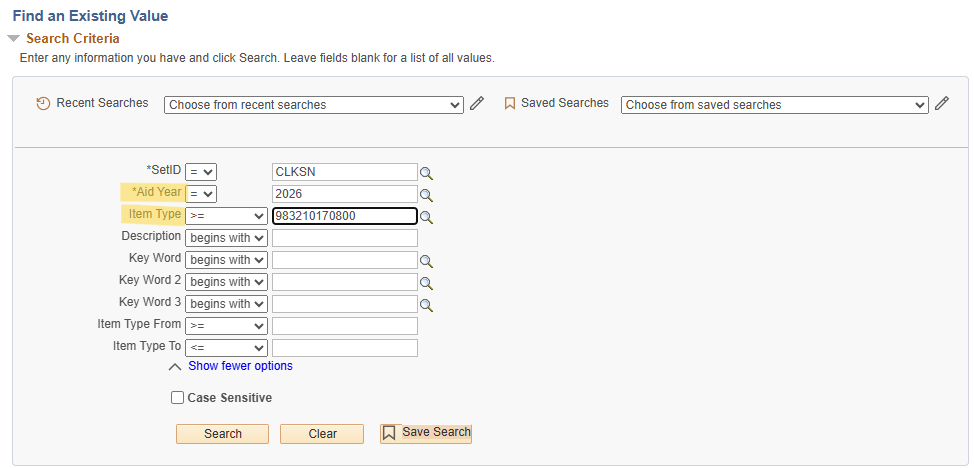
STEP 4: (Final Step):
-
Enter Aid Year
-
Insert Item Type Number
-
Click Search
-
Enter seven 9’s in each of the fields: Offer; Accept; Disbursements
-
Click Save
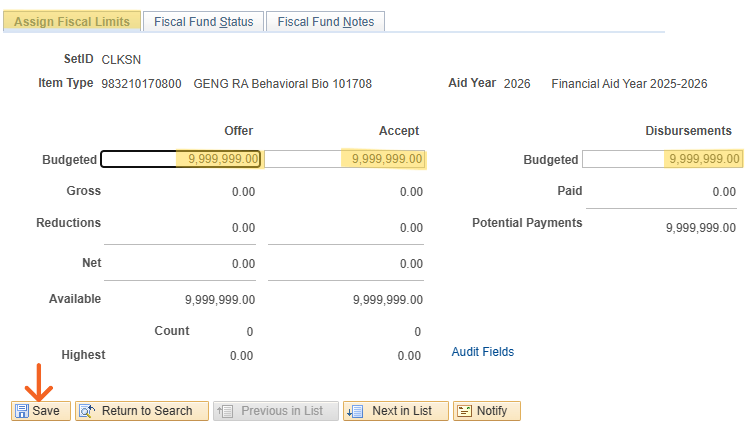
YOU ARE DONE! This is an overnight process to be able to use the Item Type Number. You will not be able to post the Award on the students PeopleSoft record until the following day.