
Activating And Maintaining A Student's Financial Aid Year
Before you can add an award for a student, you will need to Maintain their Financial Aid (FA) Term and ensure they have an Active Aid Year. This process typically only needs to be done once for new students, but can be a good place to check if you experience an award not applying properly.
If your student already has their Aid Term updated, you can click over to the Assigning an Award guide for instructions on how to apply the award
First, you will want to log into myCU in PeopleSoft. Once in myCU, follow the navigation path below:

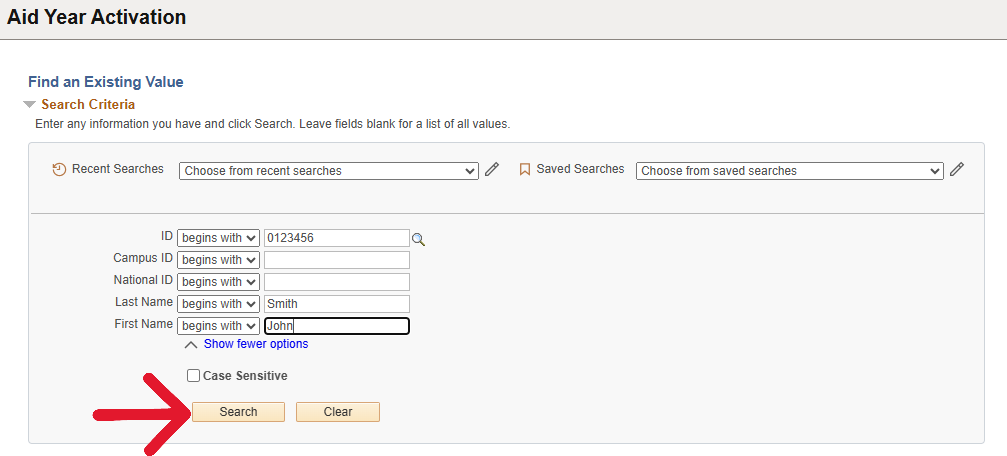
Add Student ID in the top box. If you do not know the students ID, you can search by name in the boxes lower down the list. Click 'Search'
In the Aid Year box, put in the financial aid year that the award needs to be applied to. To add multiple years, click the blue plus sign at the end of the row to create a new row. Click Save
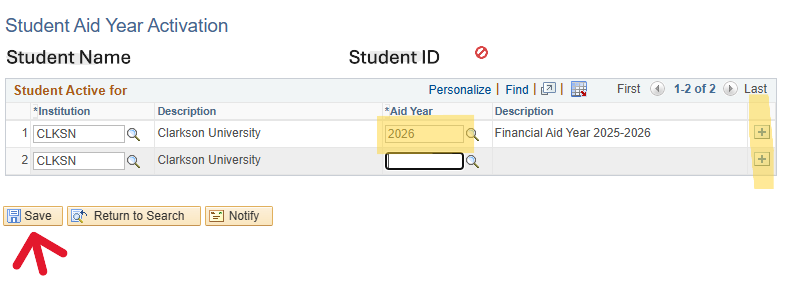
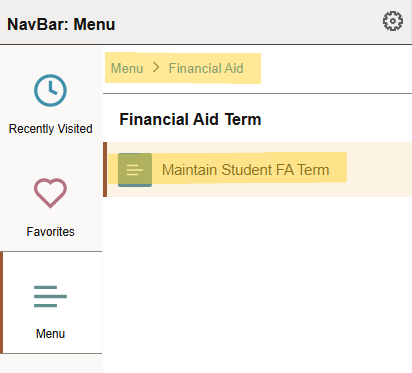
You have now activated an Aid Year for a student. The next step is to Maintain the FA Term. You will follow the navigation path below:
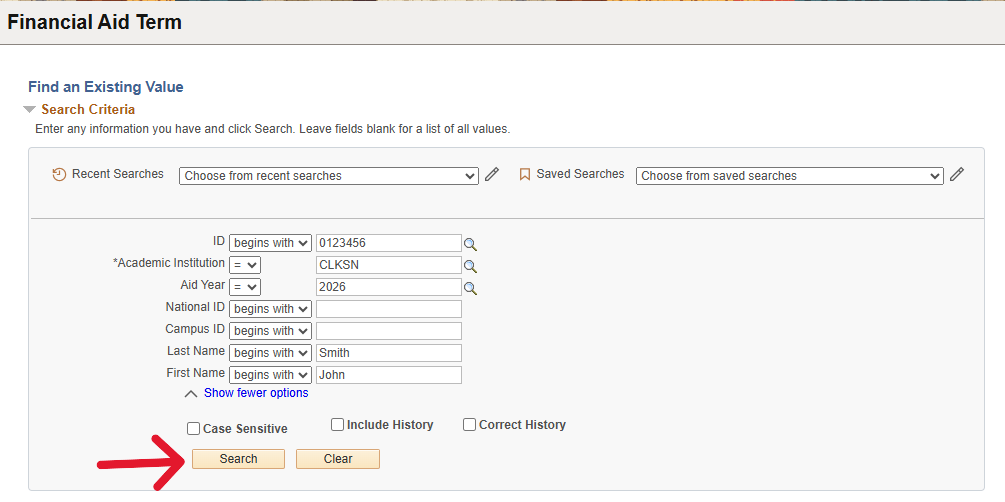
Input the student's ID number, if you do not know their ID number you can move to the next step by searching their first and last name. You will also need to input the aid year you are wishing to maintain (this will be the same year you activated in the last step). Click 'Search'
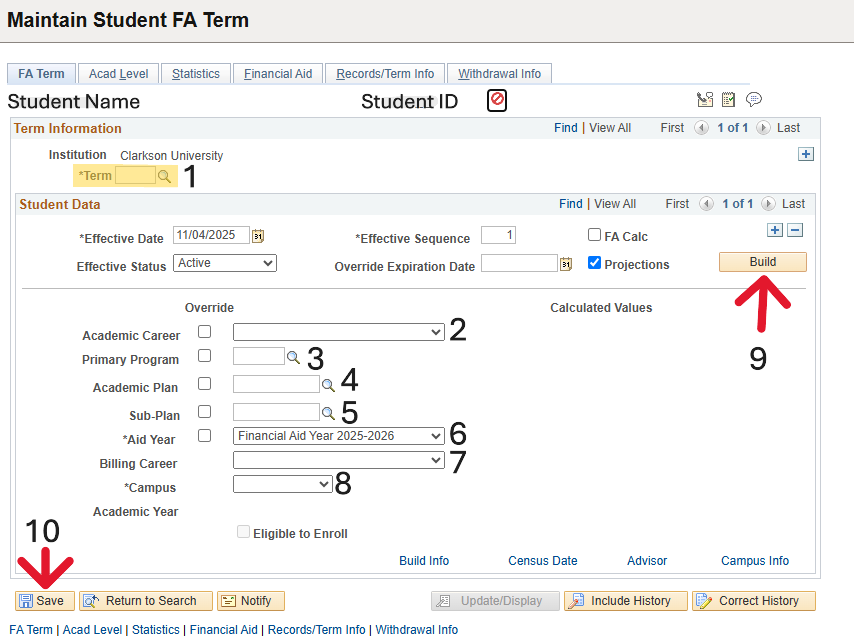
You will want to fill in the following information:
- *Term - Click the magnifying glass next to the box and select the first semester the student will be receiving aid (you may need to scroll down to find the proper semester)
- Academic Career - Click Graduate or Grad Quarterly Calendar (depending if the student is on the semester or quarter schedule) from the drop down
- Primary Program - Click the magnifying glass next to the box and select the appropriate program
- Academic Plan - Click the magnifying glass and select the appropriate program from the list
- Sub-Plan - Click the magnifying glass if you know the student has a sub-plan and select from the list, if student does not have a sub-plan, skip this step
- *Aid Year - will auto fill in
- Billing Career - will auto fill in
- *Campus - Select 'Main' from drop down
- Click 'Build'
- Then click 'Save'
You are now all set to begin adding scholarships for the activated students. For a guide on how to add scholarships, click here