
Feature: Faculty/Advising Portal - My Class Roster
Goal
The My Class Roster view in the Faculty & Advising Portal allows a user to see a list of students in the class(es) they instruct along with information about each student.
Steps
- After logging into Slate, click on the My Advising Portal link

- Select the My Class Roster navigation button at the top of the screen. This will bring up a list of students enrolled in the class(es) you instruct.
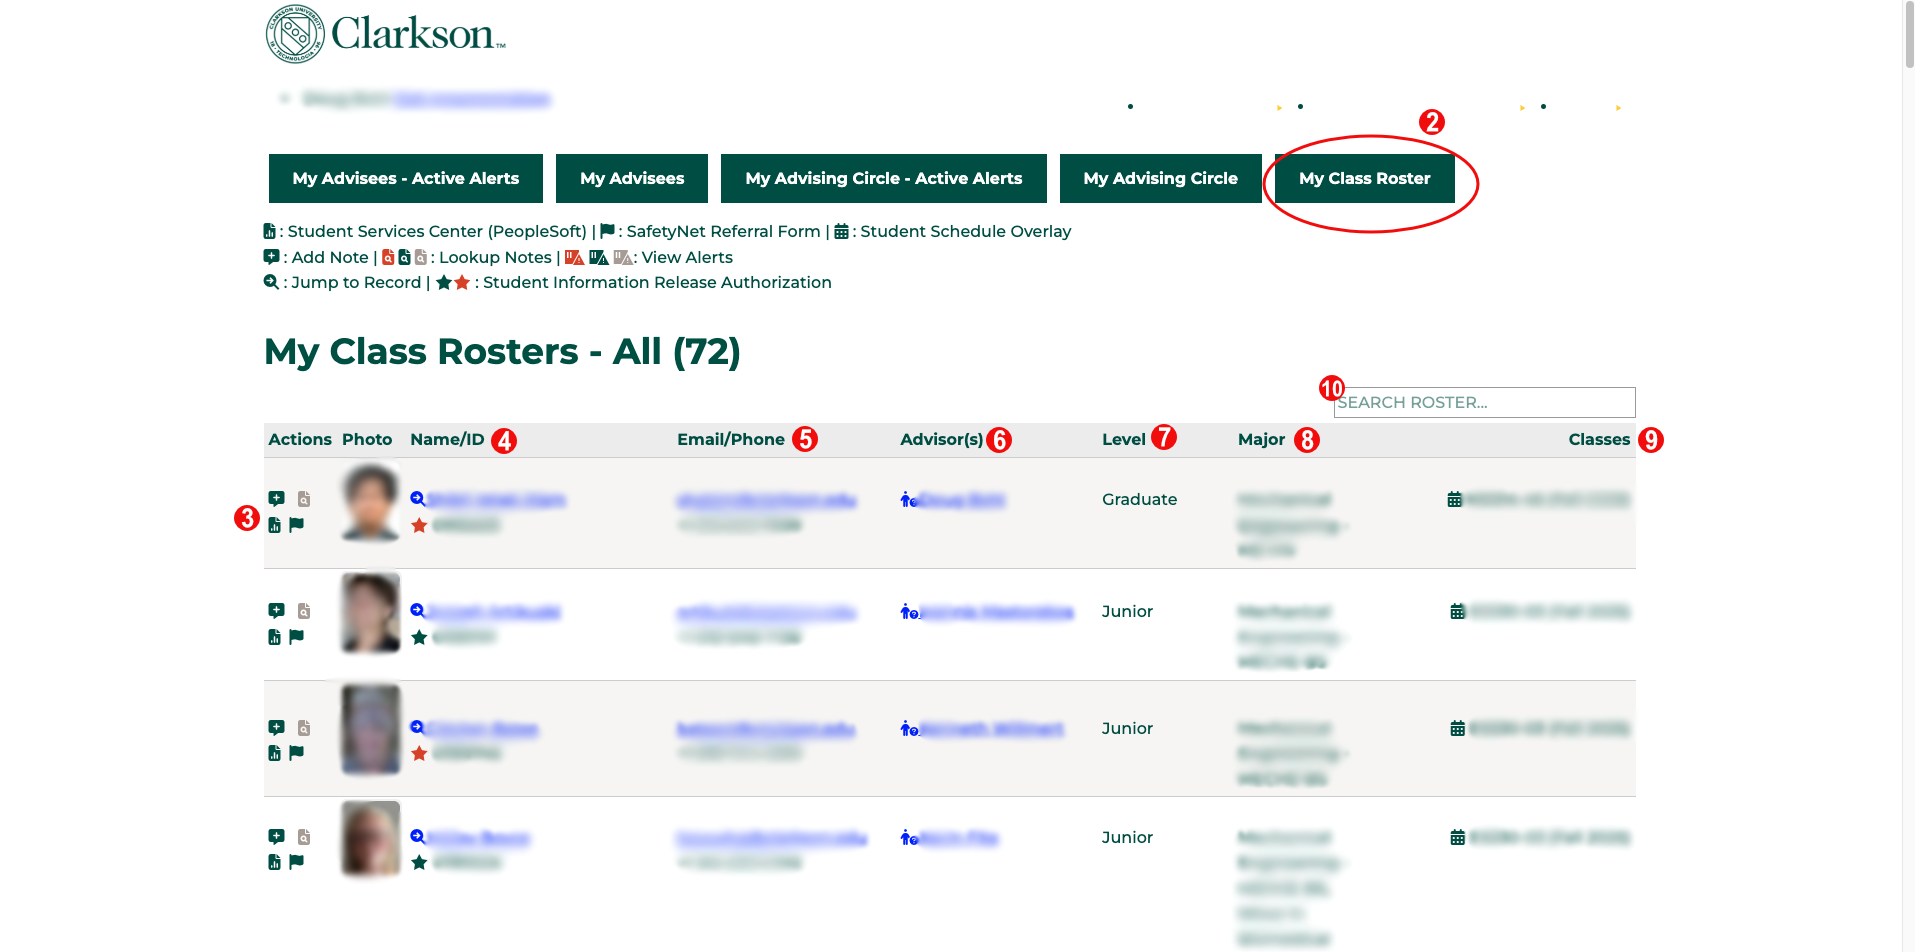
- In the left column are buttons for actions you can take. A key for the meaning of these icons is at the top of the page below the navigation buttons. The top three are actions you can take on the student record:
- Add Note: instructions for adding an advising note can be found at Feature: Advising Notes
- Lookup Notes: view a listing of all advising notes on the student's record
- Student Services Center: opens a opens the student's record in the PeopleSoft Student Services Center in a popup window
- SafetyNet Referral Form: opens a new window to submit a SafetyNet referral
- Clicking on the student's name will take you to their record in Slate
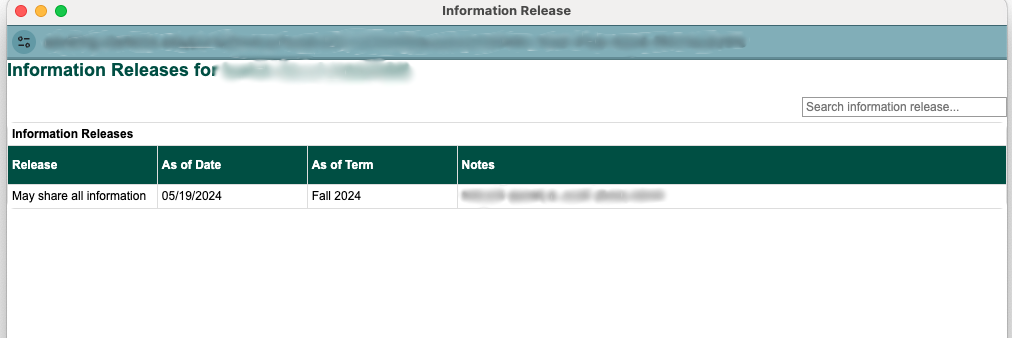
- Below the student's name is an indicator for their Student Information Release Authorization. A green star means students have given permission to share information, a red star means they have not. Clicking on this will bring up a box with details about who student information may be shared with.
- Below the student's name is an indicator for their Student Information Release Authorization. A green star means students have given permission to share information, a red star means they have not. Clicking on this will bring up a box with details about who student information may be shared with.
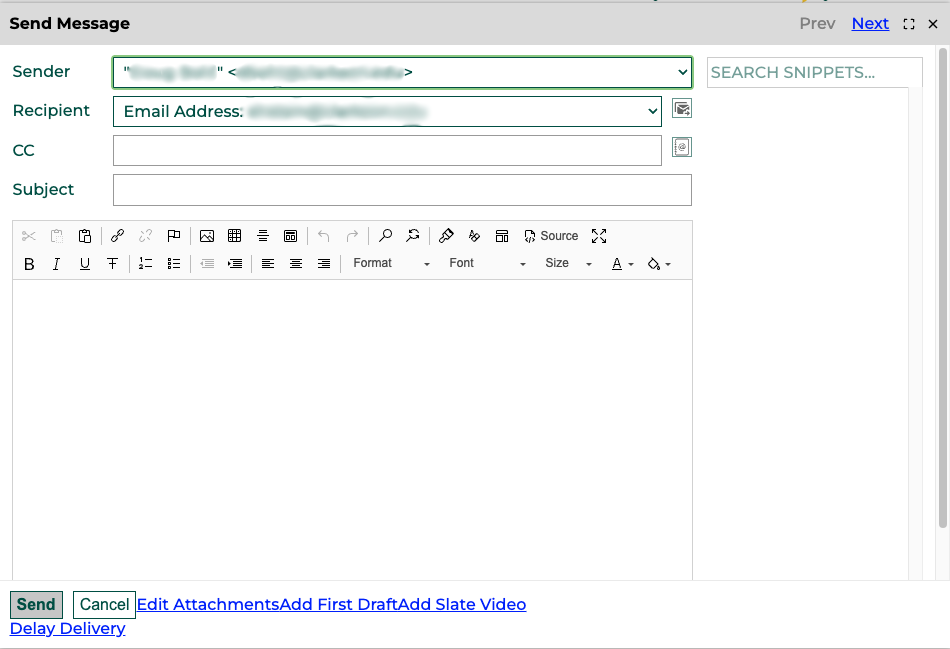
- Clicking on the student's email address will bring up a popup allowing you to email the student directly
- This email will be visible on the student's timeline, able to be viewed by anyone who has access to the system. With this in mind, do not share any private or sensitive information through this Slate email.
- Any replies from the student to this message will be sent directly to your Gmail inbox.

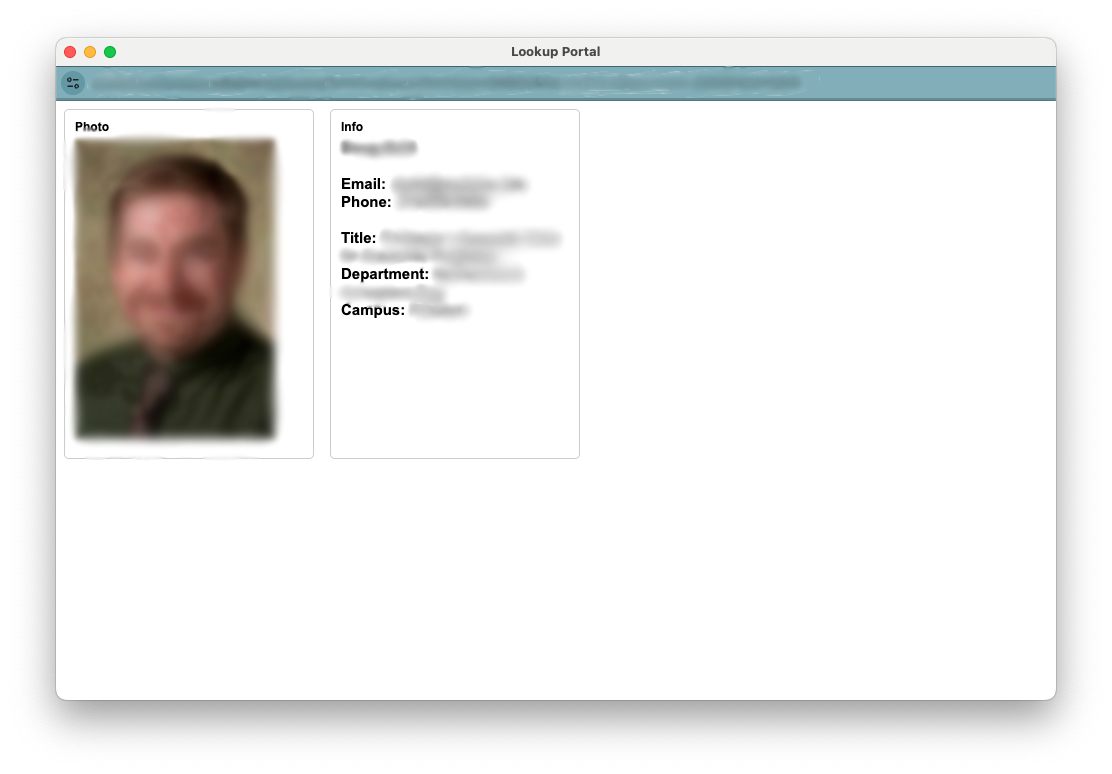
- To see information about the student's academic advisor(s), click on the advisors name. This will open a popup window with contact information for that advisor.
- You can view the student's current level.
- View information about the student's major(s). These are shown both with the full title and the major code.
- The final column shows the class(es) that the student is enrolled in.
- Clicking on the calendar icon next to the class name will bring up a class schedule overlay for all students in that particular class section. You can learn more about the schedule overlay at Feature: Class Schedule Overlay
- Clicking on the calendar icon next to the class name will bring up a class schedule overlay for all students in that particular class section. You can learn more about the schedule overlay at Feature: Class Schedule Overlay
- All screens are searchable
- Any text that is displayed on the screen (name, class section, level etc.) can be searched
- You can search for multiple elements (ex: sophomores in a specific class section) as well.


Automatic Notifications
There are no automatic notification as part of this process.
Automation Notes
Are there automations happening in the system when something from this feature is submitted or updated? This might need to be updated by the Slate Developer for the feature.