
Moodle: Insert an Image
Summary
Often you can copy and paste an image into a Moodle topic, page, forum, etc. See the example below to see how an image can enhance your words. Add an image by using the editor in Moodle, follow the Step-by step guide belowunder the example.example below.
This Guide Will Help You to:
-
Find an image
-
Insert an image using the Atto text editor.
-
Get help with image alignment and spacing.
Before you start!
-
Do you have the image?
Have the image already to upload/add on your computer.If you need to find the image, or to take a screenshot of the image, do that first. If you have an image follow thesteps.steps below. -
2. If you need to find or create an
image, firstimage, save the image by downloading to your computer or rightclickingclick on the image andchoosingchoose Save as Image (or picture). Or use the Snipping Tool on your computer to take a picture of the image. Note where you saved the image so you can find it in Step 3 below. -
WhereFindcananIimage.findFind free images that may or may not need citing? See Moodle Choosing Resources & Media
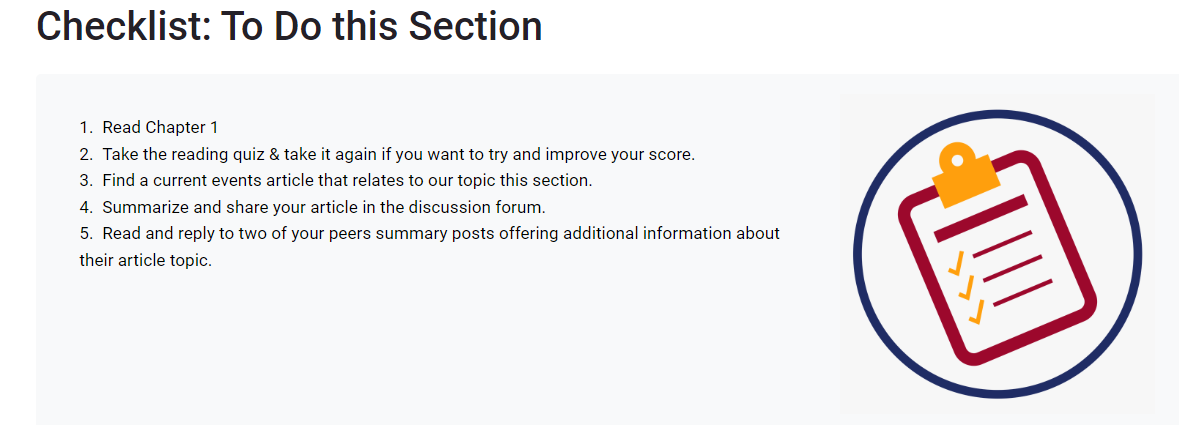
Example
An image in the description area ofto enhance the activity
Summary
Often you can copy and paste an activity:image into a Moodle topic, page, forum, etc. See the example below to see how an image can enhance your words. Add an image by using the editor in Moodle, follow the Step-by step guide under the example below.
This Guide Will Help You to:
-
Find an image
-
Insert an image using the Atto text editor.
-
Get help with image alignment and spacing.
Before you start!
-
Do you have the image? If you need to find the image, or to take a screenshot of the image, do that first. If you have an image follow the steps below.
-
2. If you need to find or create an image, save the image by downloading to your computer or right click on the image and choose Save as Image (or picture). Or use the Snipping Tool on your computer to take a picture of the image. Note where you saved the image so you can find it in Step 3 below.
-
Find an image. Find free images that may or may not need citing? See Moodle Choosing Resources & Media
Example
An image in the description area to enhance the activity

Step-by-step "how to" guide
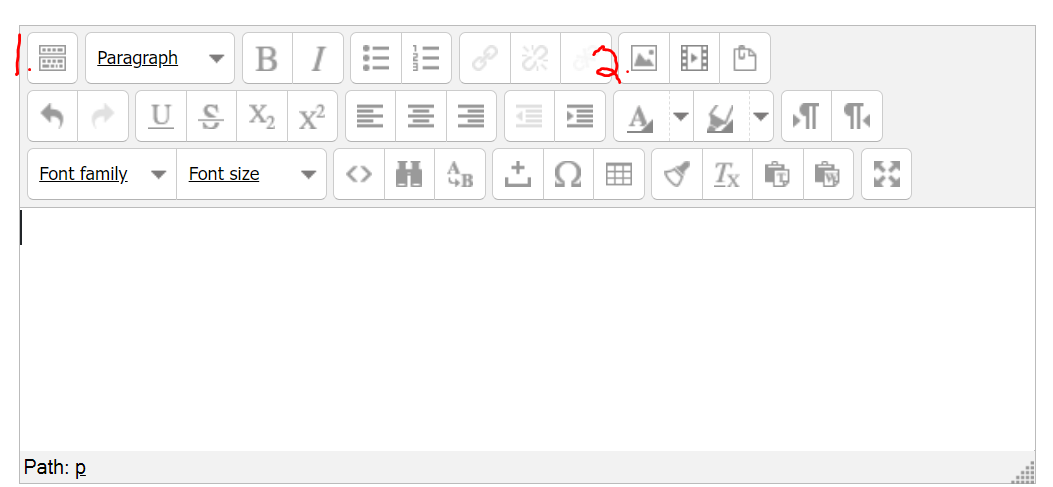
1. If you are using the LegacyAtto Tinyeditor MCE editoryou shownwill below, turn on all ofsee the rowstools bybelow. clicking on the top left icon-the Toolbar Toggle (If your editor looks different from the one below, you are probably using the AttoTiny MCE editor.) Adding an image is similar in both. Images can be added almost anywhere you have a text editor.
2.

-
Click on the
Insert/EditImageimagetoolicon in theeditor:editor, highlighted in yellow above.-
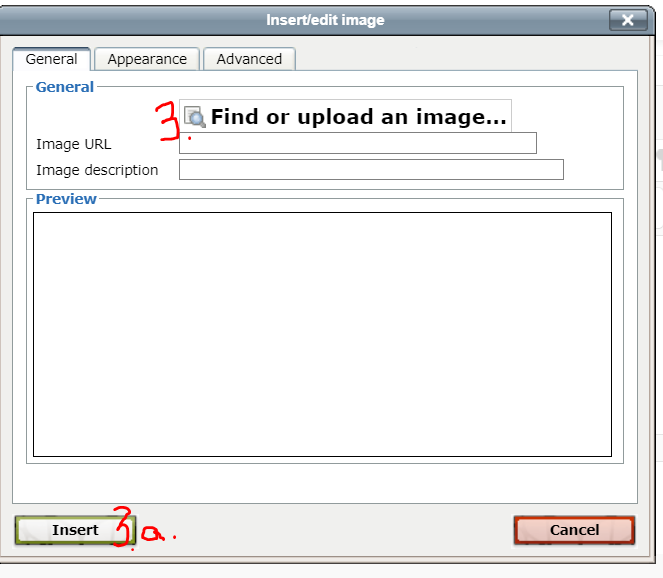
Depending on the location of the file, follow one of the three options to insert the image:
-

3. click to Find or upload an image and click Insert:
4. Choose Upload a file in the File Picker window.
5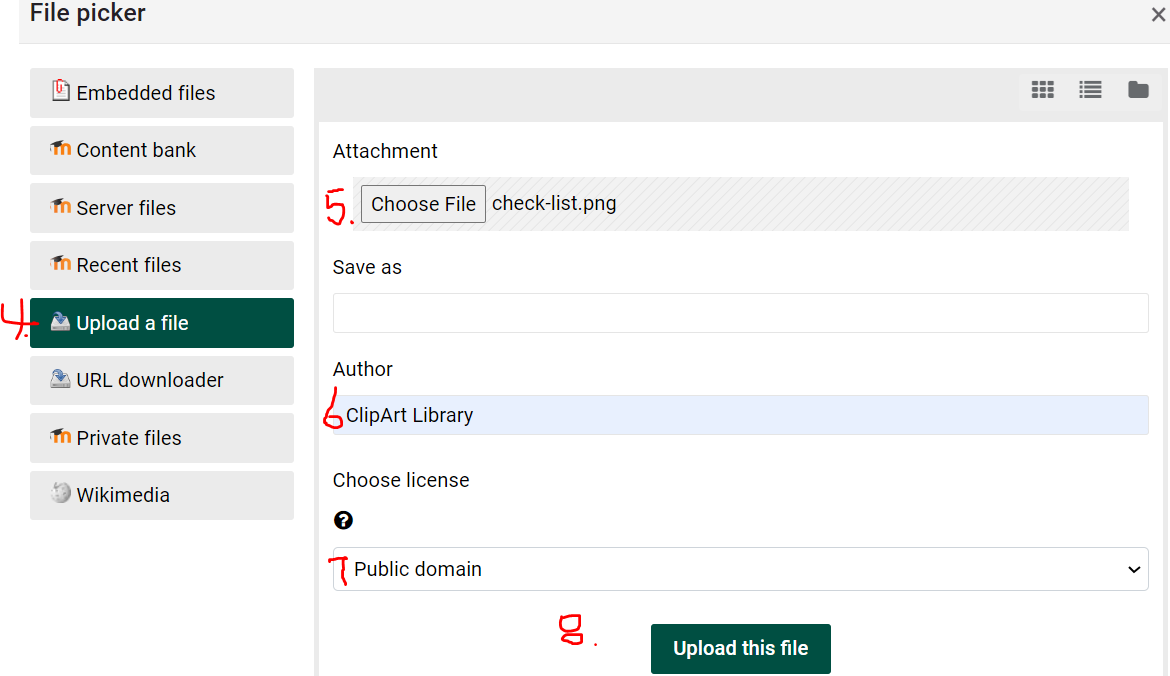
. Choose File (Browse) for your image file and click Upload this file.
6. Fill in theany Author.
7. Chooseabout the License,image if you know it.
9. On the General tab,prompted, give the image a descriptive name in the Image Description space.name. (Or if the image is not important to the content of the course add double quotes "")*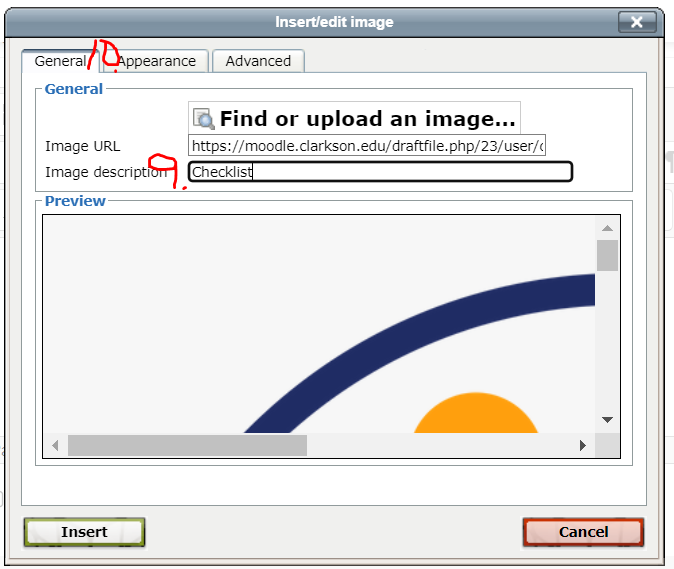
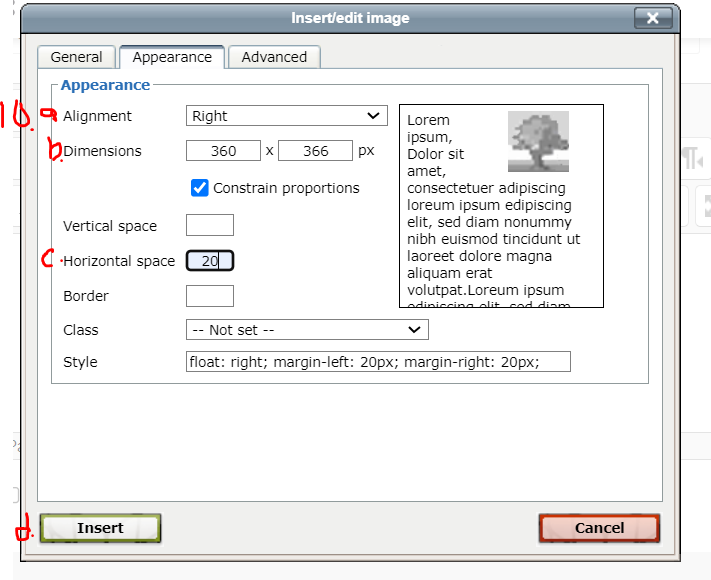
10.5. ClickIf on the Appearance tab. Youryour image may beis too large, or you might want it to be aligned on the left or right of the text, or leave some space between text or bullets and the image.image, Followplease contact the lettersHelpDesk onand the screenshot below:
a. Alignment on the page where you are adding the image.b. Choose the dimensionsone of the imageTLC as you want it to show on the page.c. Horizontal spacing at 20team will allow about 1/2 inchhelp.d. Click Insert.
These steps will get you back to the Appearance settings.
*If you want to make changes beginto the appearance of an imagesimage after inserting, edit the settings of the label/page where the image is located. Click on the image to select it, click on the image tool (or right click on the image and choose edit image from the drop down menu.
- See information on changing Text Editor Toolbar Preferences
- See more information in this Moodle Doc About Images
Seek Further Assistance
For additional assistance please contact, Clarkson OIT Help Desk;
Online: Get Help
Email: helpdesk@clarkson.edu
Call: 315-268-HELP (x4357)
Step-by-step "how to" guide
If you are using the Atto editor you will see the tools below. If your editor looks different from the one below, you are probably using the Tiny MCE editor. Adding an image is similar in both. Images can be added almost anywhere you have a text editor.
-
Click on the Image icon in the editor, highlighted in yellow above.
-
Depending on the location of the file, follow one of the three options to insert the image:
4. Fill in any information about the image if prompted, give the image a descriptive name. (Or if the image is not important to the content of the course add double quotes "")*
5. If your image is too large, or you want it to be aligned on the left or right of the text, or leave some space between text or bullets and the image, please contact the HelpDesk and one of the TLC team will help.
*If you want to make changes to the appearance of an image after inserting, edit the settings of the label/page where the image is located. Click on the image to select it, click on the image tool (or right click on the image and choose edit image from the drop down menu.
- See information on changing Text Editor Toolbar Preferences
- See more information in this Moodle Doc About Images
Seek Further Assistance
For additional assistance please contact, Clarkson OIT Help Desk;
Online: Get Help
Email: helpdesk@clarkson.edu
Call: 315-268-HELP (x4357)