
Groups
Summary
Creating a group (of students) within a Moodle course can be useful for team grading, team projects and team access to specific files/folders.
Video
This Tutorials:
Steps for Creating Groups
With editing on accessOn the"Administration"topblocknavigation bar on therightcoursesidehomepage,ofclick Participants.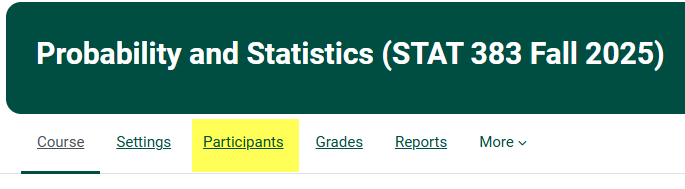
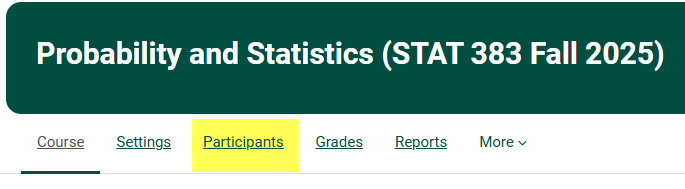

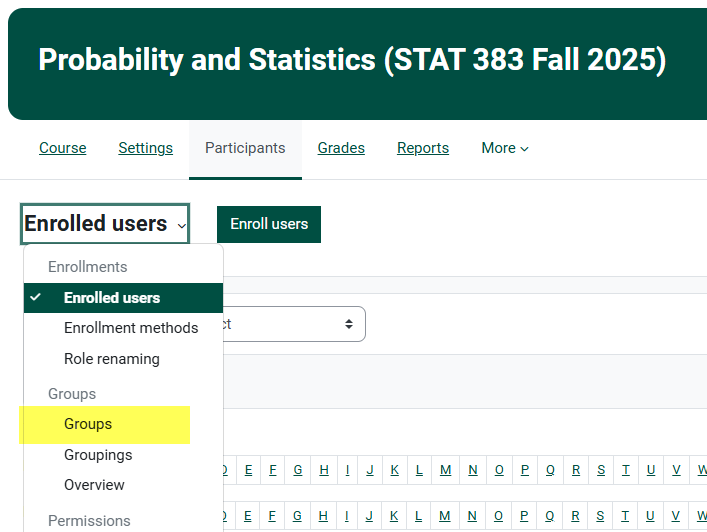
On the
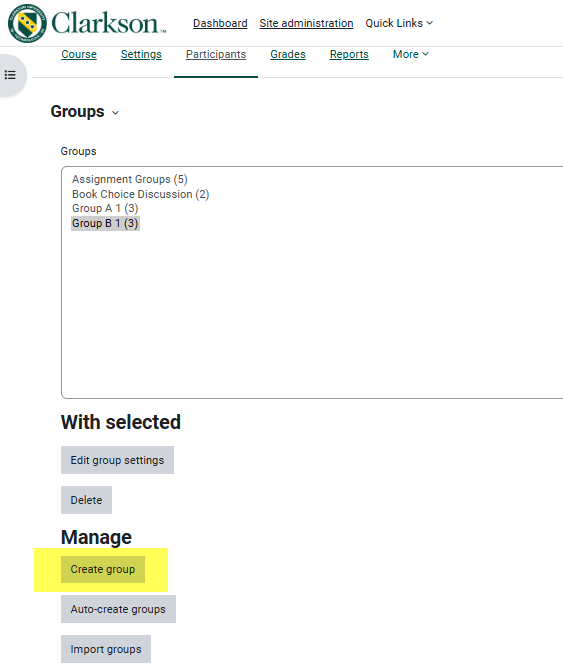
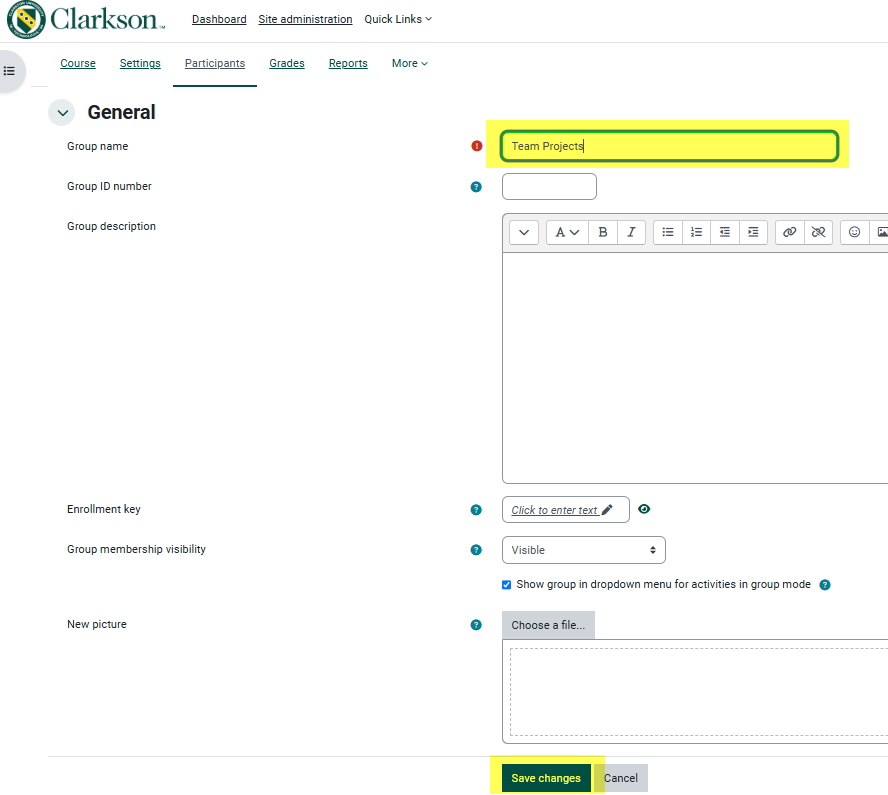
Give the group a name and then click "Save changes".
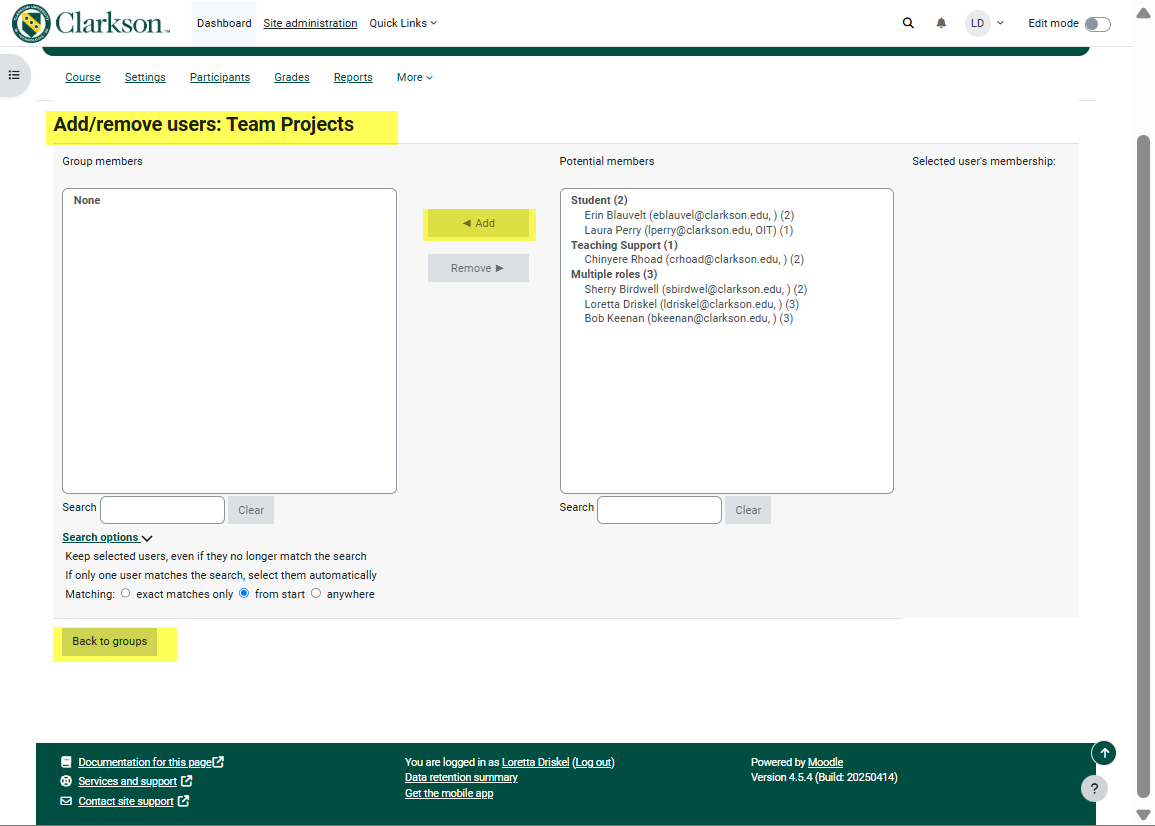
Back on the main "Groups" page. Click on the name of the group you created and assign students to the group using the "Add/remove users" button. When finished adding students to this group, click on Back to Groups to create more groups if necessary.
Options
Continue creating groups and adding students or alternatively, use the Auto-create option to create any number of groups.groups Addfor the course. You can then add student maually,manually orOR allow Moodle Groups to randomly choose students in each group.
Students
can easily be moved from one group to another by using the Add/Remove buttons.
View examples of Collaborative Learning or Group Activities for online or classroom
Example of Restricting Access to Groups for Folders/Activities: Assignments, Folders, Files, etc.
- Go to the location of where the
folder/fileassignment, folder, file, etc. is located.(MakeTurnsureEditingyou are in "Editing" mode)on and click Settings on"Editthesettings"
top nav bar. - Once you are on the
folder/fileitem youwishwant toeditrestrict access to,click on "Add restriction..." under the "Restrict Access" tab. Choose the option for "Group". Click the Group button and add the appropriate group.
AfterOncethat,restrictions have been added, only students in the specified group will see the contents of thefolderassignment,orfolder,file.file, etc.
Video Tutorials: TBD
See all about using Groups in Moodle Docs.
Seek Further Assistance
For additional assistance please contact, Clarkson OIT Help Desk;
Online: Get Help
Email: helpdesk@clarkson.edu
Call: 315-268-HELP (x4357)