
Clarkson VPN Removal Instructions
To remove the Clarkson Forticlient VPN from your machine, you must have administrative privileges.
If you have a Clarkson-owned Windows computer, please contact the HelpDesk for assistance.
Choose an arrow below to expand for installation instructions:
Uninstall on Windows 10 or 11
Note: you will need an Administrator-level account to complete this process.
- Open the FortiClient by right-clicking the FortiClient icon in the task bar and selecting "Open FortiClient Console"

- Select the "Zero Trust Telemetry" tab

- Click the "Disconnect" button to disconnect your client from the management system

- Use the Add/Remove programs feature in System Settings to uninstall the client


Install on MacOS
Note: These instructions have been written based on MacOS 15 (Sequoia).
- Download the FortiClient VPN application.
- Open the downloaded "ClarksonFortiClient.dmg" disk file.
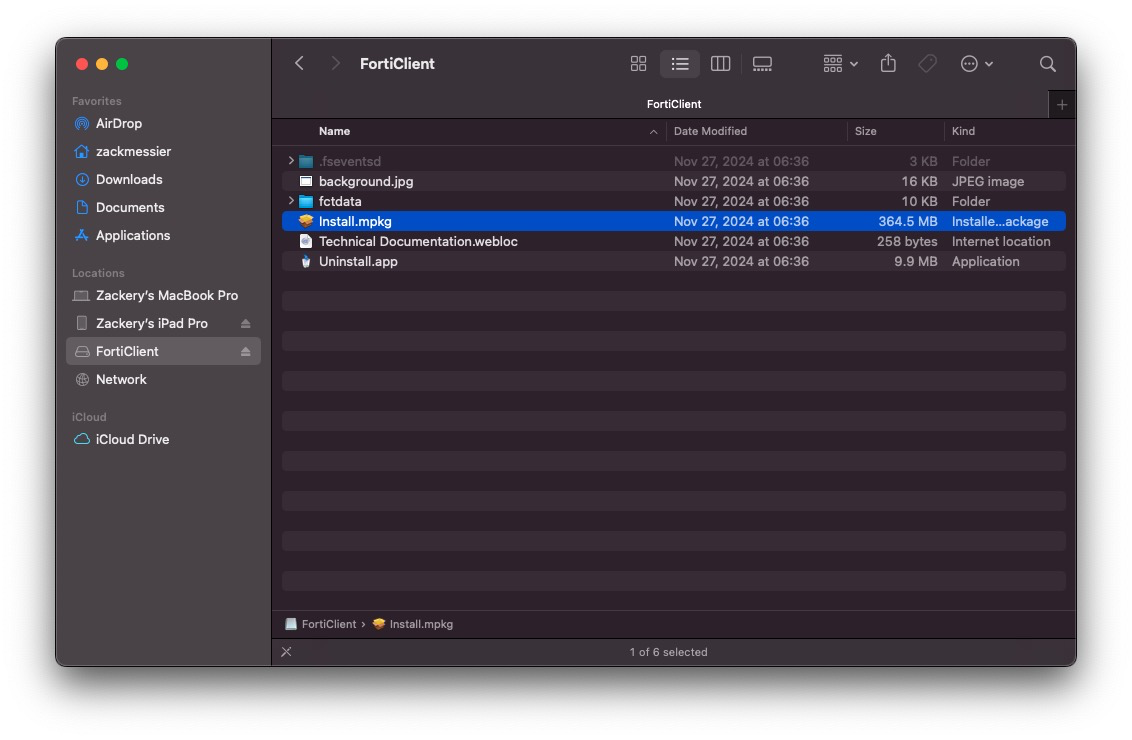
- Open "Install.mpkg", this should show in your Finder under
/Locations/FortiClient/.

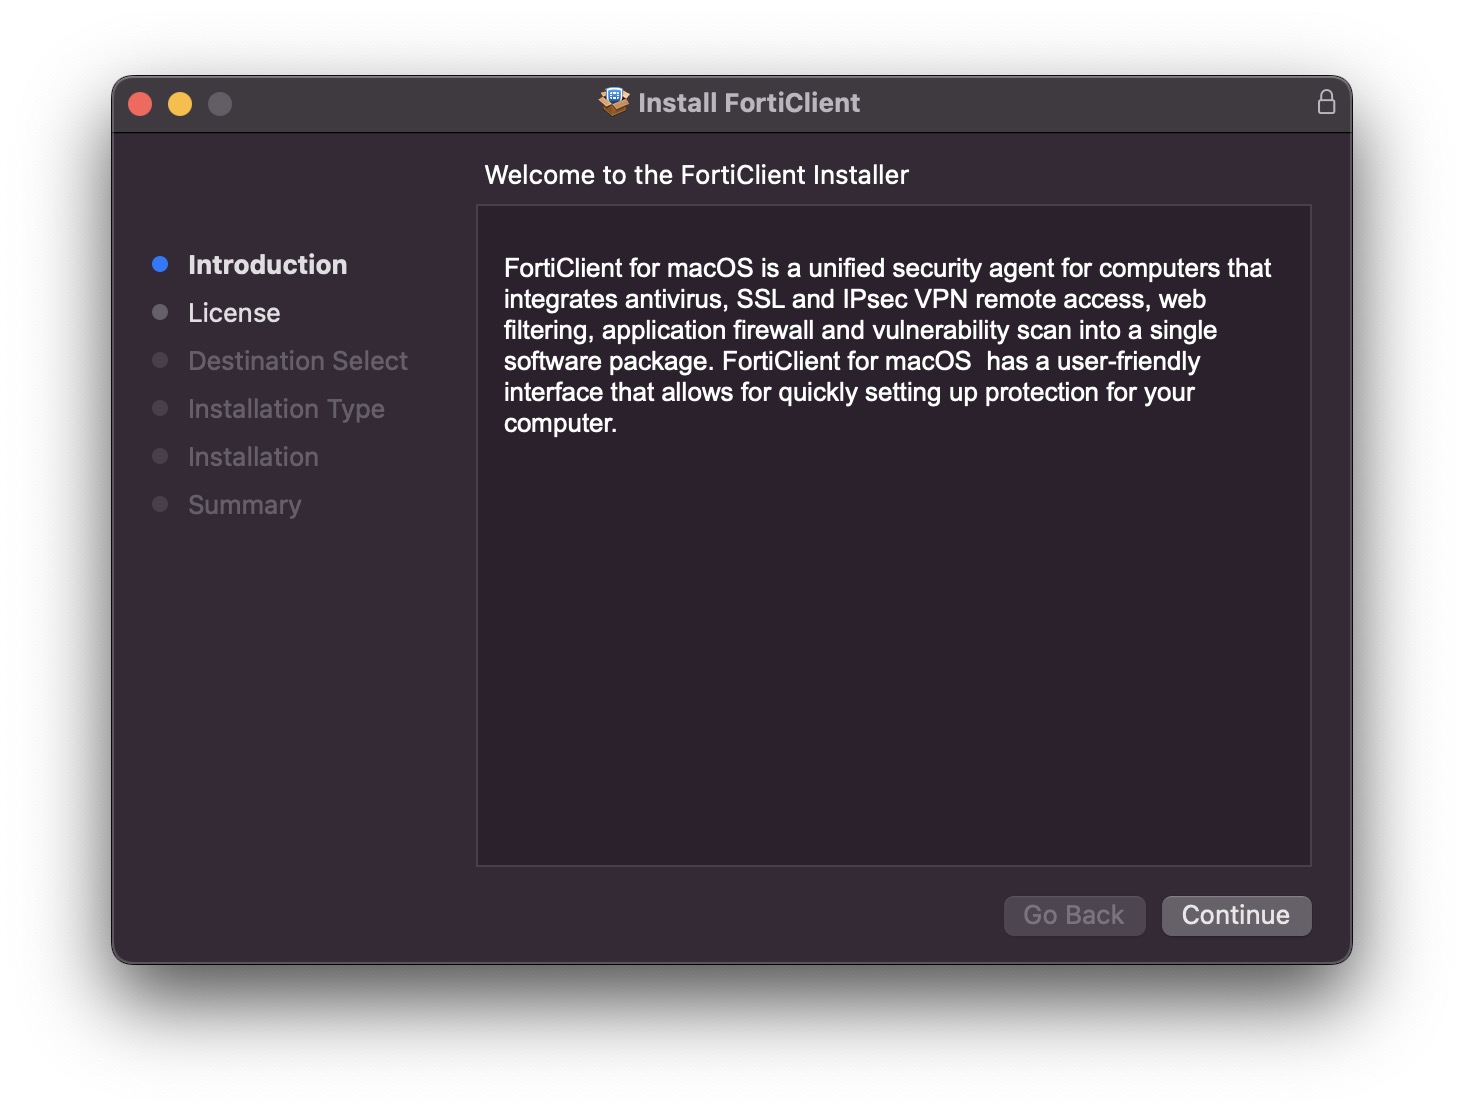
- The application installer should open. Press continue.
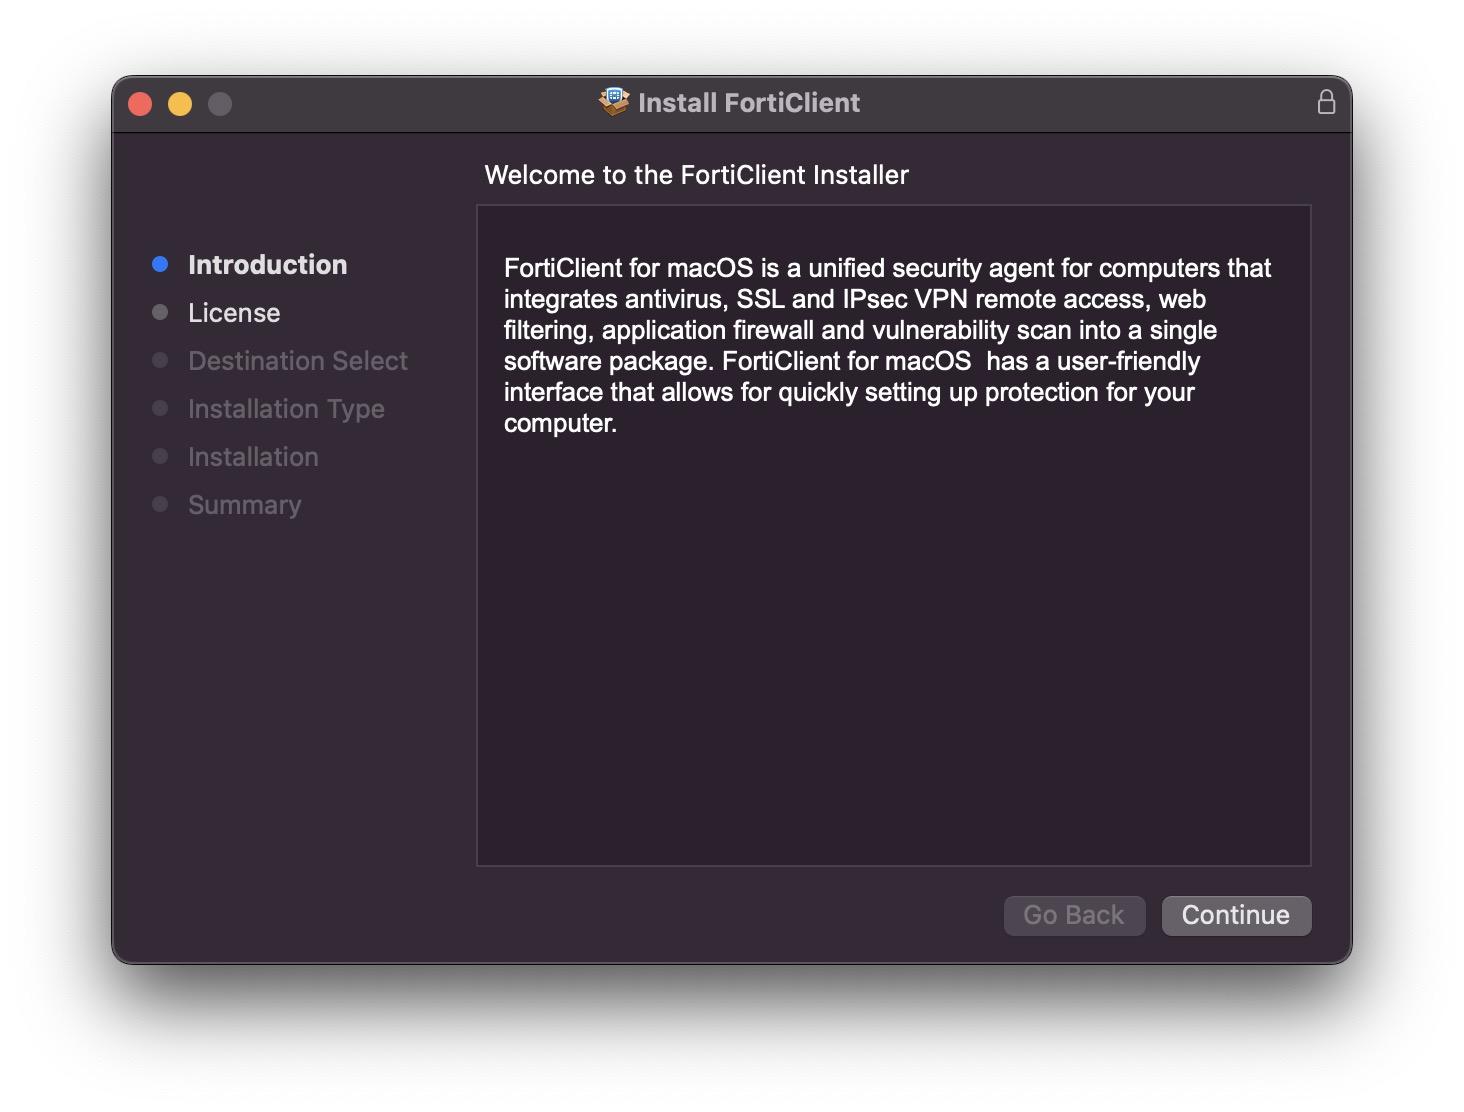
- Read and accept the Terms and Conditions.

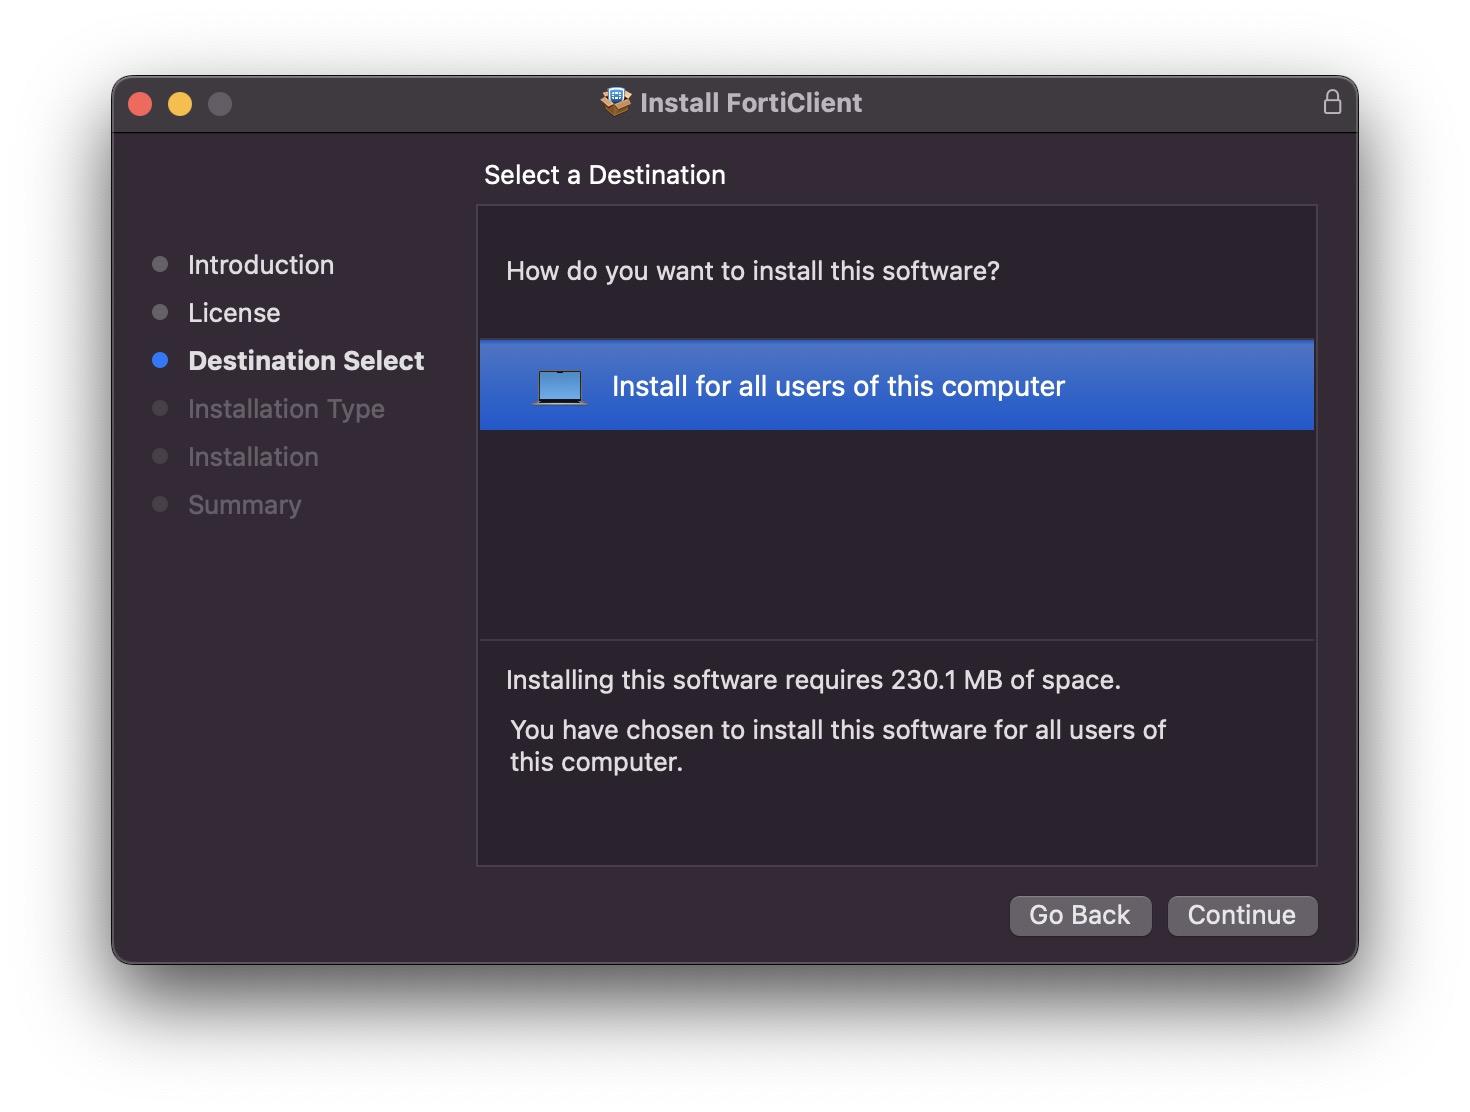
- Select "Install for all users of this computer"
- Press the "Install" button. When prompted, enter your Mac password (or use your fingerprint.)
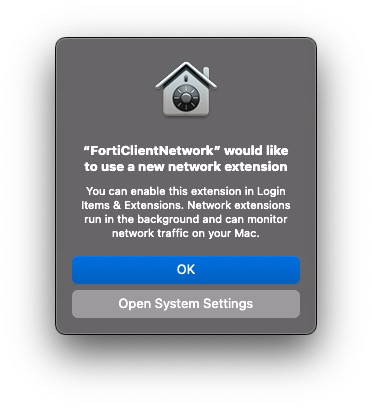
*There may be a popup that will appear that will inform you that "FortiClientNetwork" would like to use a new network extension. Simply press "OK" to dismiss this popup.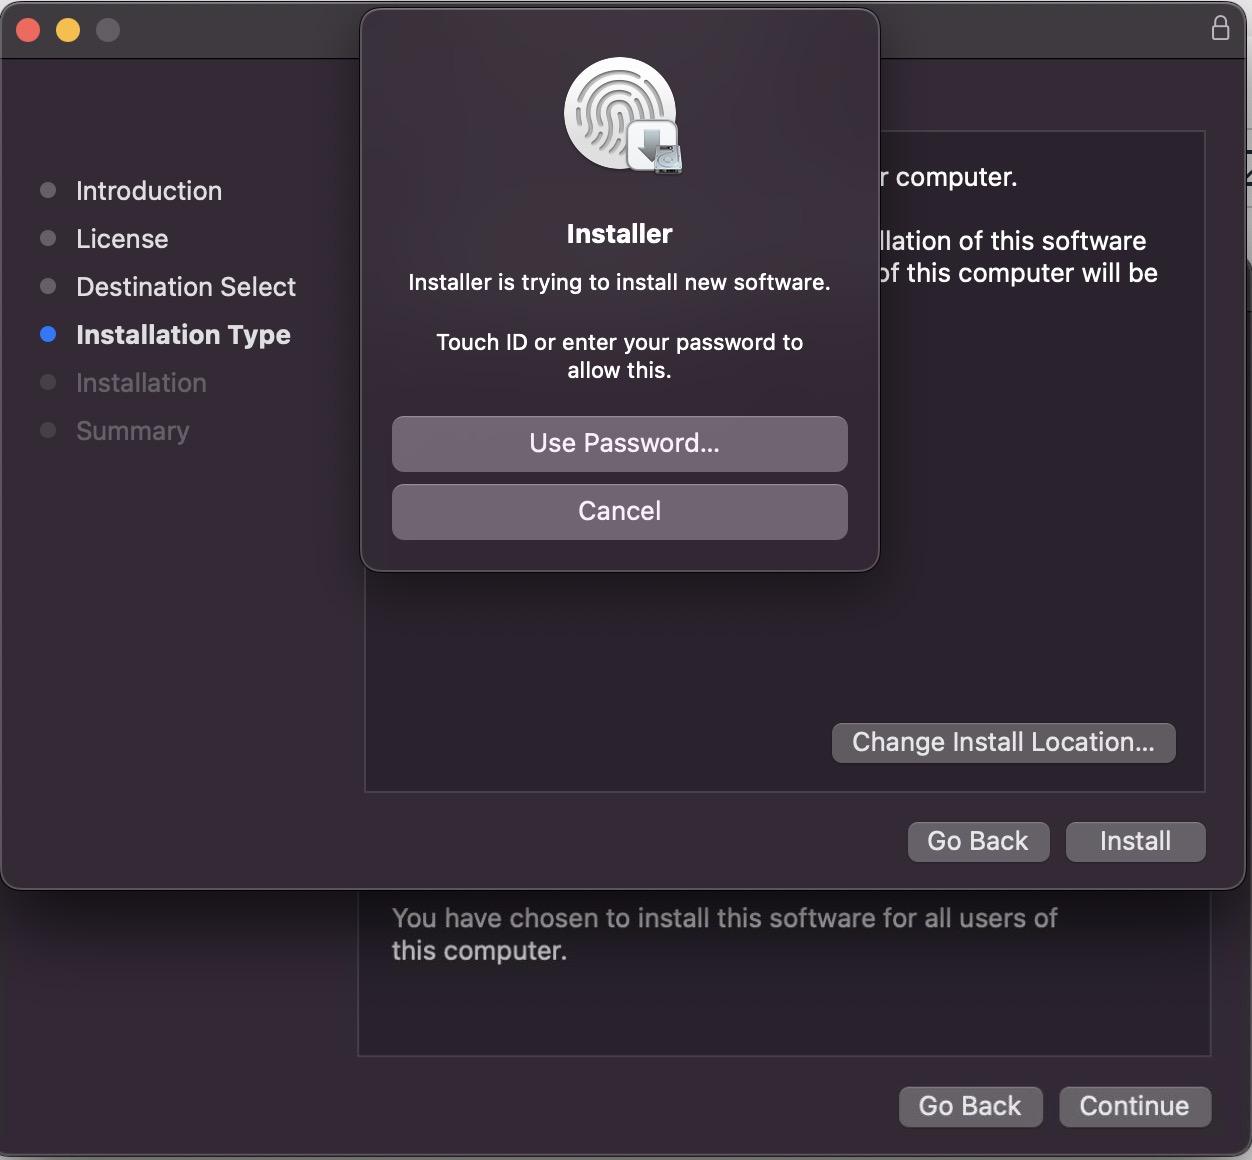
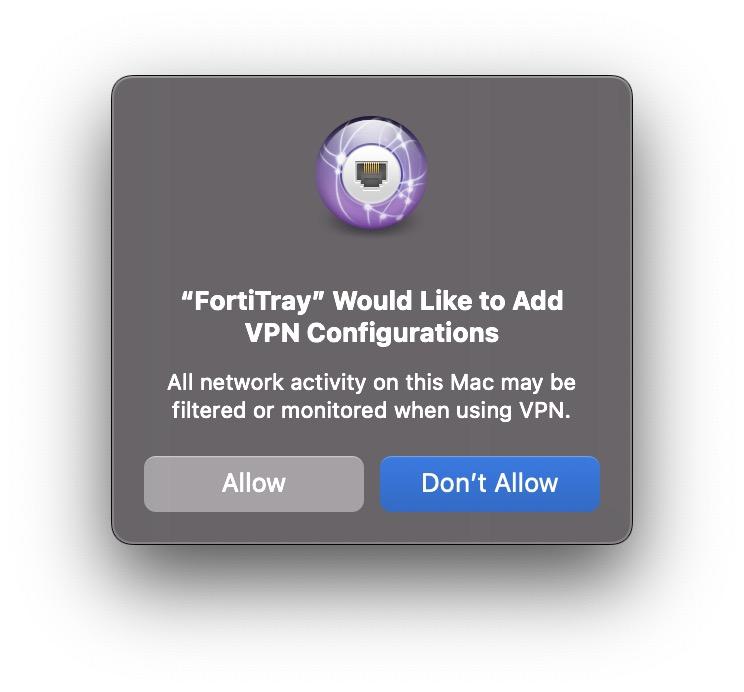
- When asked if "FortiTray" would like to add VPN Configurations, press "Allow".
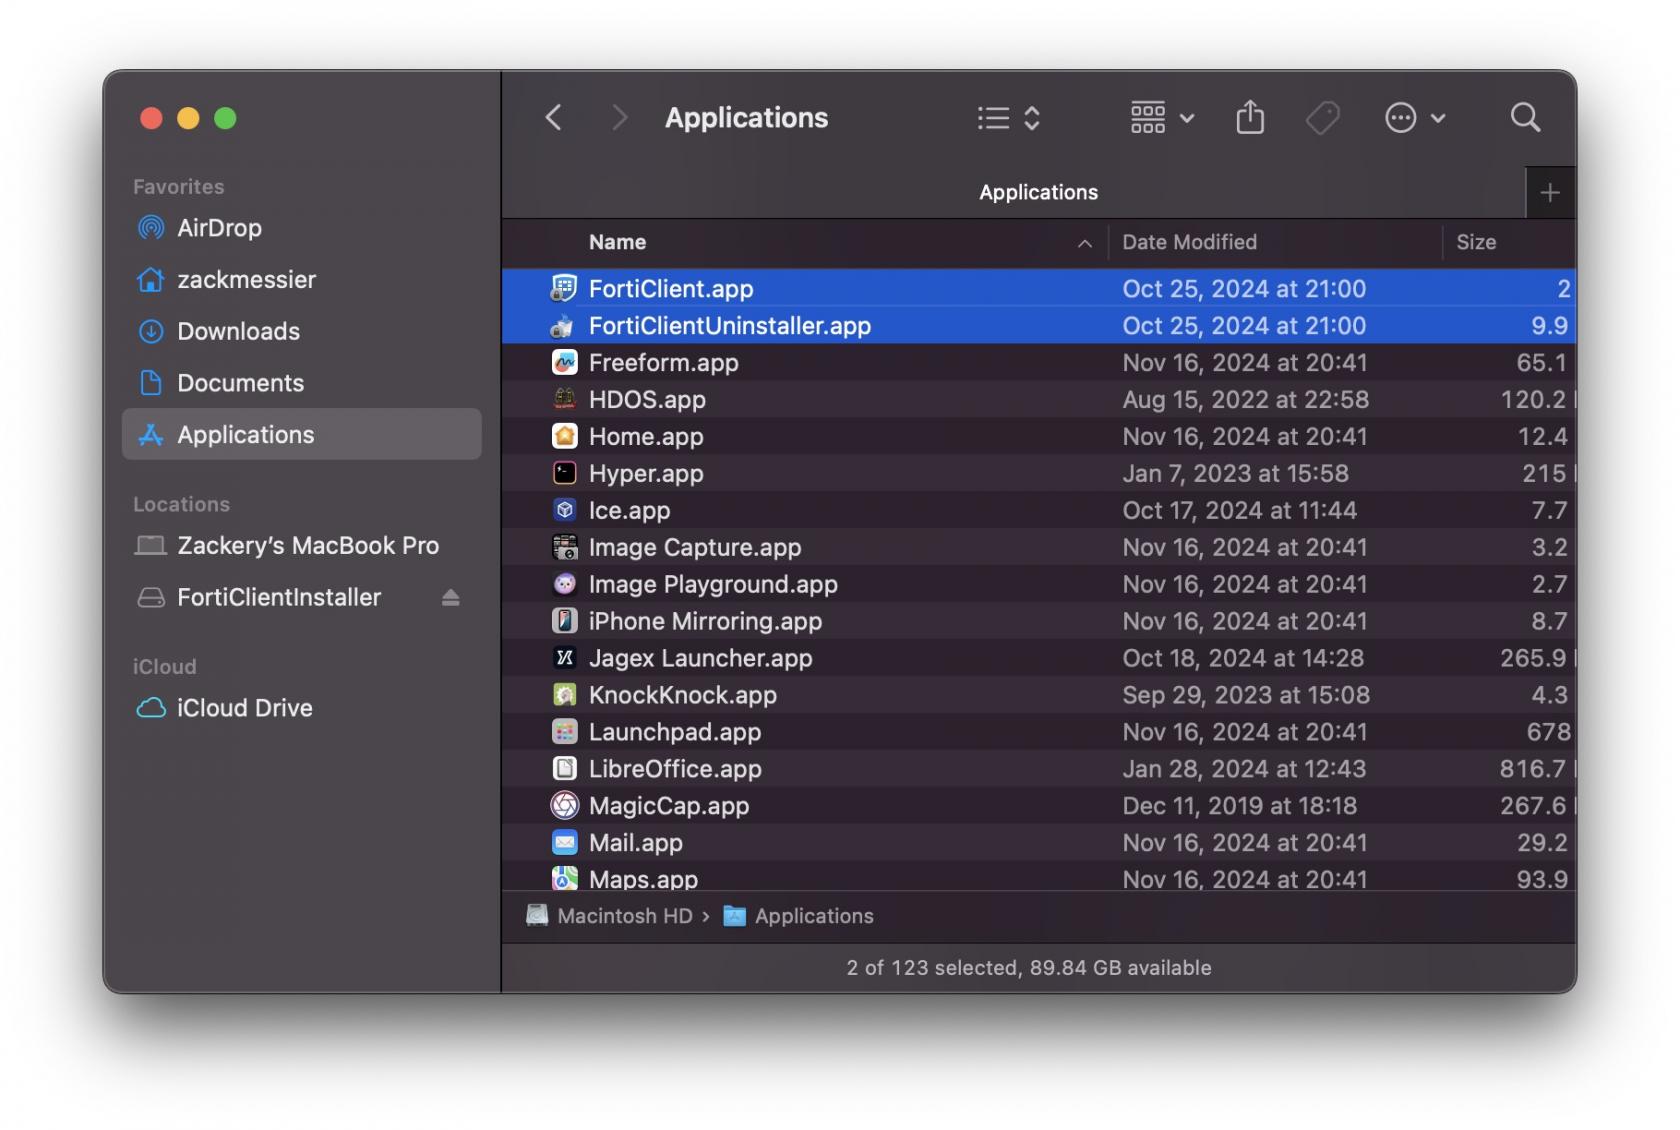
- Close the installer. You should now see "FortiClient" in your MacOS applications folder.
- Setup complete! To connect, see the Connection Instructions


Install on iOS
- Install the FortiClient from the App Store - note that you should not install the FortiClient VPN.
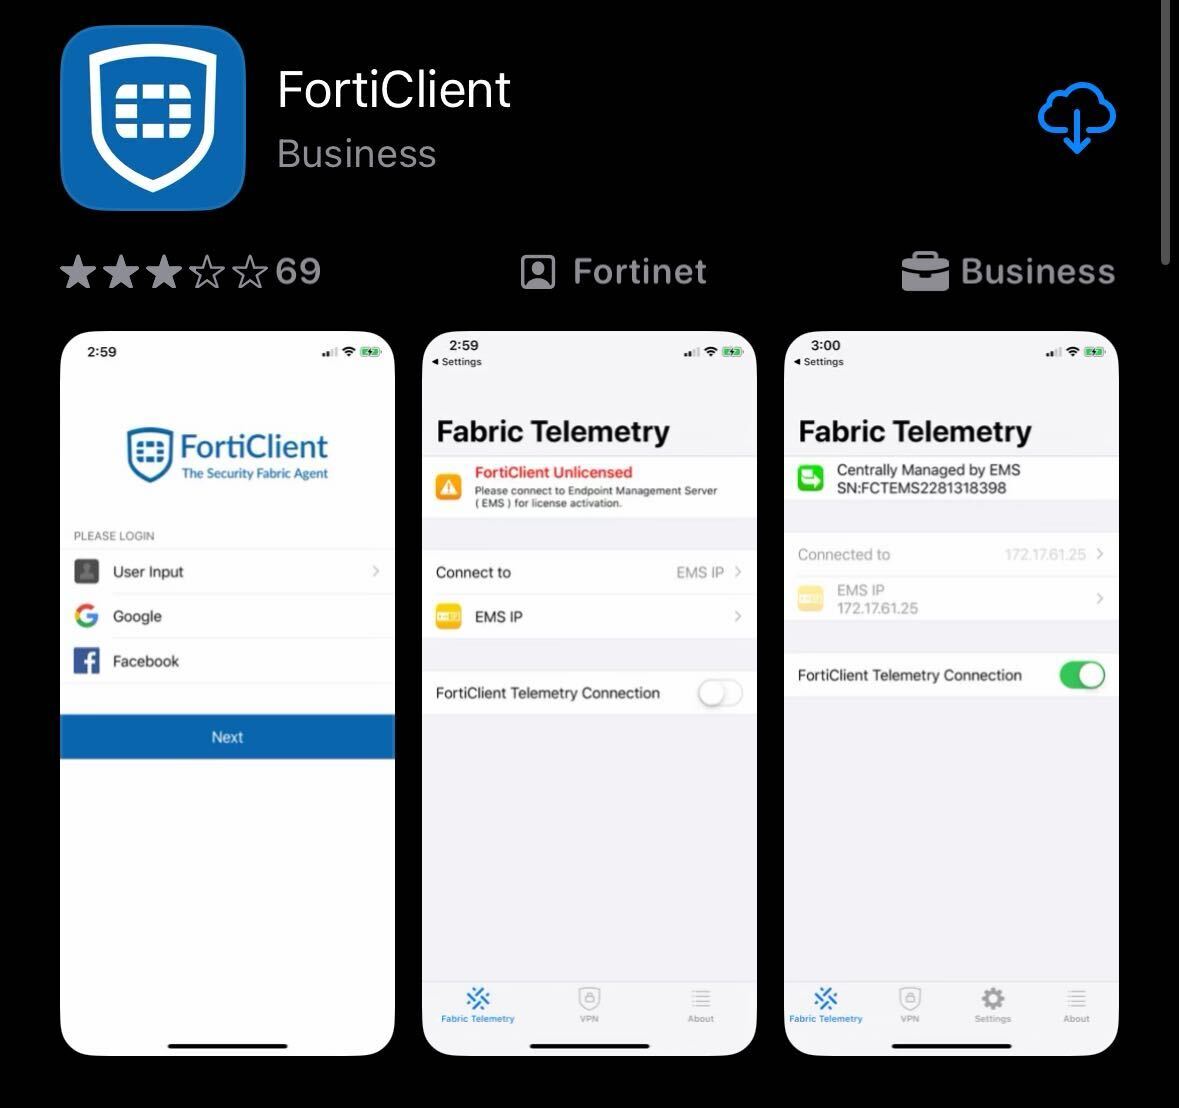
- Once installed, launch the FortiClient app. When prompted, permit notifications, accept the privacy policy and tap "Next" to bypass the login screen.
- When prompted, allow FortiClient to add VPN configurations
- Tap "Connect to EMS IP"
- Tap Scan QR Code, allow FortiClient to access your device's camera and use this QR Code:

- FortiClient should indicate it was connected successfully and receive its configuration:
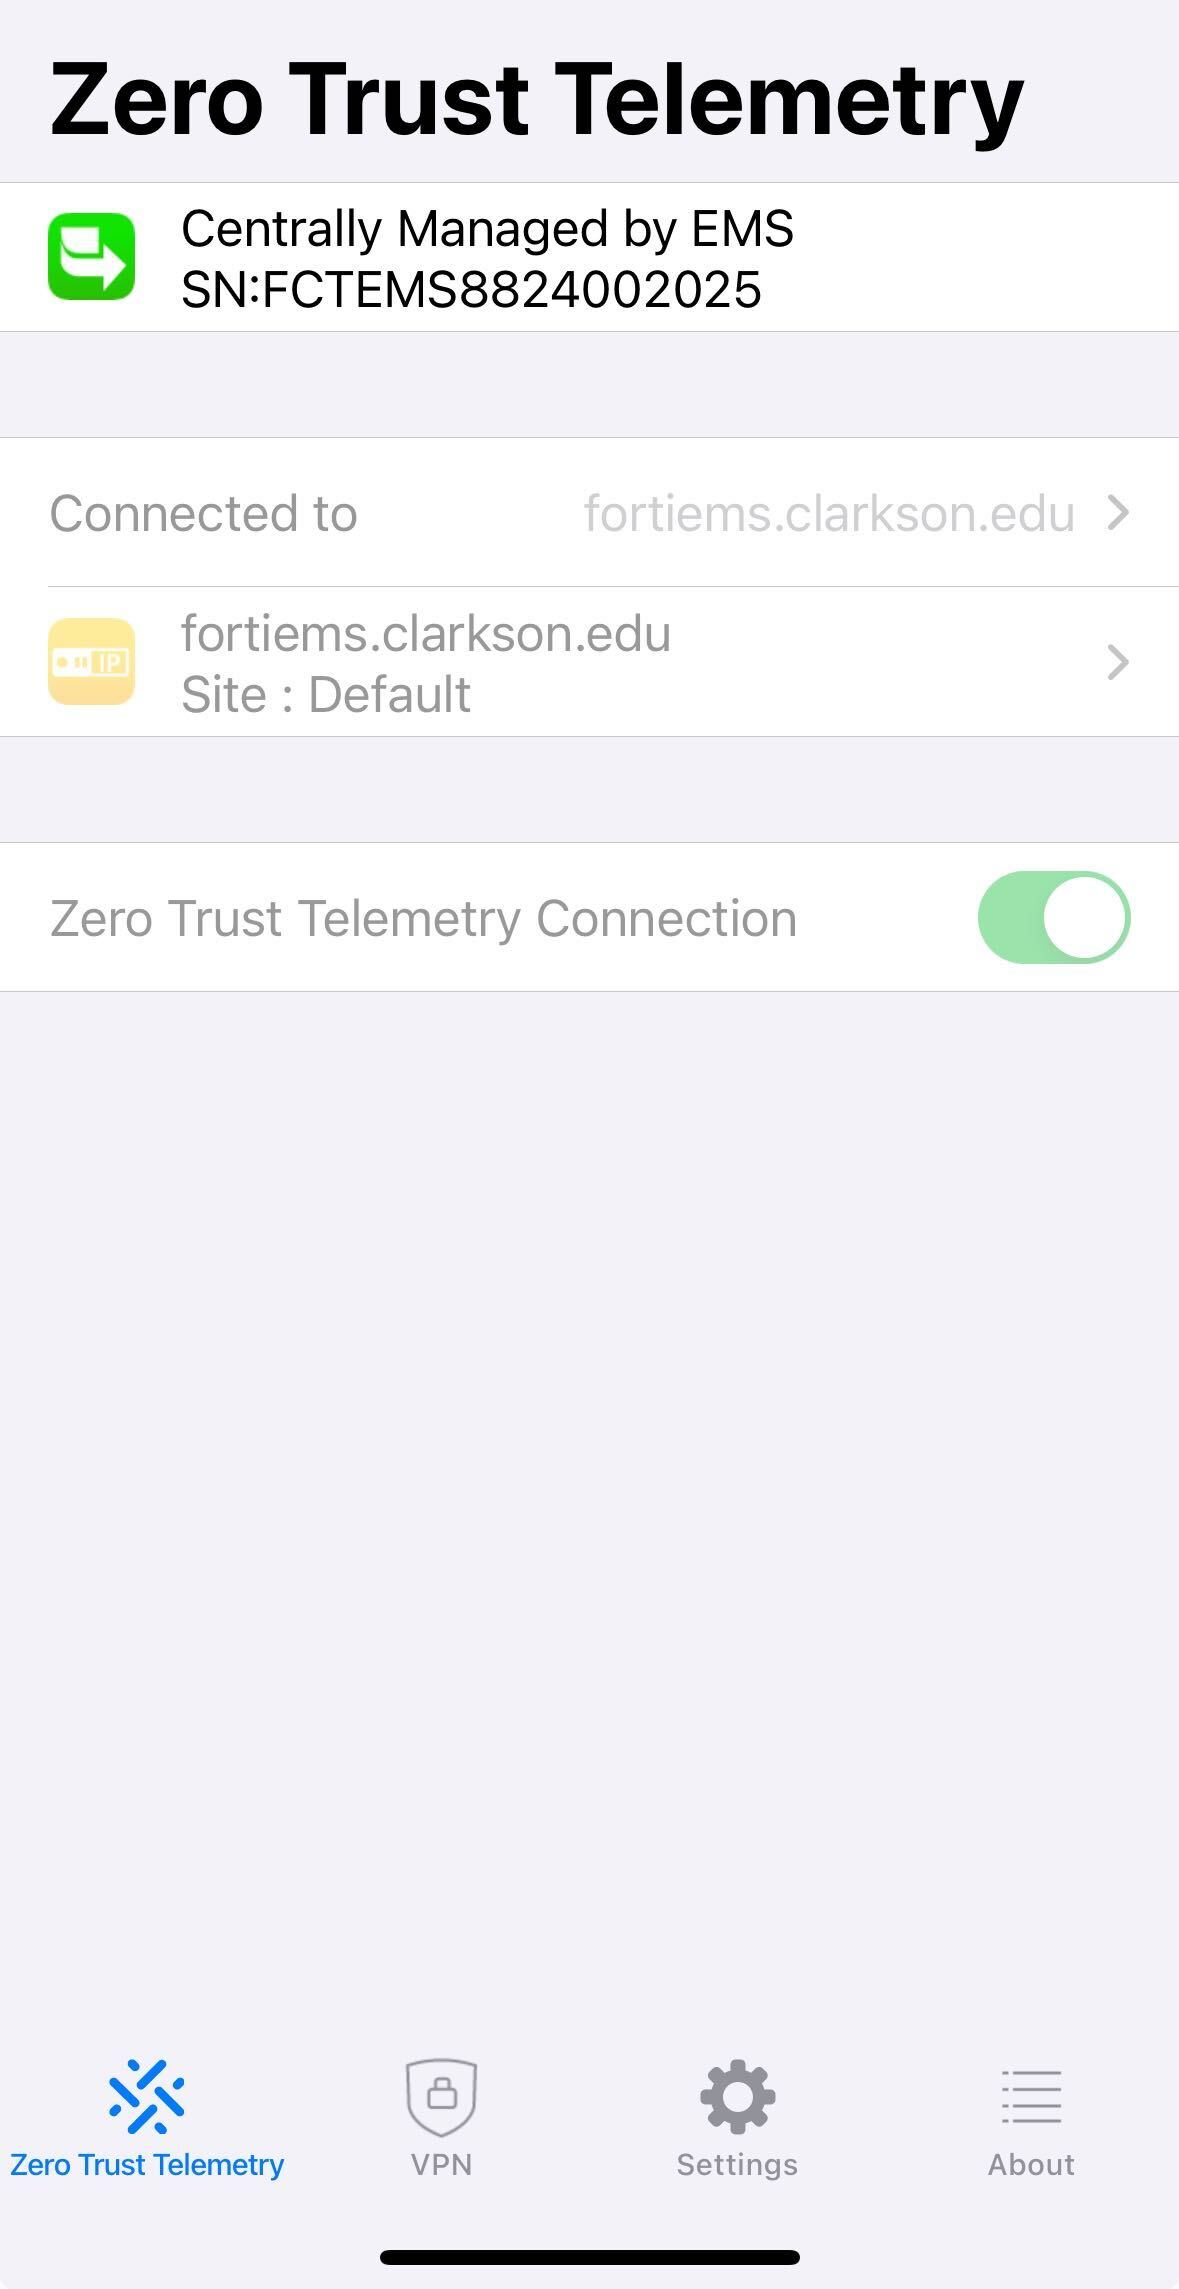
- Select the "VPN" tab at the bottom of the app:

- Tap "Connections" and select the "Clarkson VPN" profile
- Tap the "VPN" tab at the bottom of the app
- Setup complete! To connect, see the VPN Connection Instructions.


Install on Linux
Install on Red Hat Enterprise Linux or derivatives or Fedora
- Add the repository:
sudo yum-config-manager --add-repo https://repo.fortinet.com/repo/forticlient/7.2/centos/8/os/x86_64/fortinet.repo
- Install FortiClient:
sudo yum install forticlient
Install on Ubuntu 18.04 LTS or 20.04 LTS
- Install the gpg key:
wget -O - https://repo.fortinet.com/repo/forticlient/7.2/ubuntu/DEB-GPG-KEY | sudo apt-key add -
- Add the following line in
/etc/apt/sources.list:deb [arch=amd64] https://repo.fortinet.com/repo/forticlient/7.2/ubuntu/ /stable multiverse
- Update package lists:
sudo apt-get update
- Install FortiClient:
sudo apt install forticlient
Install on Ubuntu 22.04 LTS
- Install the gpg key:
wget -O - https://repo.fortinet.com/repo/forticlient/7.2/debian/DEB-GPG-KEY | gpg --dearmor | sudo tee /usr/share/keyrings/repo.fortinet.com.gpg
- Create
/etc/apt/sources.list.d/repo.fortinet.com.listwith the following content:deb [arch=amd64 signed-by=/usr/share/keyrings/repo.fortinet.com.gpg] https://repo.fortinet.com/repo/forticlient/7.2/debian/ stable non-free
- Update package lists:
sudo apt-get update
- Install FortiClient:
sudo apt install forticlient
Once your client is installed, you will need to register it with the Endpoint Management Server. To do this, use the command:
% sudo forticlient epctrl register fortiems.clarkson.edu
You can confirm a successful registration by issuing
% sudo forticlient epctrl detail
The output should look similar to this:
=====================================
FortiClient License Details
=====================================
License Expiry: Fri Jul 18 00:00:00 2025 EDT
VPN Expiry: N/A (EMS Connected)
=====================================
FortiClient EMS Details
=====================================
IP: fortiems.clarkson.edu
Site: default
Host: fortiEMS.ad.clarkson.edu
SN: FCTEMS882412345
Status: Connected
Last Access Time: Mon Dec 16 13:03:36 2024 EST
Once you've reached this point, your Linux machine is ready to connect.
To connect, see the VPN Connection Instructions.