
Grade Assignments Using Annotate PDF
This tutorial shows how to create an Assignment that uses the Annotate PDF Tool which allows instructors to grade assignments without downloading them.
Note: It is not recommended using this tool to provide feedback for an assignment that students will need to revise, work on further, etc. This is because students will receive the feedback in the form of a PDF, which they won't be able to edit.
To create an Assignment with Annotate PDF:
- Follow the instructions to Create an Assignment
- When you get to the settings choose Submission Types, Feedback types, Grade settings, as described below:
Submission types
-
- Make sure the File Submissions box is selected.
- In the Accepted file types area, add Documents which includes .pdf files.
.(Note Annotated PDF grader will also allow you to annotate Word docs)

Feedback Types
-
-
- Make sure the Annotate PDF box is selected.
Make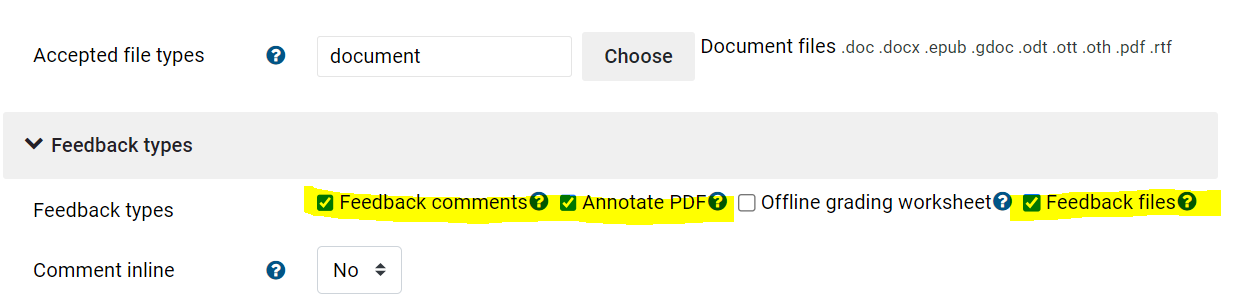
Comment inlineYes (Default is No).
-
- After you've finished setting up the Assignment, click


Marking with Annotate PDF
Graders can highlight, write, type, and add stamps and post notes in a PDF document submitted by a student when Annotate PDF is enabled. They can use a mouse, trackpad, or WACOM tablet to make handwritten markings when using a computer or an iPencil, stylus, or finger when grading on an iPad or other tablet.
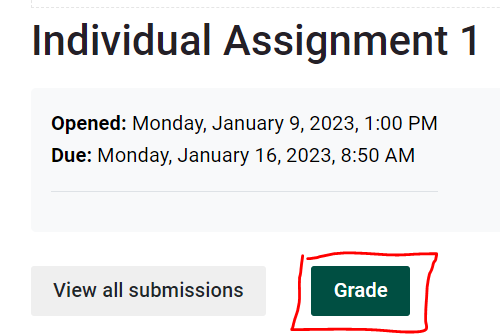
- Click the assignment you would like to grade from within your
course.course - Click the Grade button.
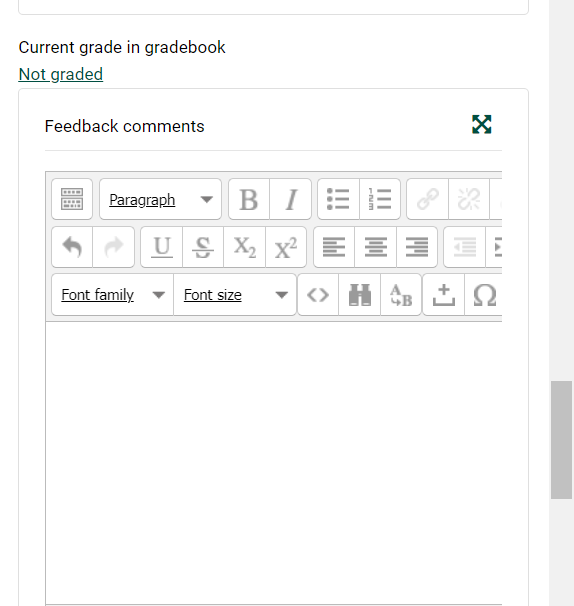
IntheGrading summaryarea, click
or
(however you typically prefer to navigate through grading). If you have chosen toView all submissions, you will then click on a specific student's submission.The submission(s) will open one at a time in an annotation window as shown below.

- Navigate through the student submissions using the grading tools to annotate directly on the assignment submitted. Select a tool from the annotation toolbar at the top of the window to mark the submission.


EnterUse theGradeand any overallFeedback commentsinarea on thepanebottom right tothegiverightgeneraloffeedback using theannotation window.editor. In addition to typing feedback, you can add files and links, or record short audio (microphone button) or video (camera button) clips.

Click
or
when you are ready to proceed to the next submission.


Notes:
- If the document in annotation window is blank, the conversion to PDF failed (for a file submitted in a different format) or Annotate PDF could not read the PDF file. You will need to download the file using the link in the pane to the right of the annotation window and add annotations outside of Moodle.
- To save a copy of your annotations and feedback outside of Moodle, click the Download Feedback PDF link beneath the Feedback Comments box.
- The Annotate PDF feature
onlyworks with PDFfiles.and Word doc files. If students submit files in other formats, Moodle will try to convert them to PDF so that you can mark them, but this conversion process does not workreliably or well.reliably. For best results when using Annotate PDF, have your students save their assignments as a single PDF filebeforeforthey upload themupload. YouNarrowcanthe document type to force students to submit assignments as a single PDF file using the settings recommended in Enabling Annotate PDF for an Assignmentabove.above and choosing only PDF instead of all document types.
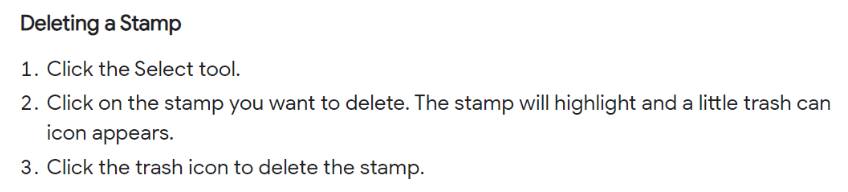
Tip Deleting a Stamp
-
- Click the Select tool:
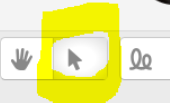
- Click the Select tool:
-
Another perspective - ![]()