
Create & Use a Rubric for Assignment
Rubrics can be created, copied and edited in the Advanced Grading area of Assignment activity settings in Moodle. The instructions below show how to create and add the rubric, and also how to use the Grade button to view the assignment and rubric in the annotated PDF grader. To create a rubric in Moodle, there are two parts. First create the assignment and choose the rubric option for the grading method.
This guide will help you to:
- Part 1- Prepare the assignment
- Part 2 - Choose or create the rubric for this assignment.
- Grade with a rubric
Part 1- Prepare the assignment
- Turn editing on

- Create the assignment (see Instructions for Creating an Assignment.)
- On the top navigation bar of the assignment, click Settings, scroll down to the Grade section and expand the grade settings.

- In the Grading Method drop down menu, select Rubric (shown below) and any other settings appropriate to the assignment.


5. Save your changes and return to course. ![]()
Part 2 - Choose or create the rubric for this assignment.
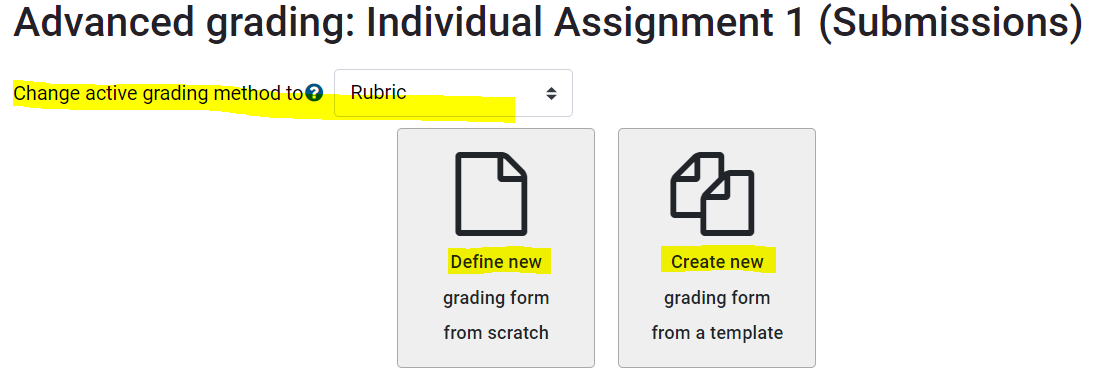
- On the top navigation for the Assignment, click Advanced Grading.
- Here you can choose to define your own rubric or use an existing rubric existing rubrics may be edited). See this video tutorial to watch how to Add a Rubric for Grading an Assignment.


- To Define a new rubric, fill out the details of the rubric. Criteria are the rows, and level are the columns.
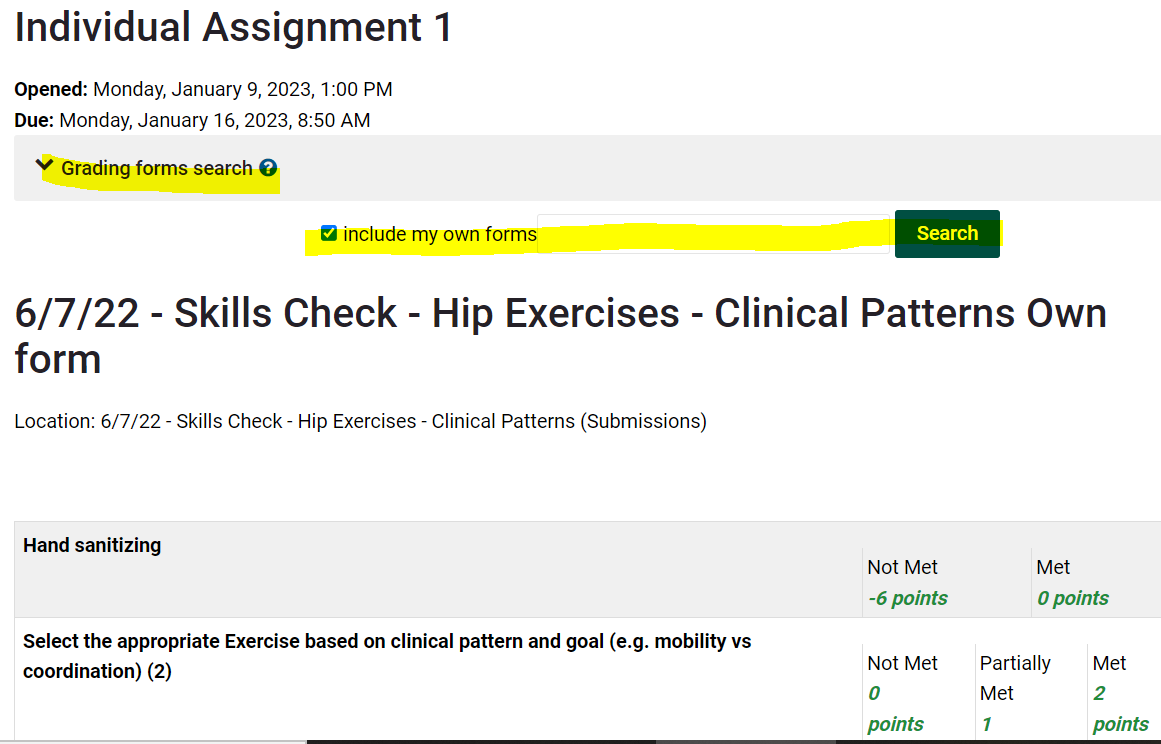
- To Create new, search for a template. Scroll down to see all of the available rubrics. You may or may not find a suitable template. Be sure to click include my own forms so that you can reuse your rubrics in the future.
 3. Grade with a Rubric in Assignment

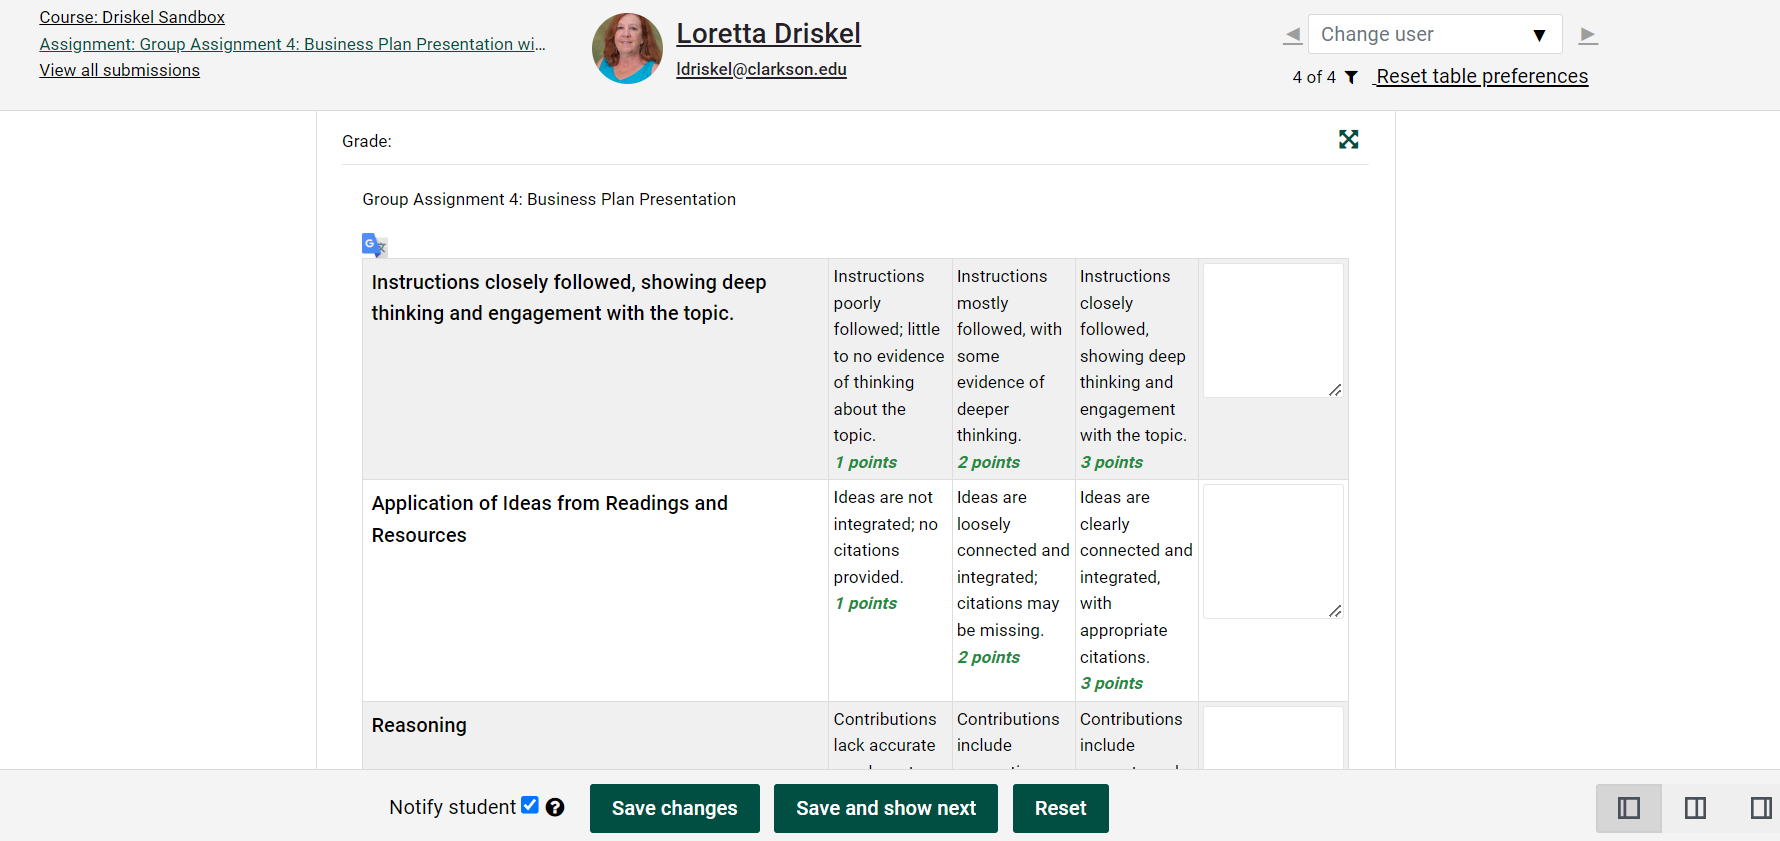
6. The rubric will be available in the Grade submissions area. View this video tutorial to see how to Grade with a Rubric in Assignment. ![]()
1. Use the icons in the lower right corner of the page to adjust the working area. To add overall feedback and/or upload a feedback file, use the center icon.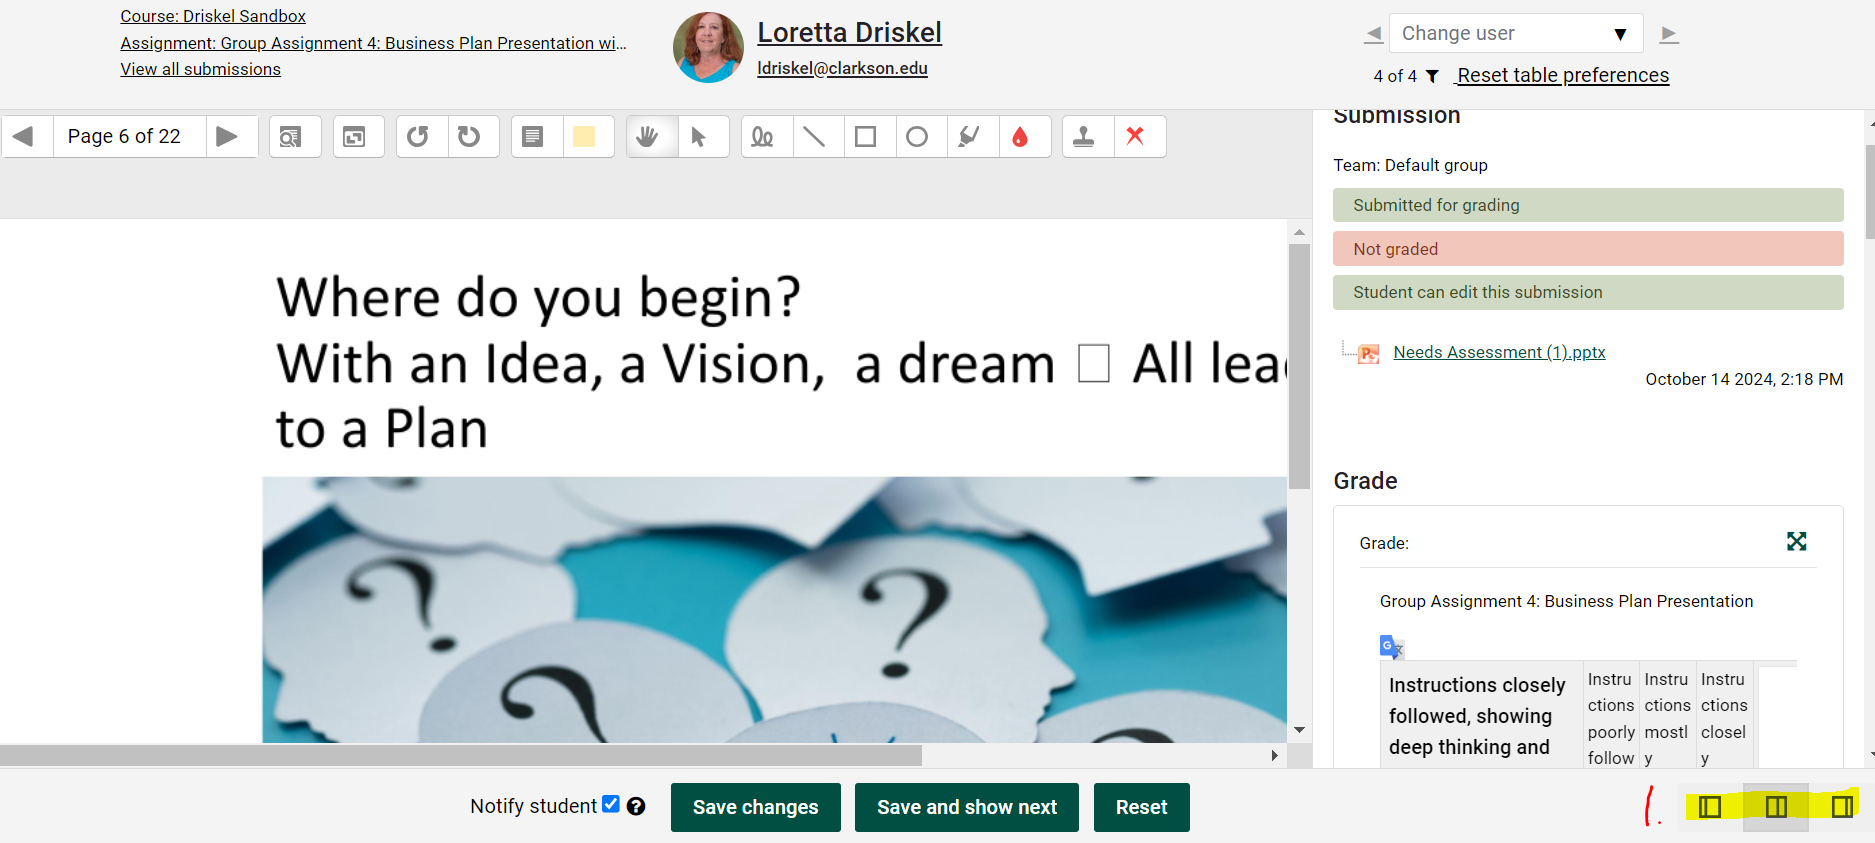
2. If you want to use the rubric, use the first icon and, 3. if you are marking the paper with the annotation tools use the last icon.
|
|
|

7. if you downloaded the assignment file for grading, scroll down to upload the graded file.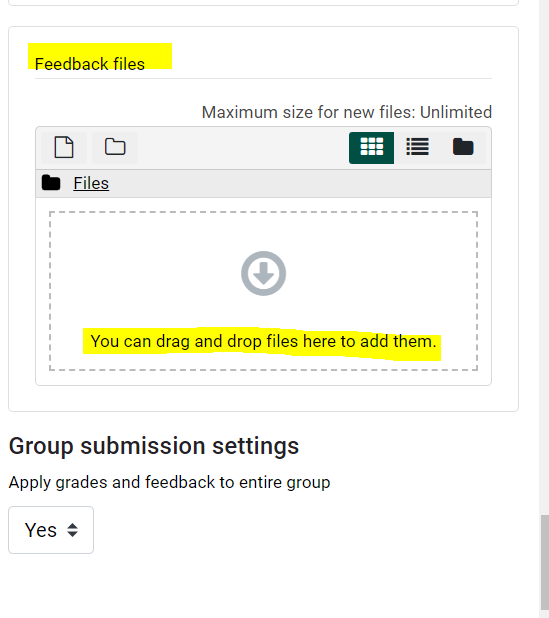
8. Students will see the results in their Grades area and detailed feedback in the Assignment submission area.
- Student - How do I view instructor feedback on an assignment?
See detailed information about Advanced Grading Methods
See information about using Turnitin Rubrics.
Seek Further Assistance
For additional assistance please contact, Clarkson OIT Help Desk;
Online: Get Help
Email: helpdesk@clarkson.edu
Call: 315-268-HELP (x4357)